A lightsaber build for Karen Larabel, a.ka. JoCasta Nu

Ask about costumes and props here. Please read the FAQs first before asking questions -- your question may have already been answered!
User avatar
Jay-gon Jinn
Great Lakes Base Member
Posts: 378
Joined: Wed Jun 27, 2007 1:25 pm
Location: Saint Johns, MI

A lightsaber build for Karen Larabel, a.ka. JoCasta Nu

Post by Jay-gon Jinn »

As many of you are probably aware, Karen has been asking me about building a saber for her Jocasta Nu costume for a couple of years now, and after much searching and digging, I found that there really aren't any good images of what her saber is supposed to look like, aside from a grainy picture of what looks like a very thin lightsaber, or dagger of some sort. so, I finally gave up on that and decided to just make something custom based loosely on what I saw when she was featured in the Cone wars 3D animated show. Karen specified that she liked the elegance of brass on Scott's (Sharke a.k.a. Qui-gon Jinn) and my own personal sabers, so I'll be making hers out of a brass tube and parts from the custom Saber shop.

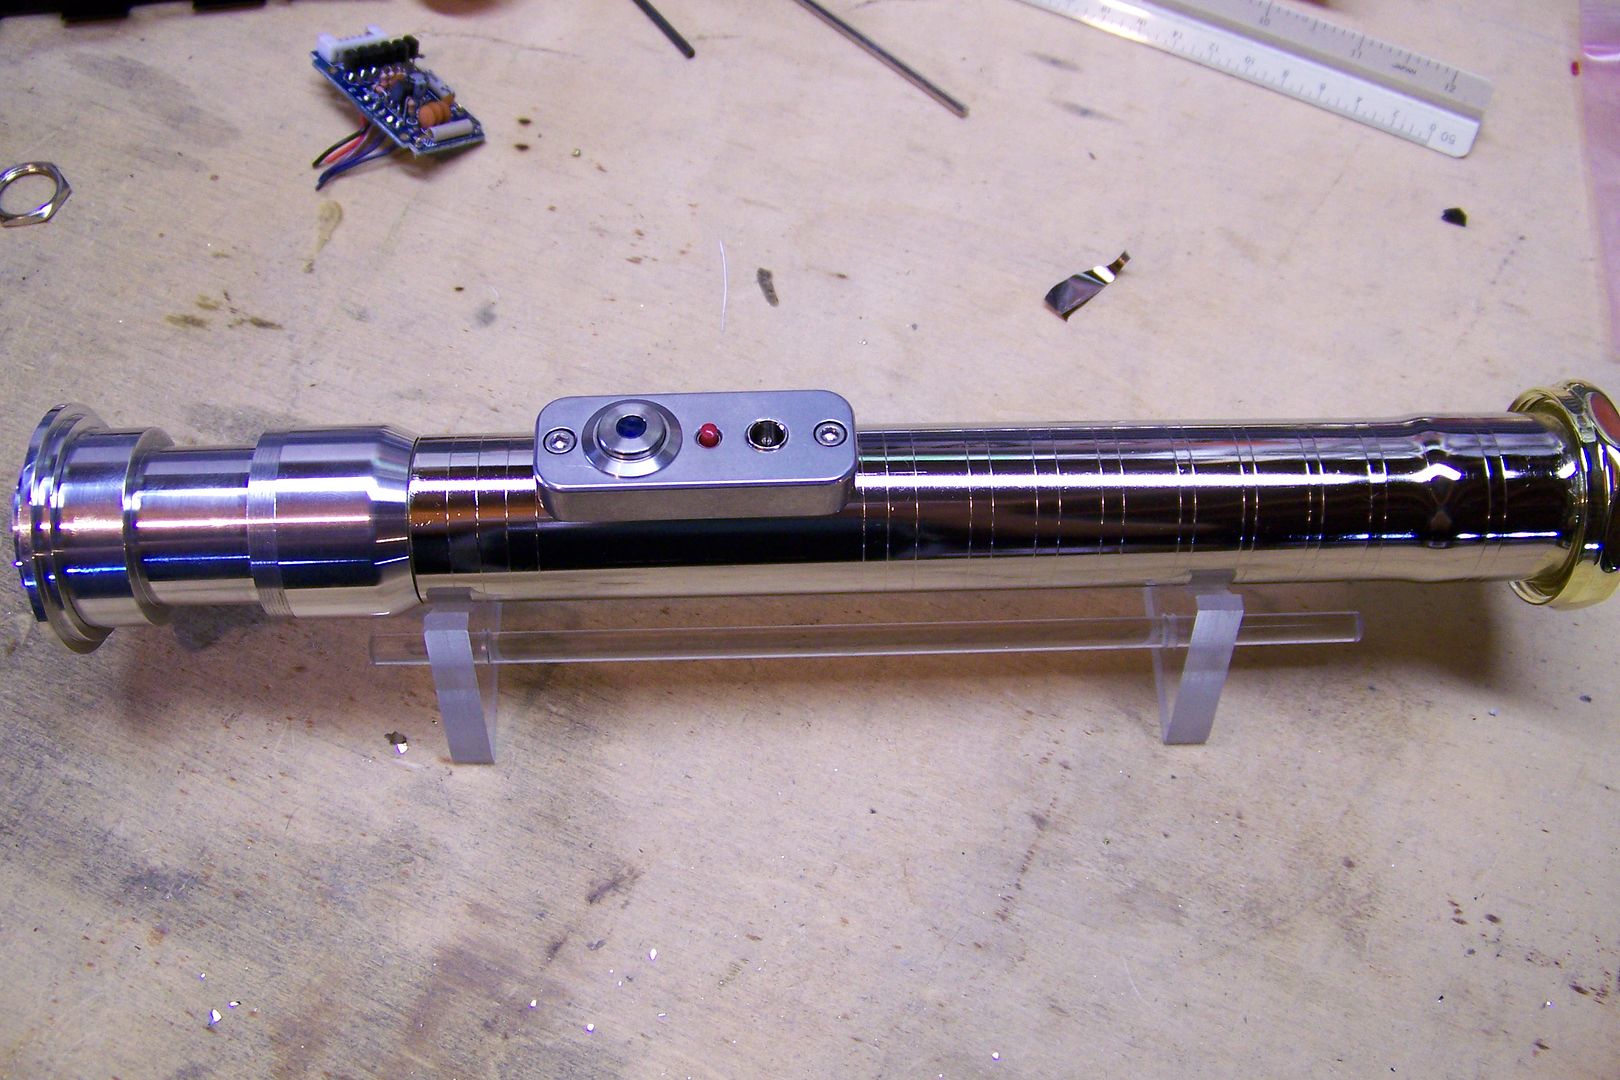
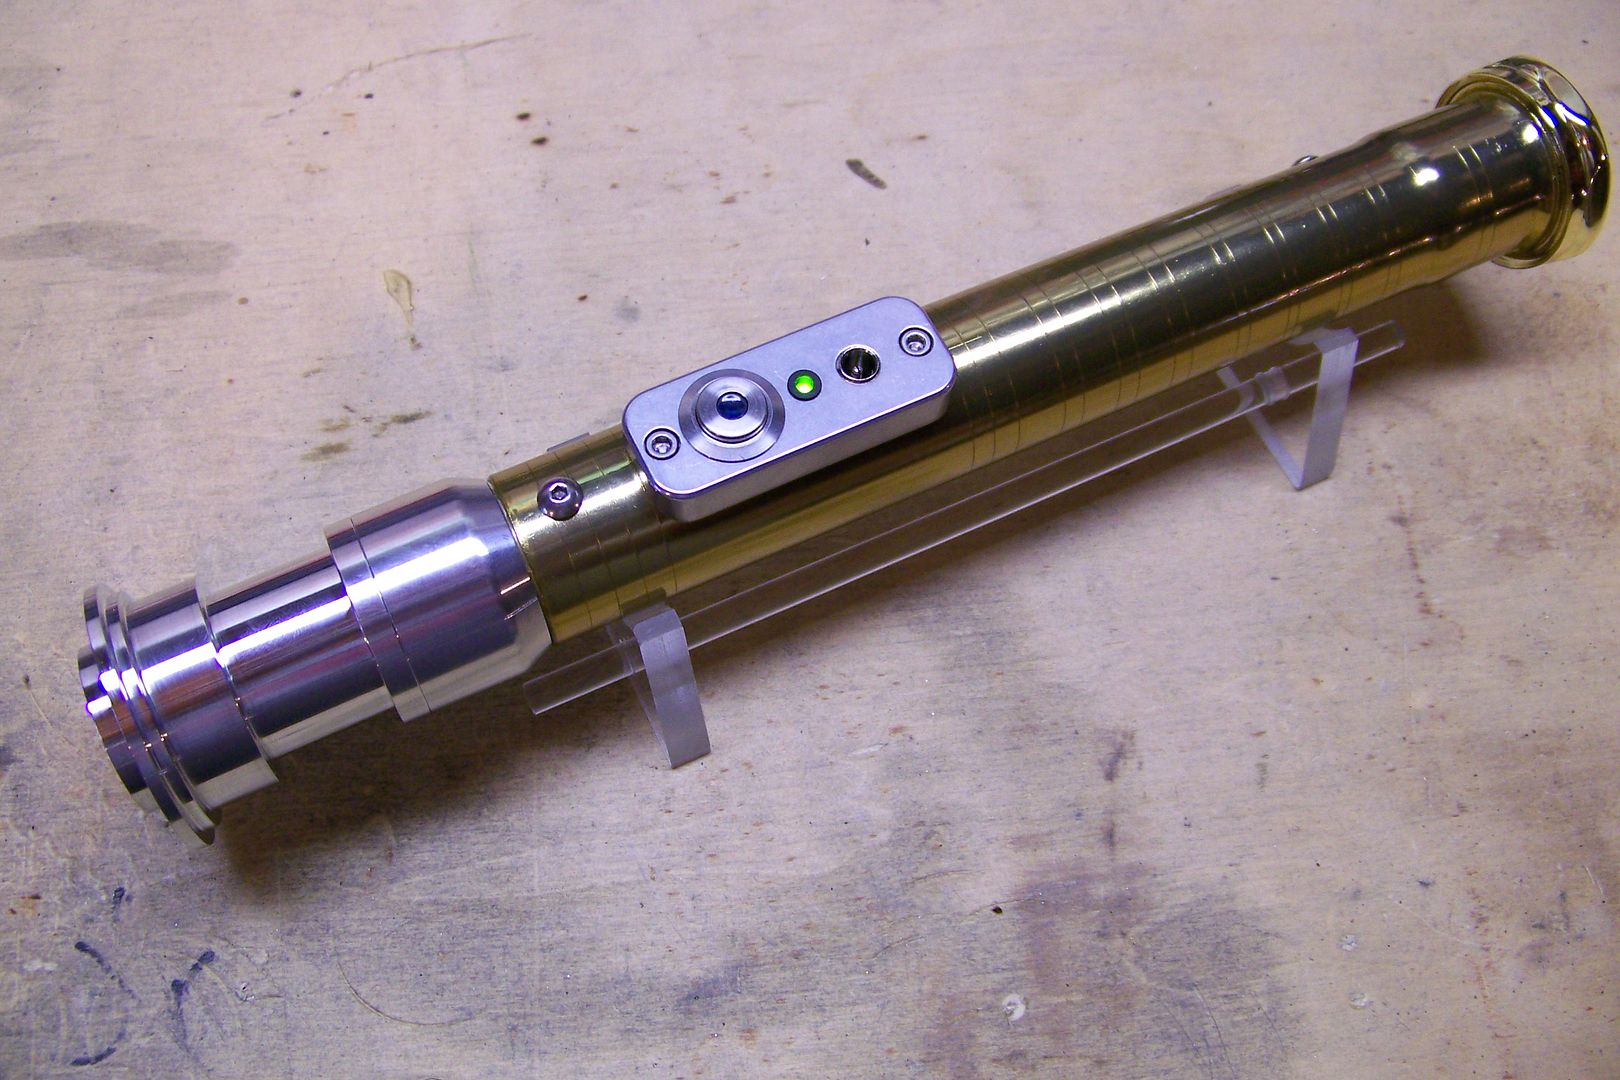
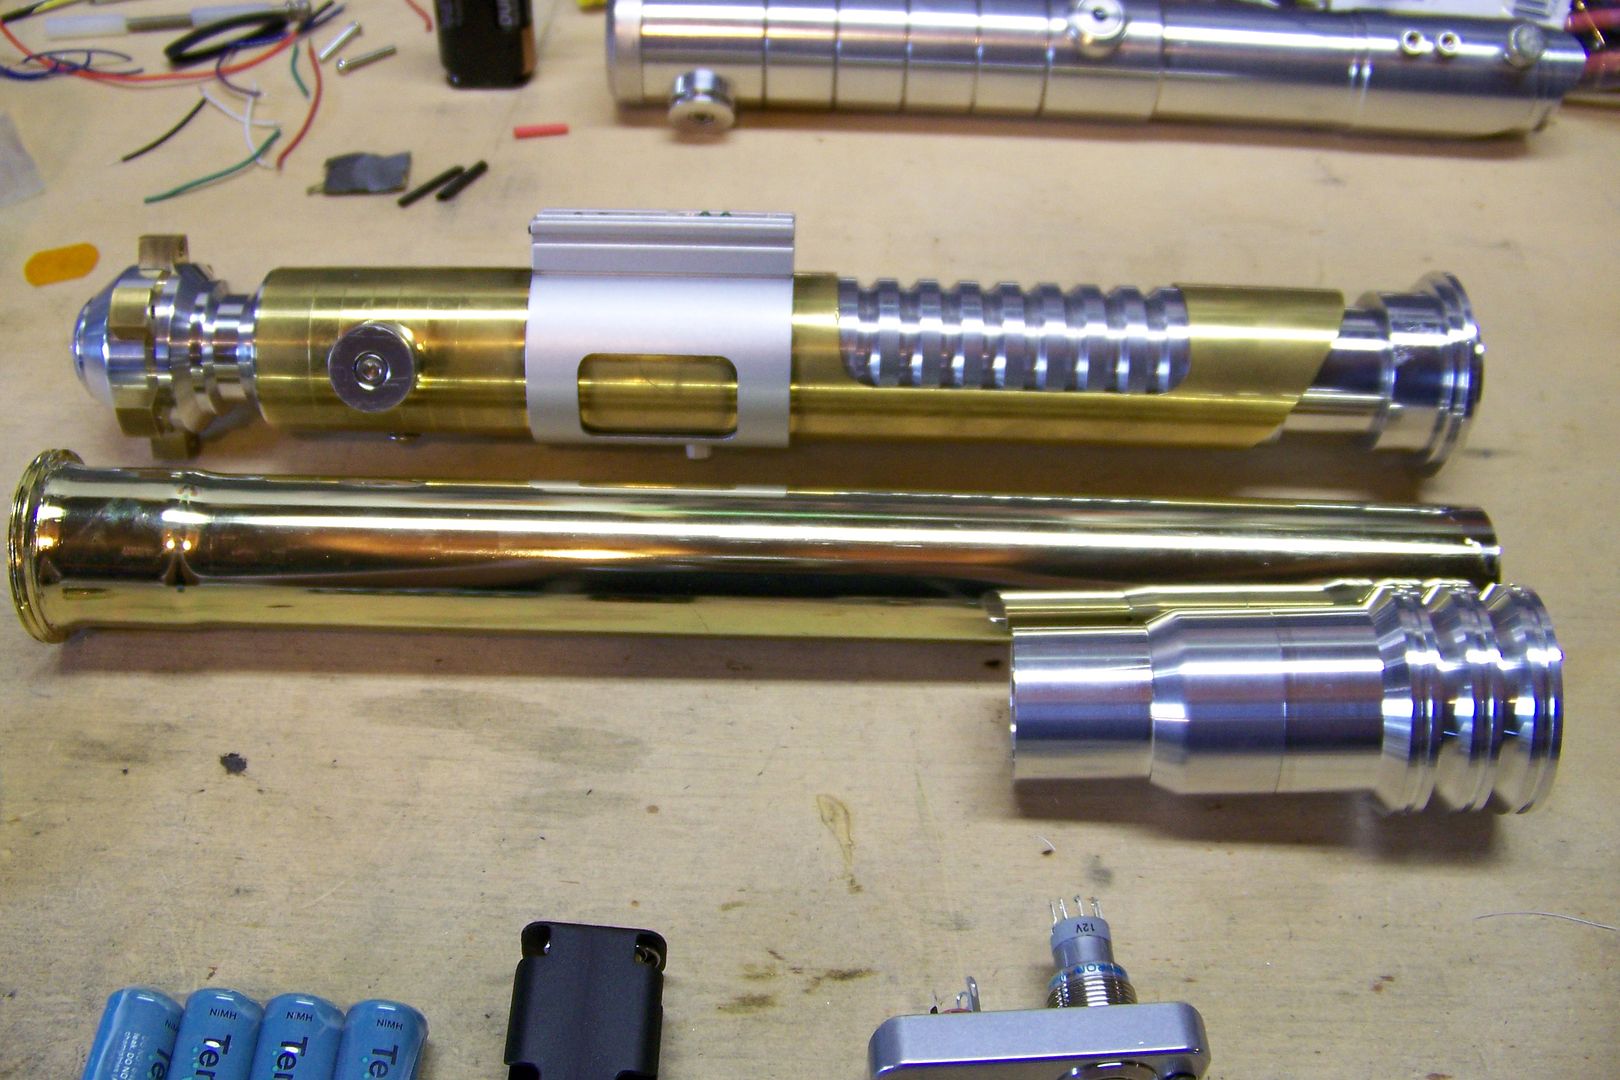
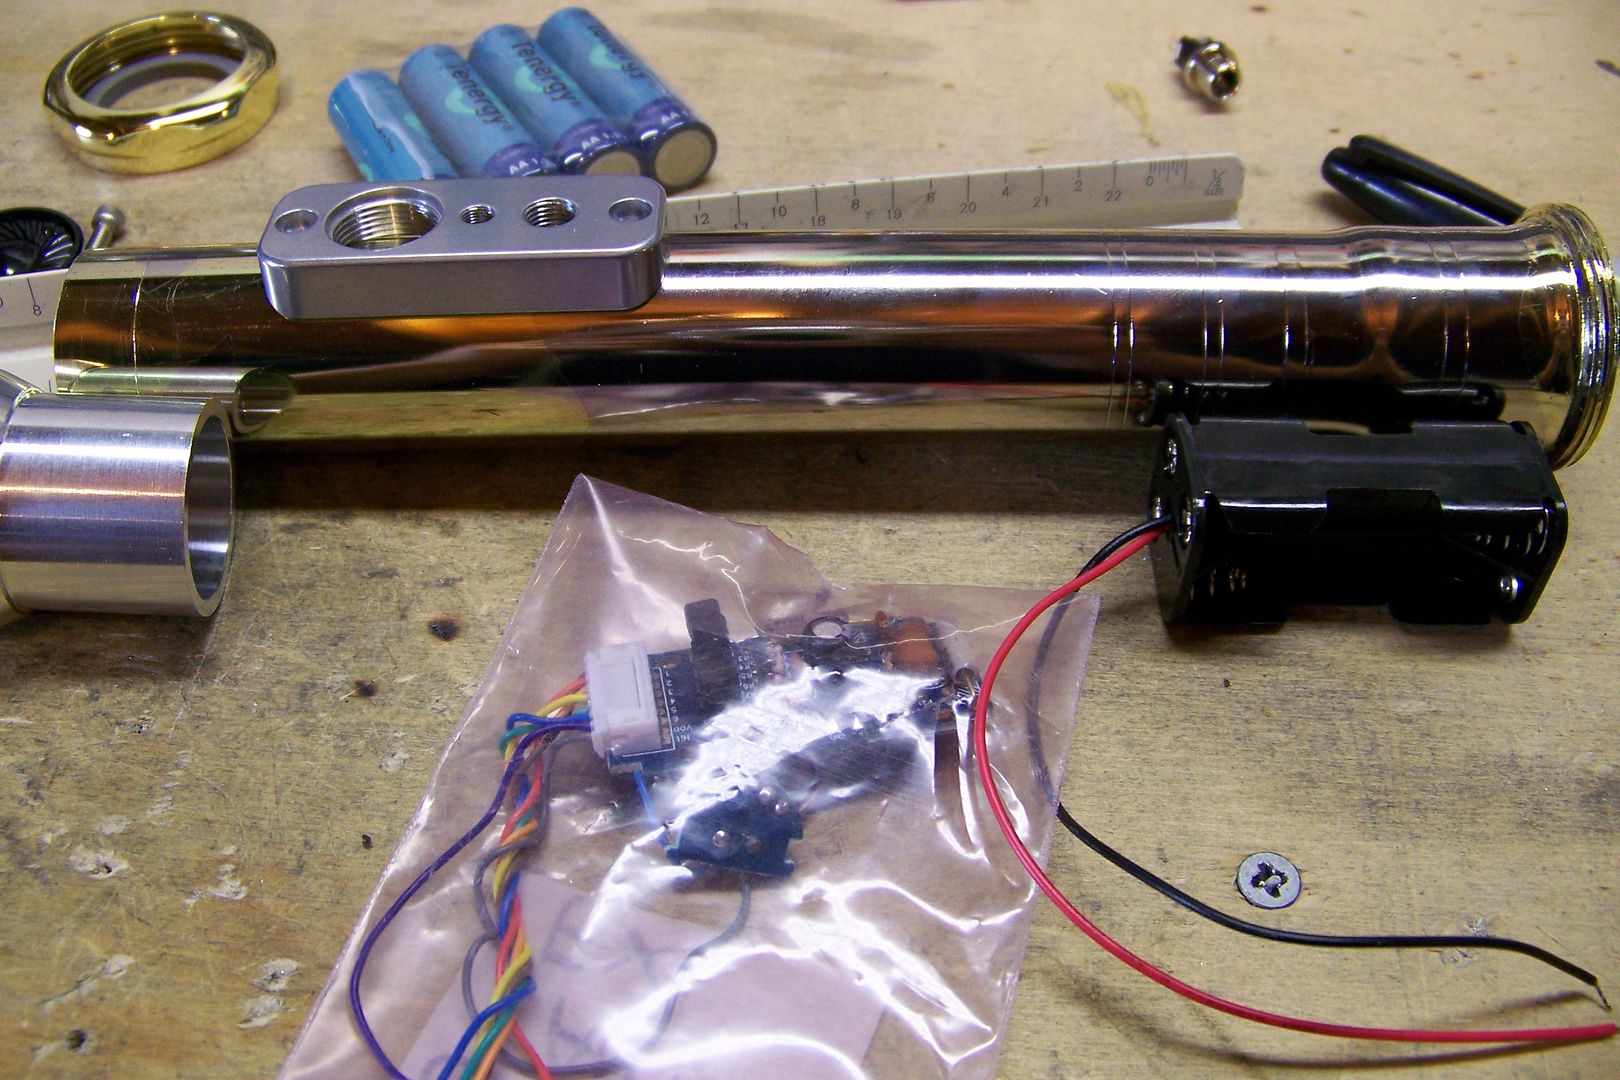
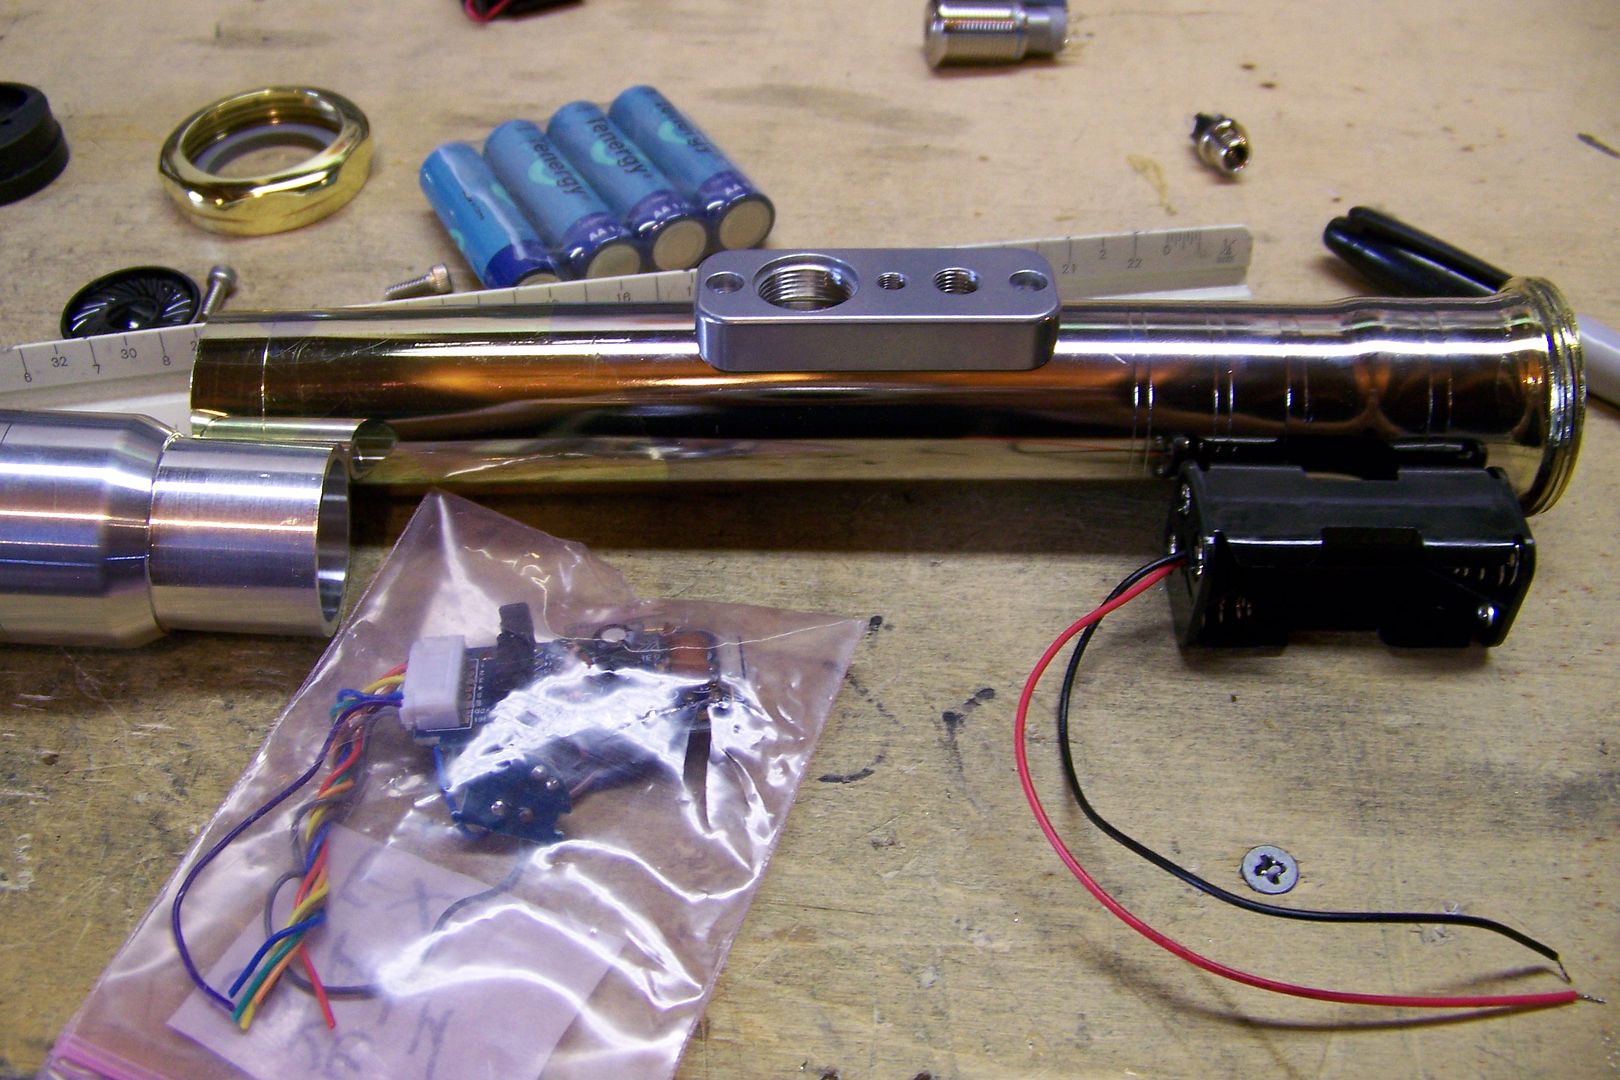
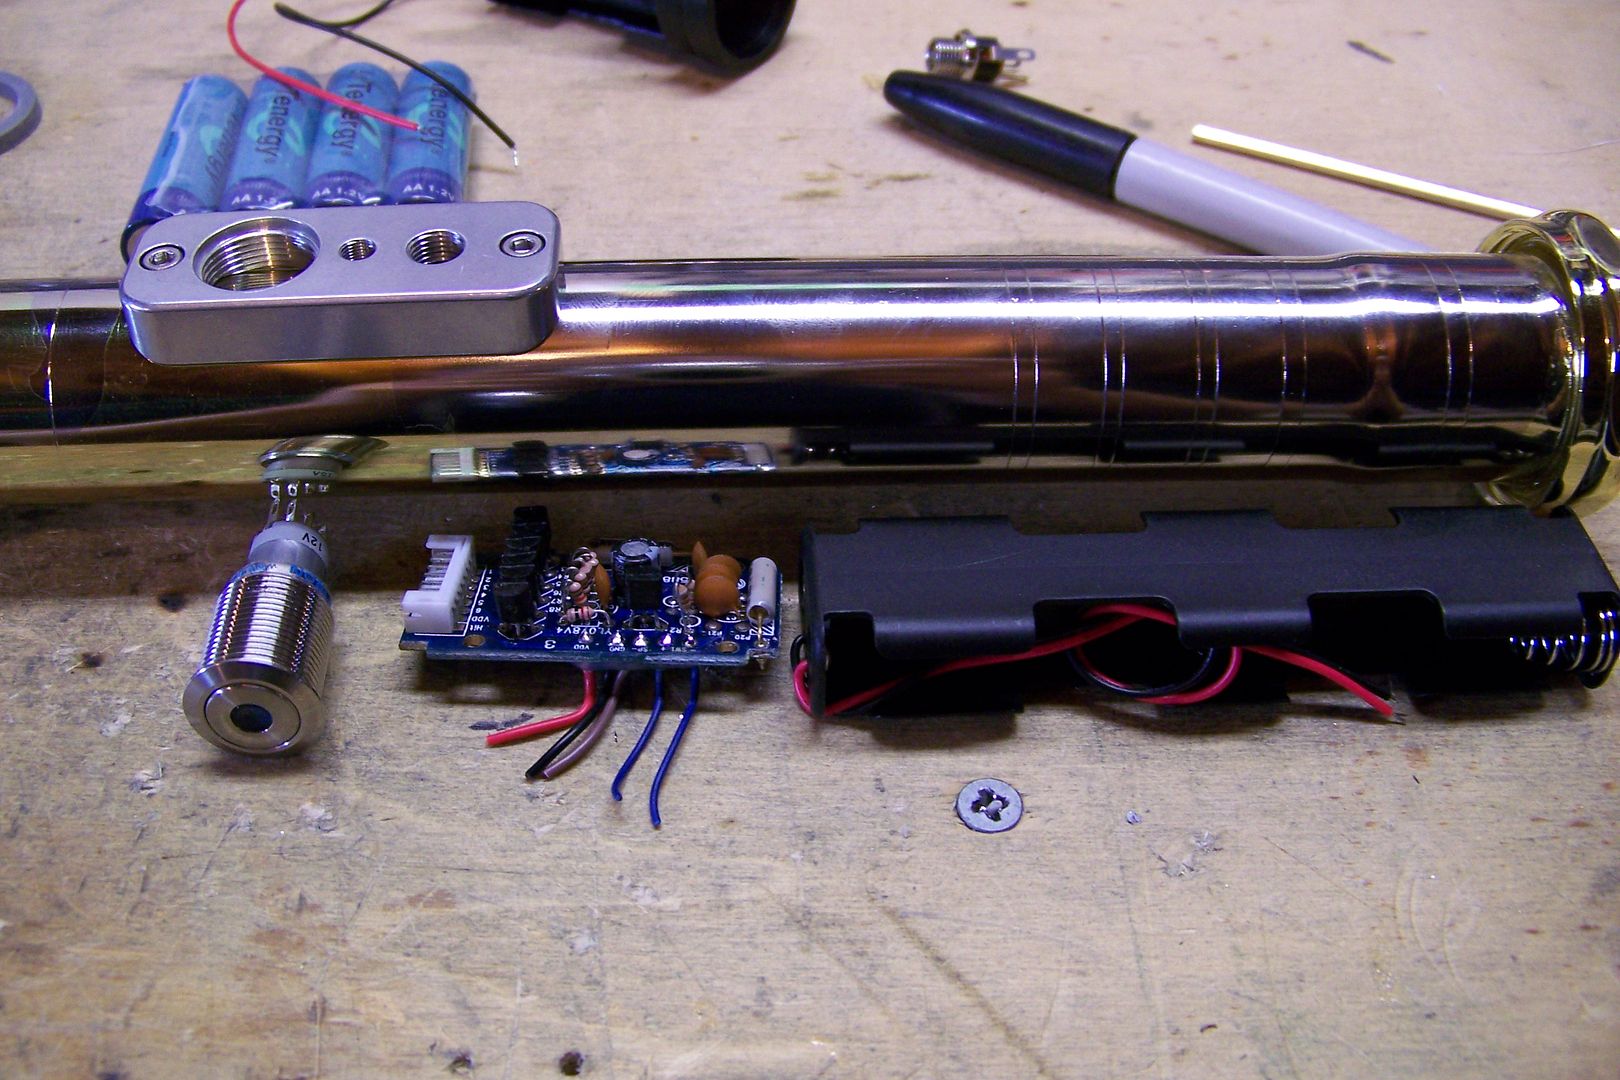
Here's what I'll be using:
Image
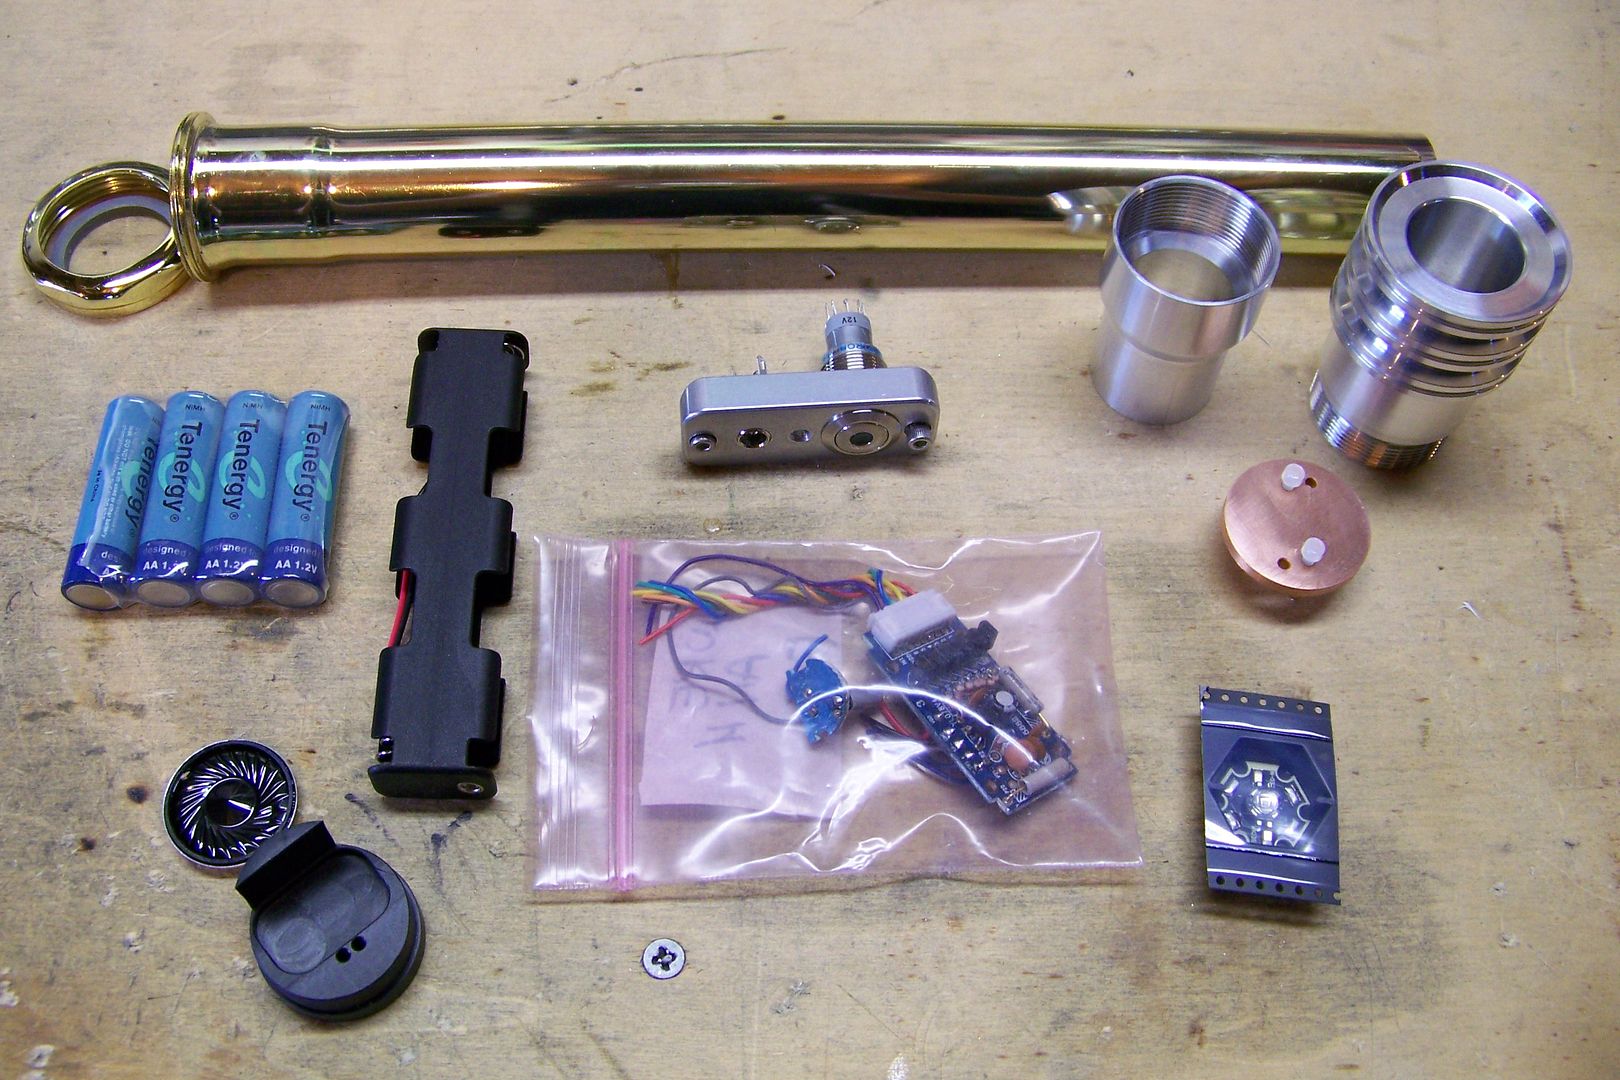
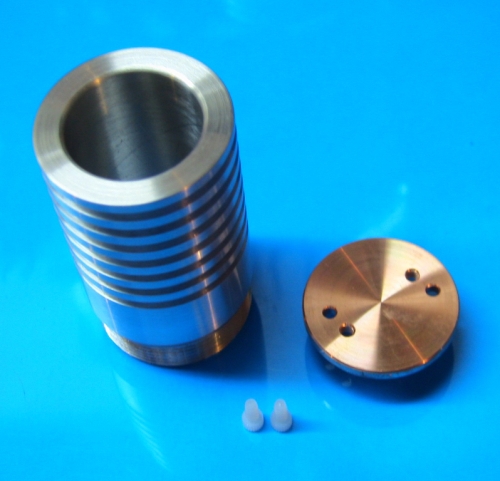
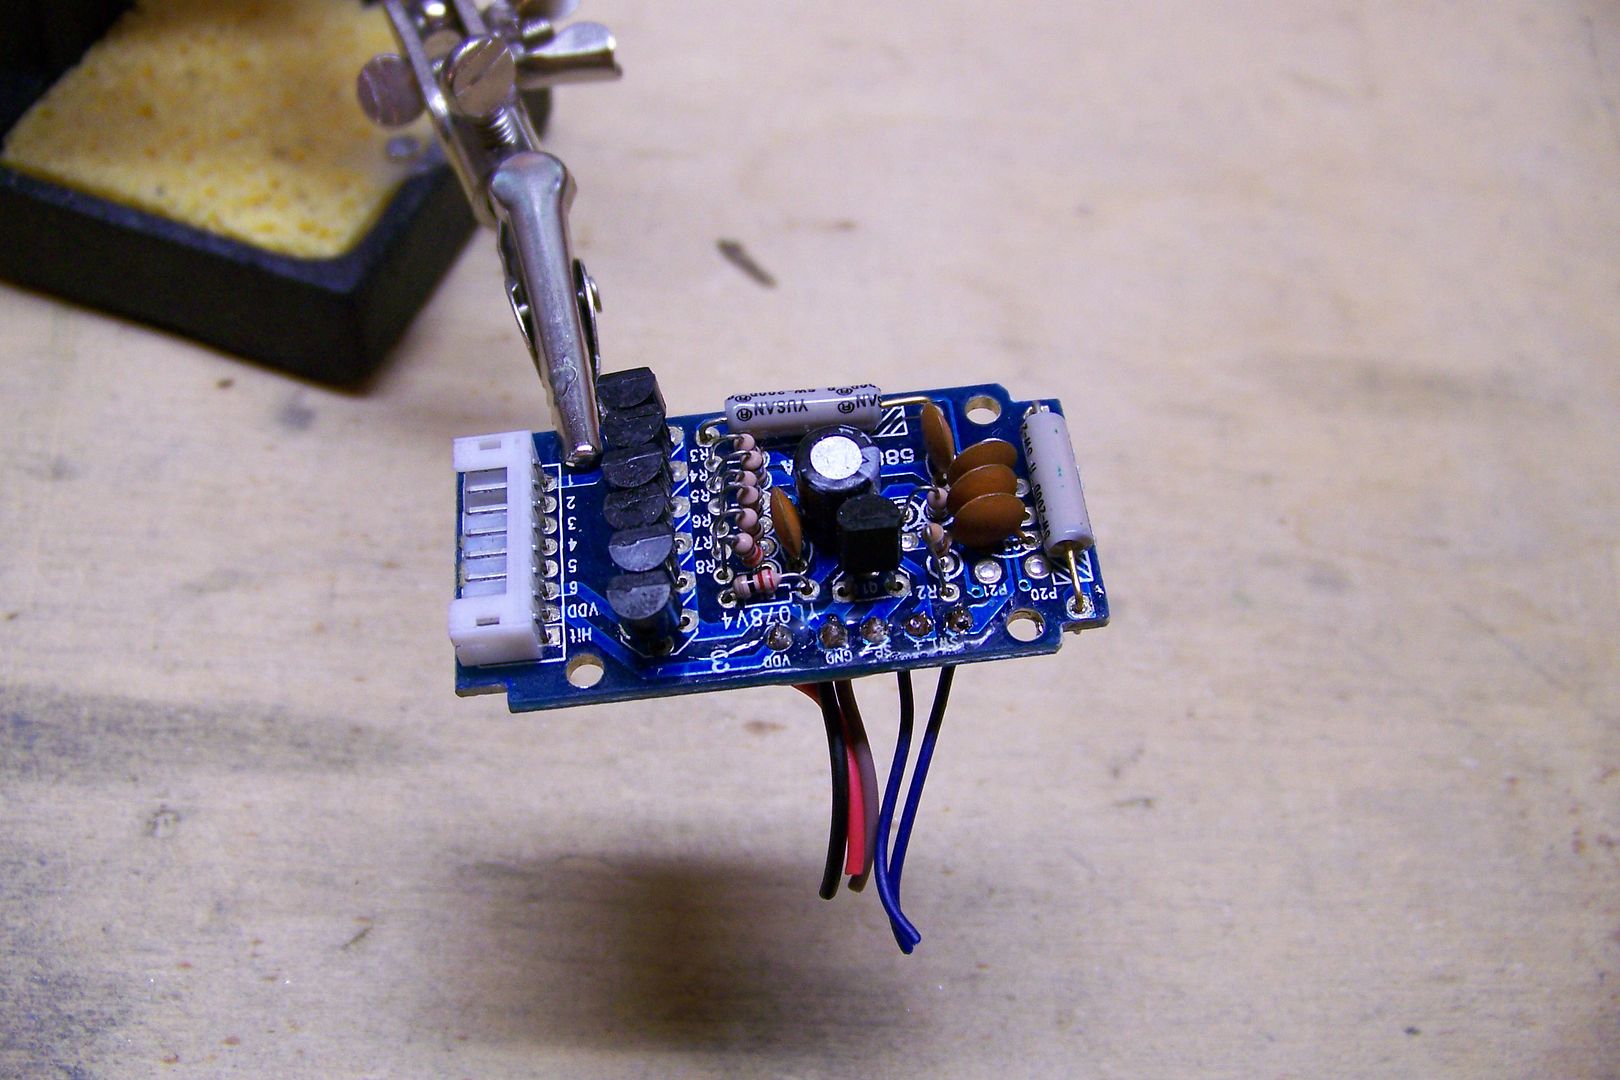
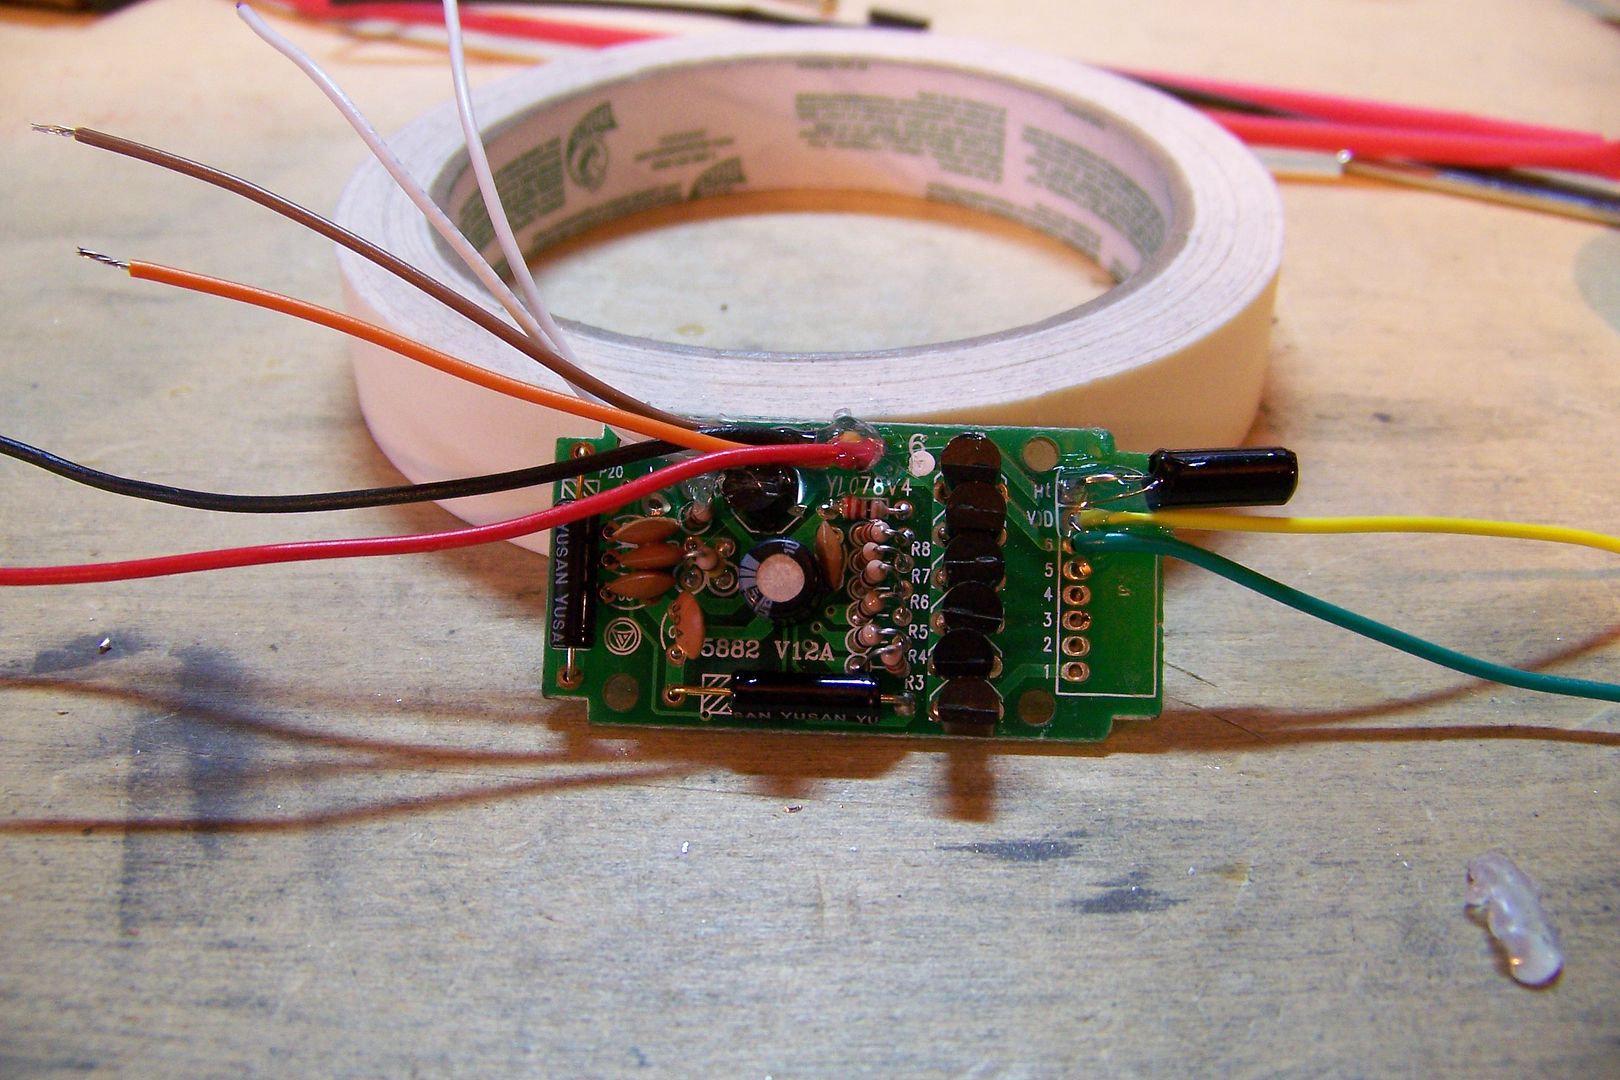
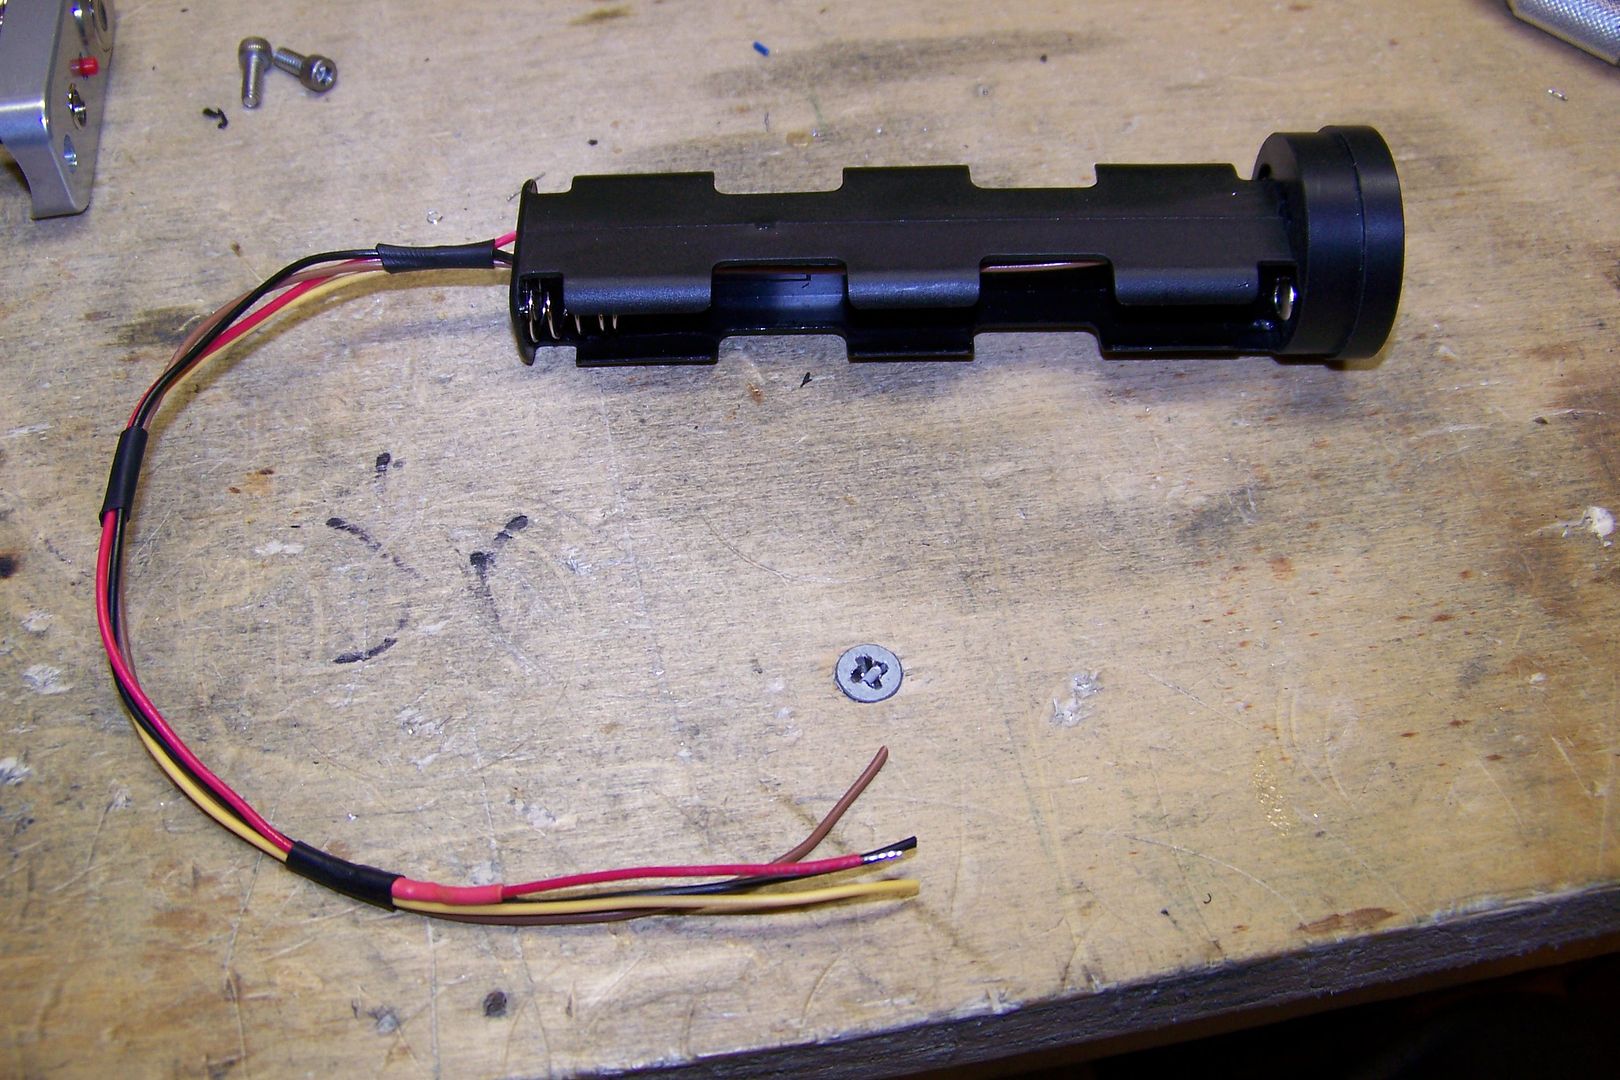
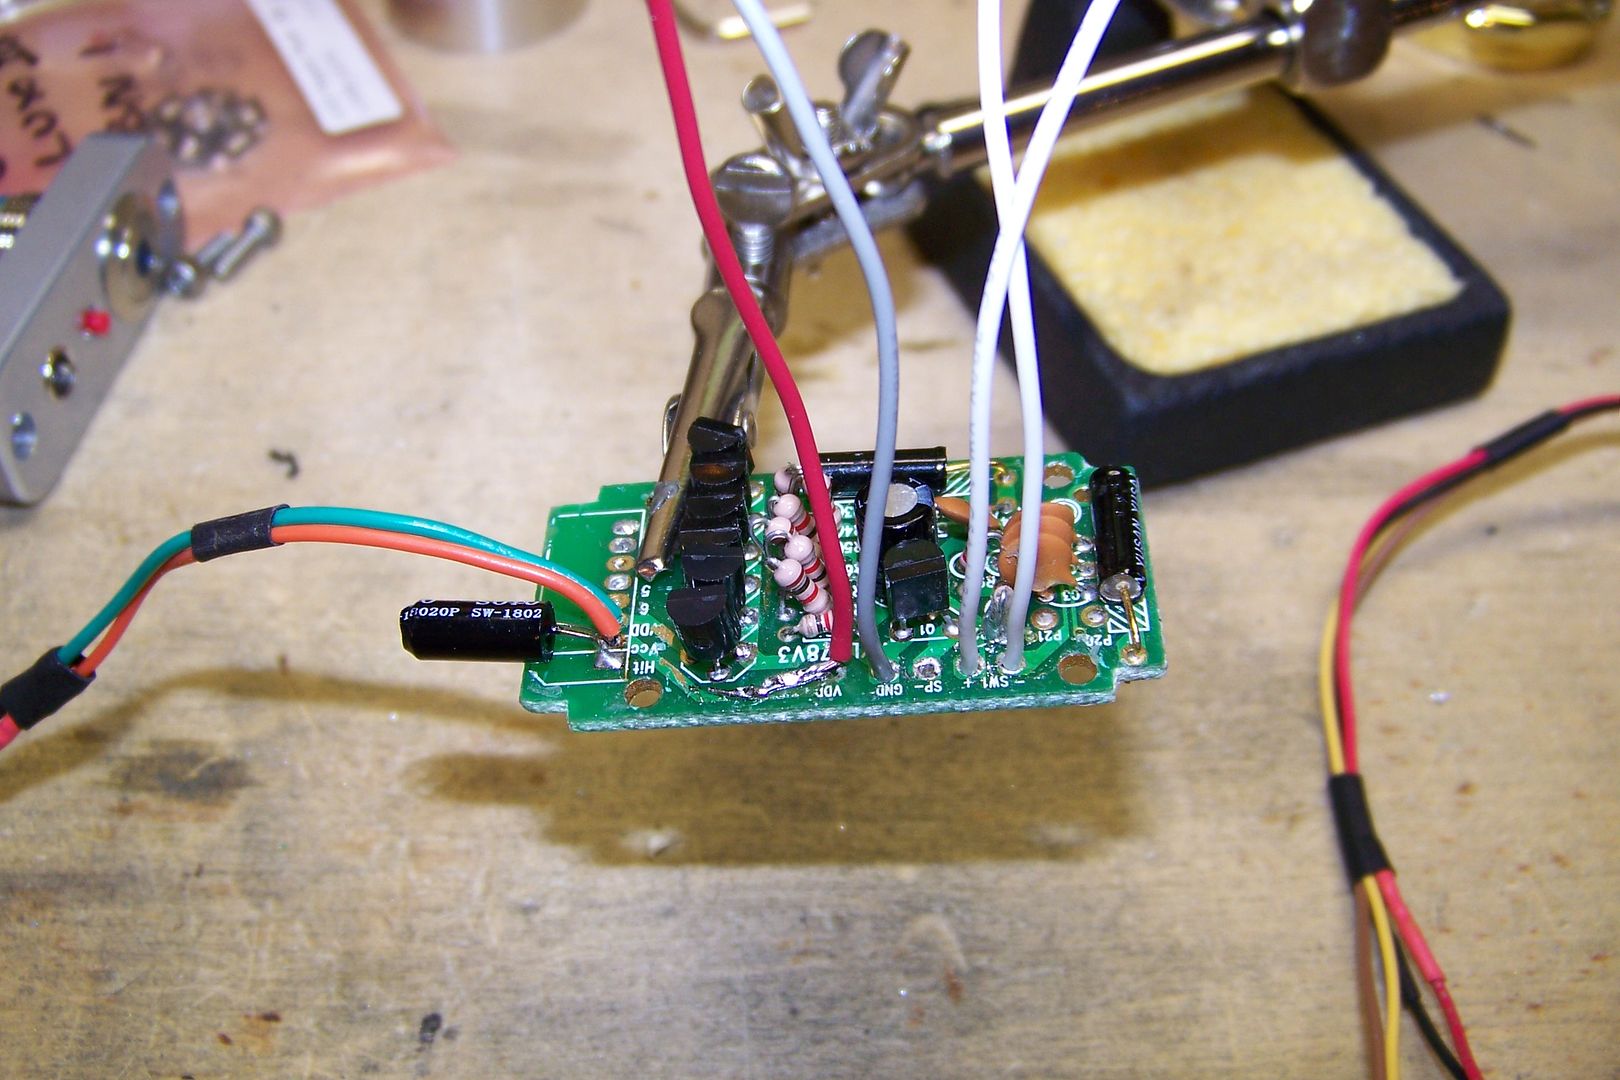
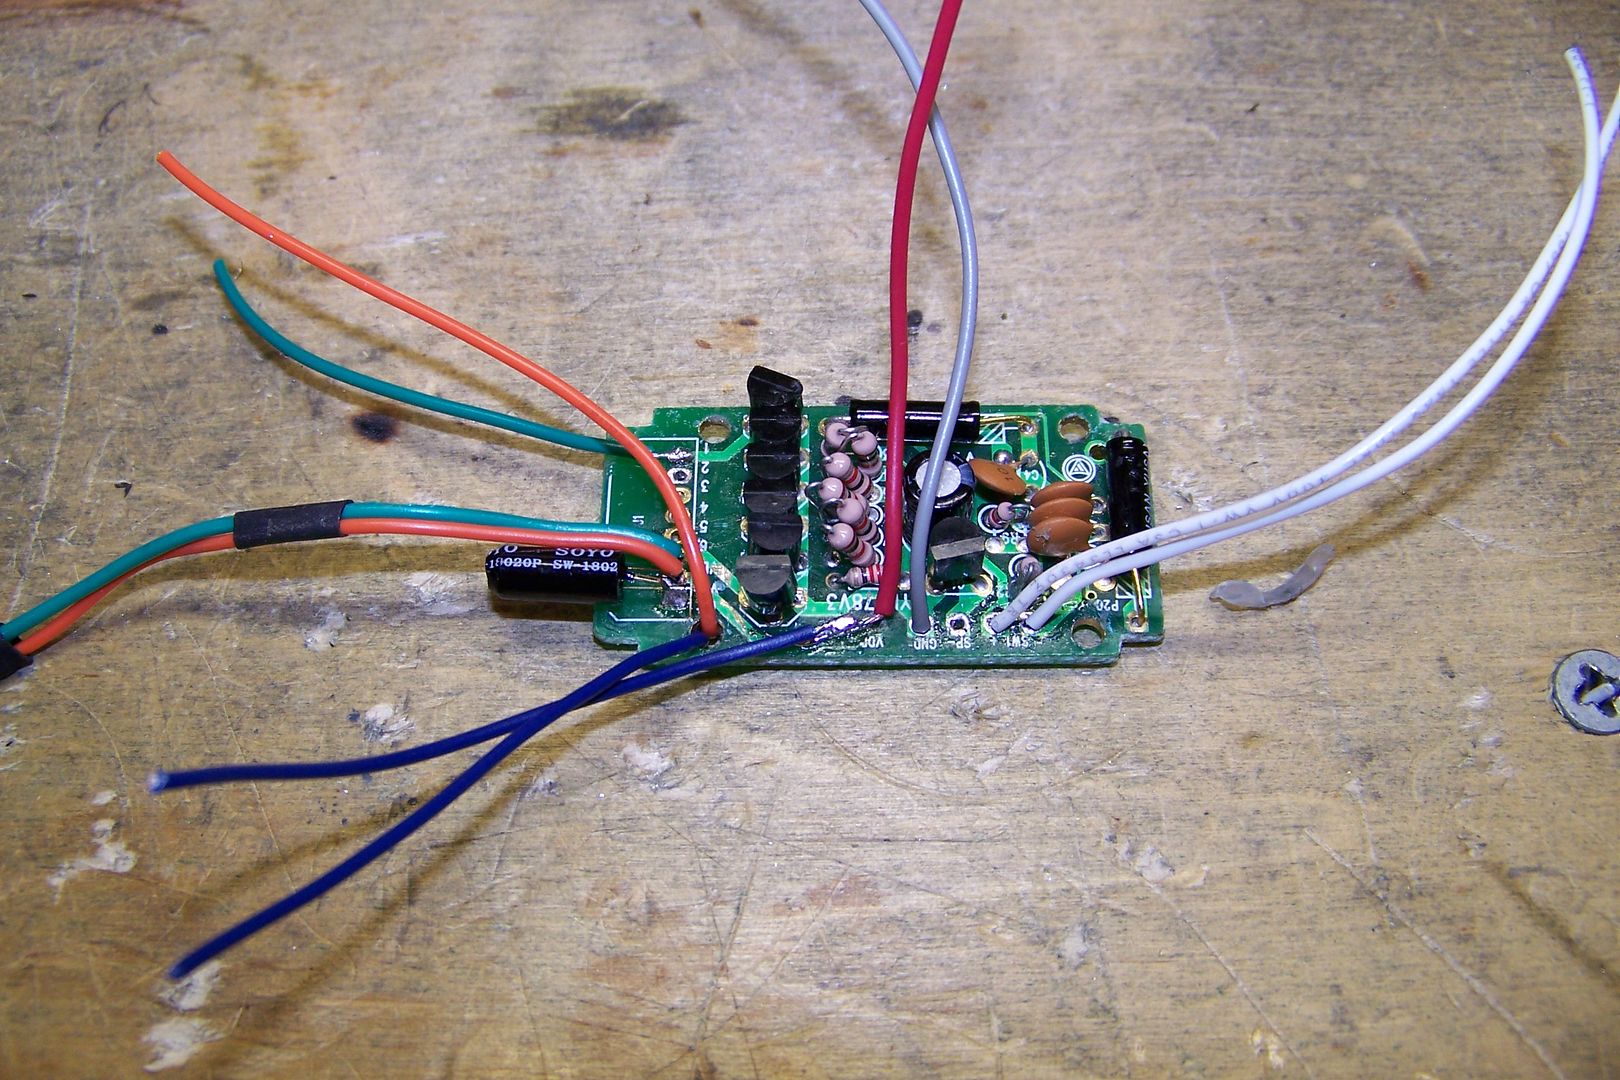
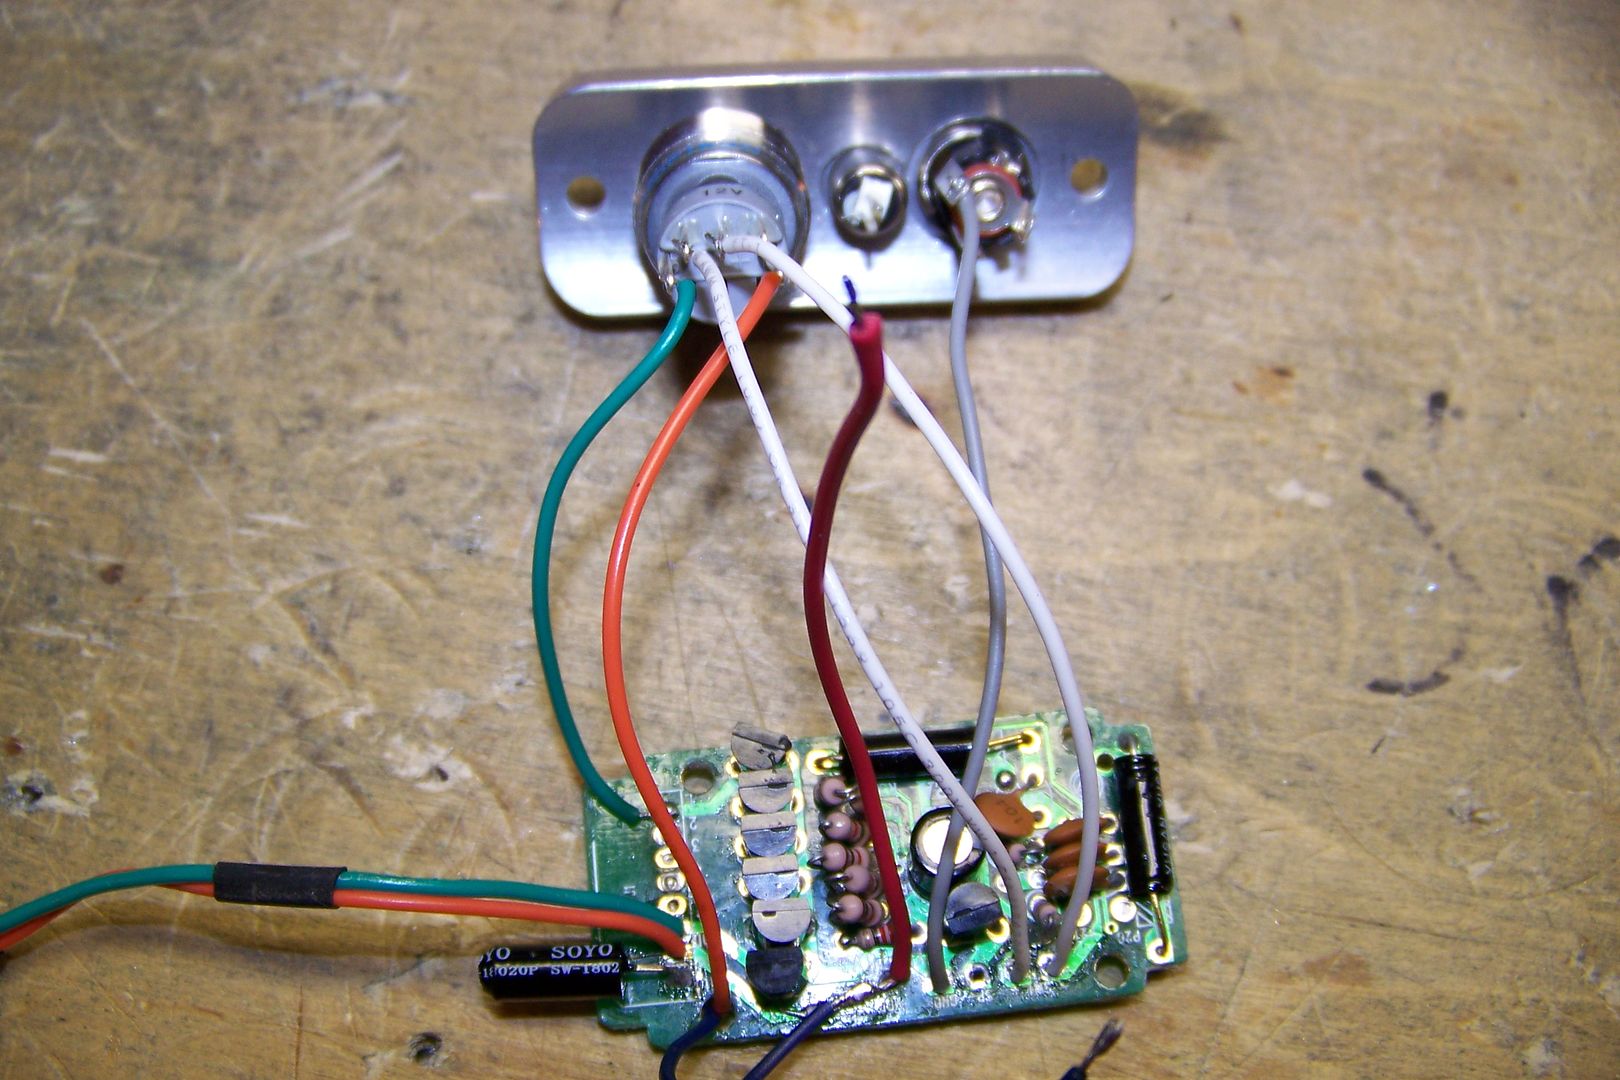
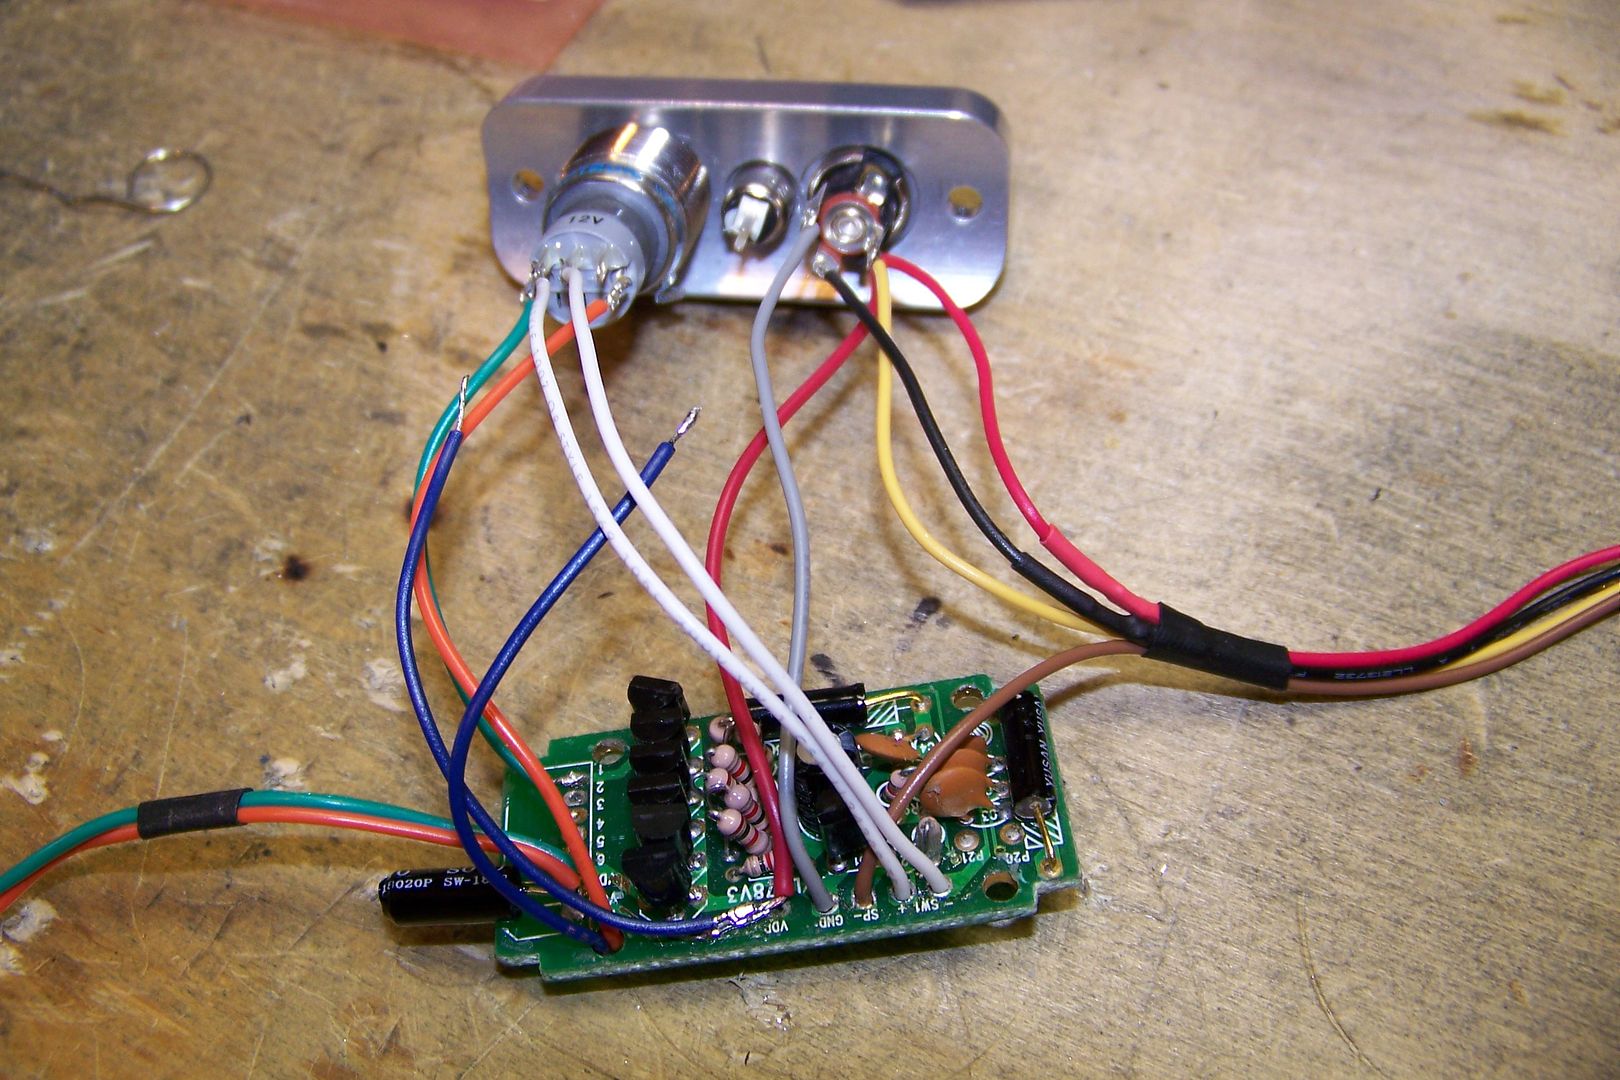
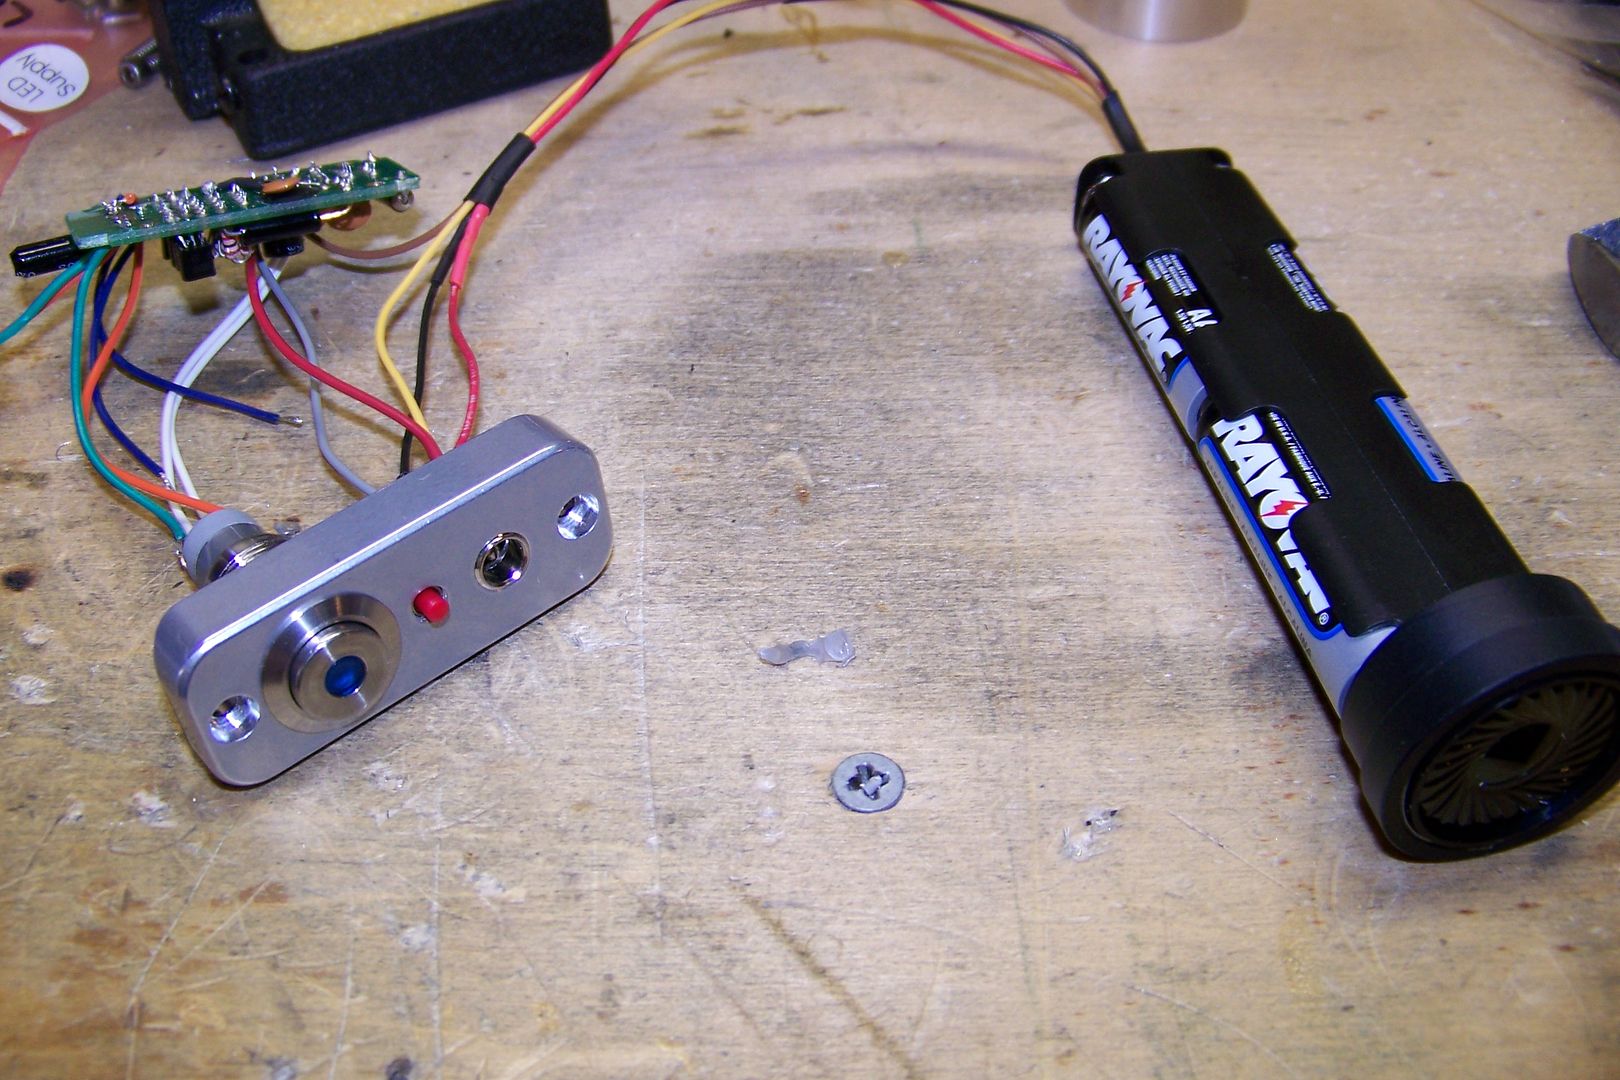
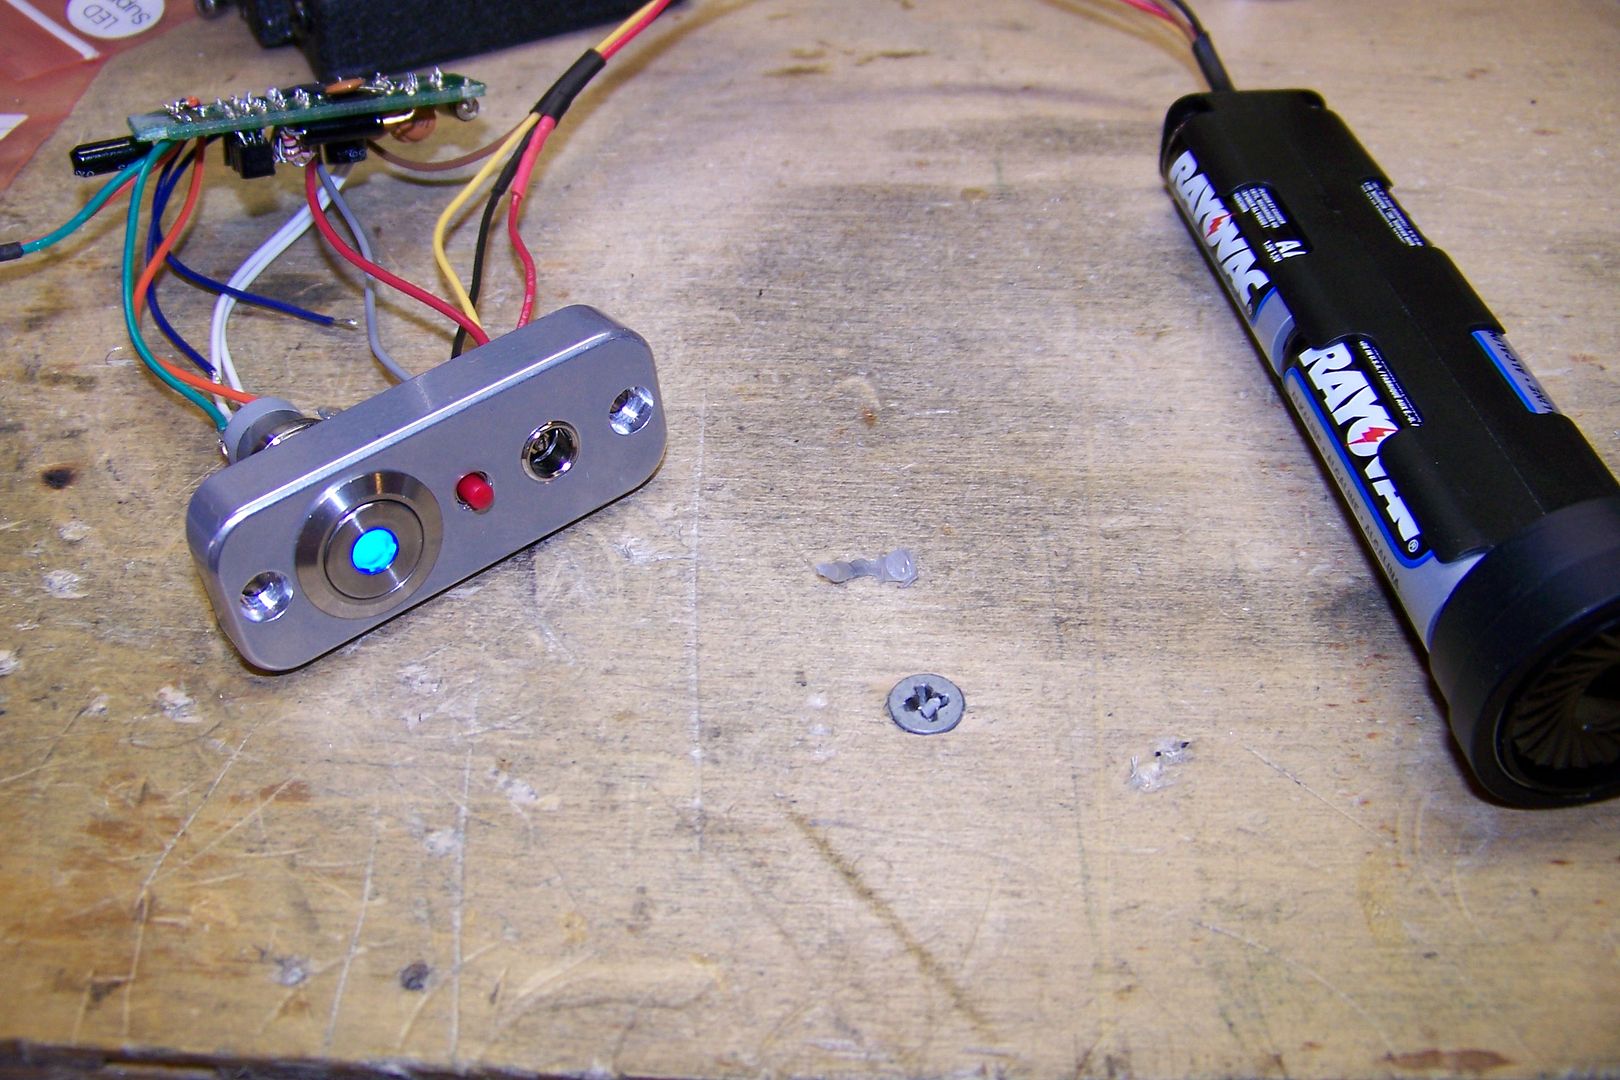
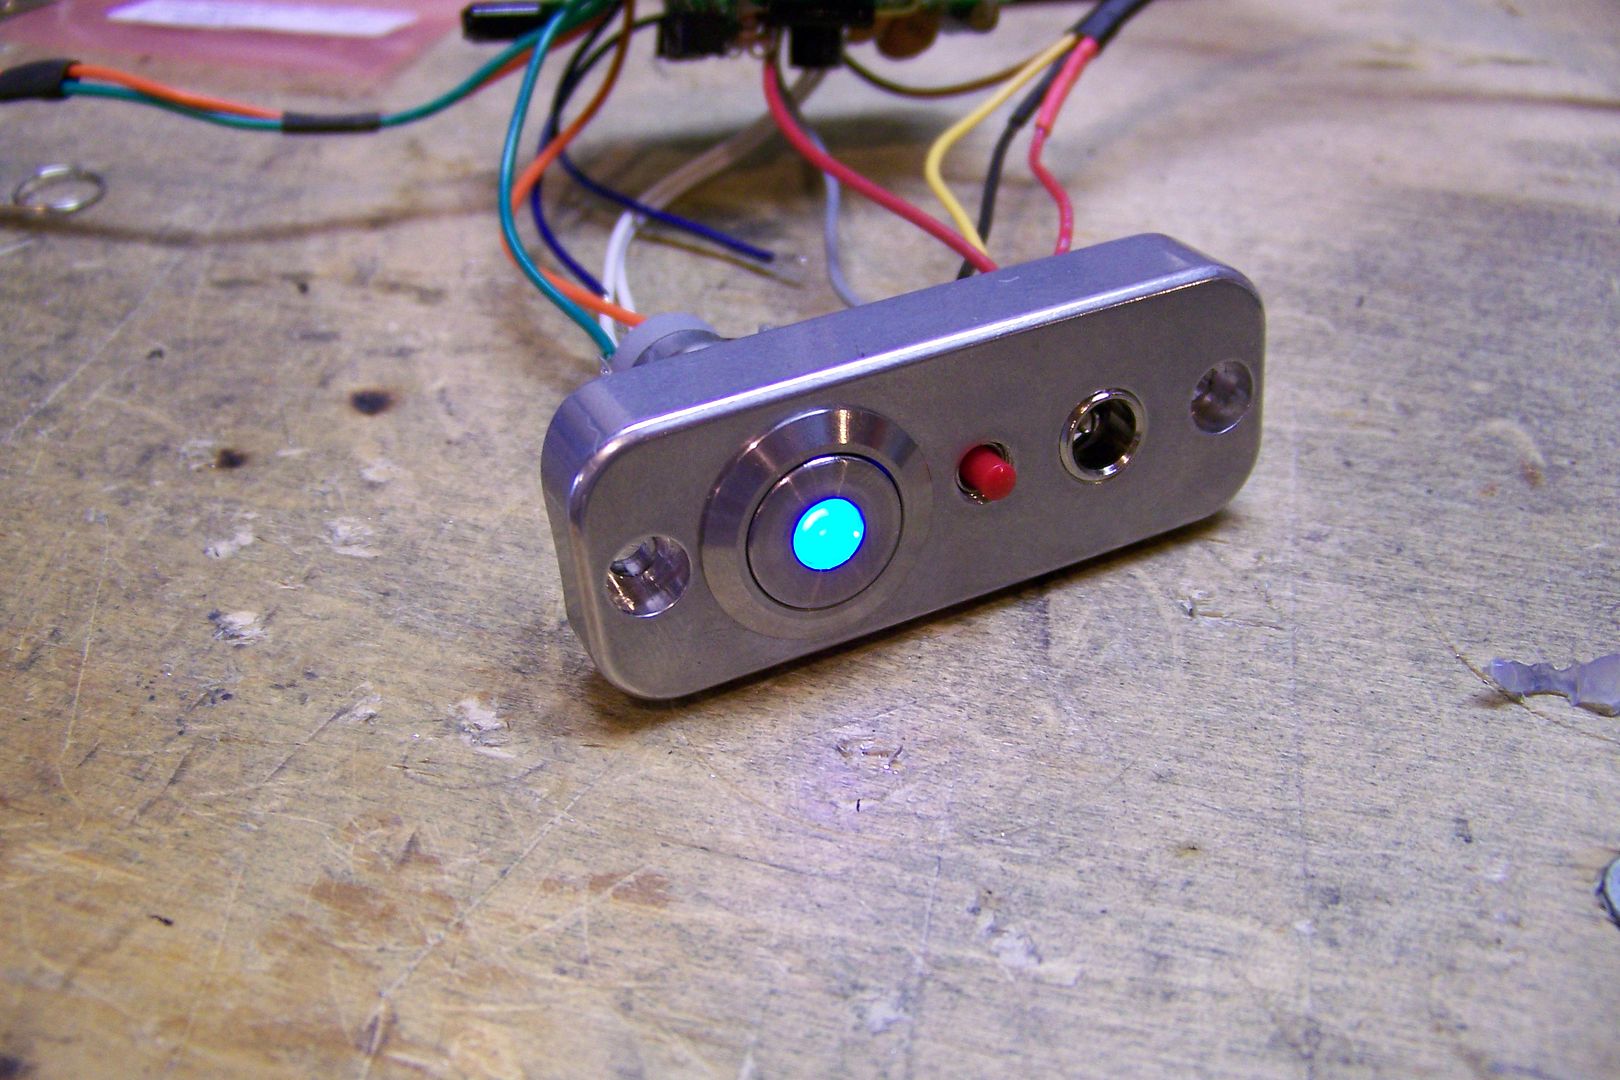
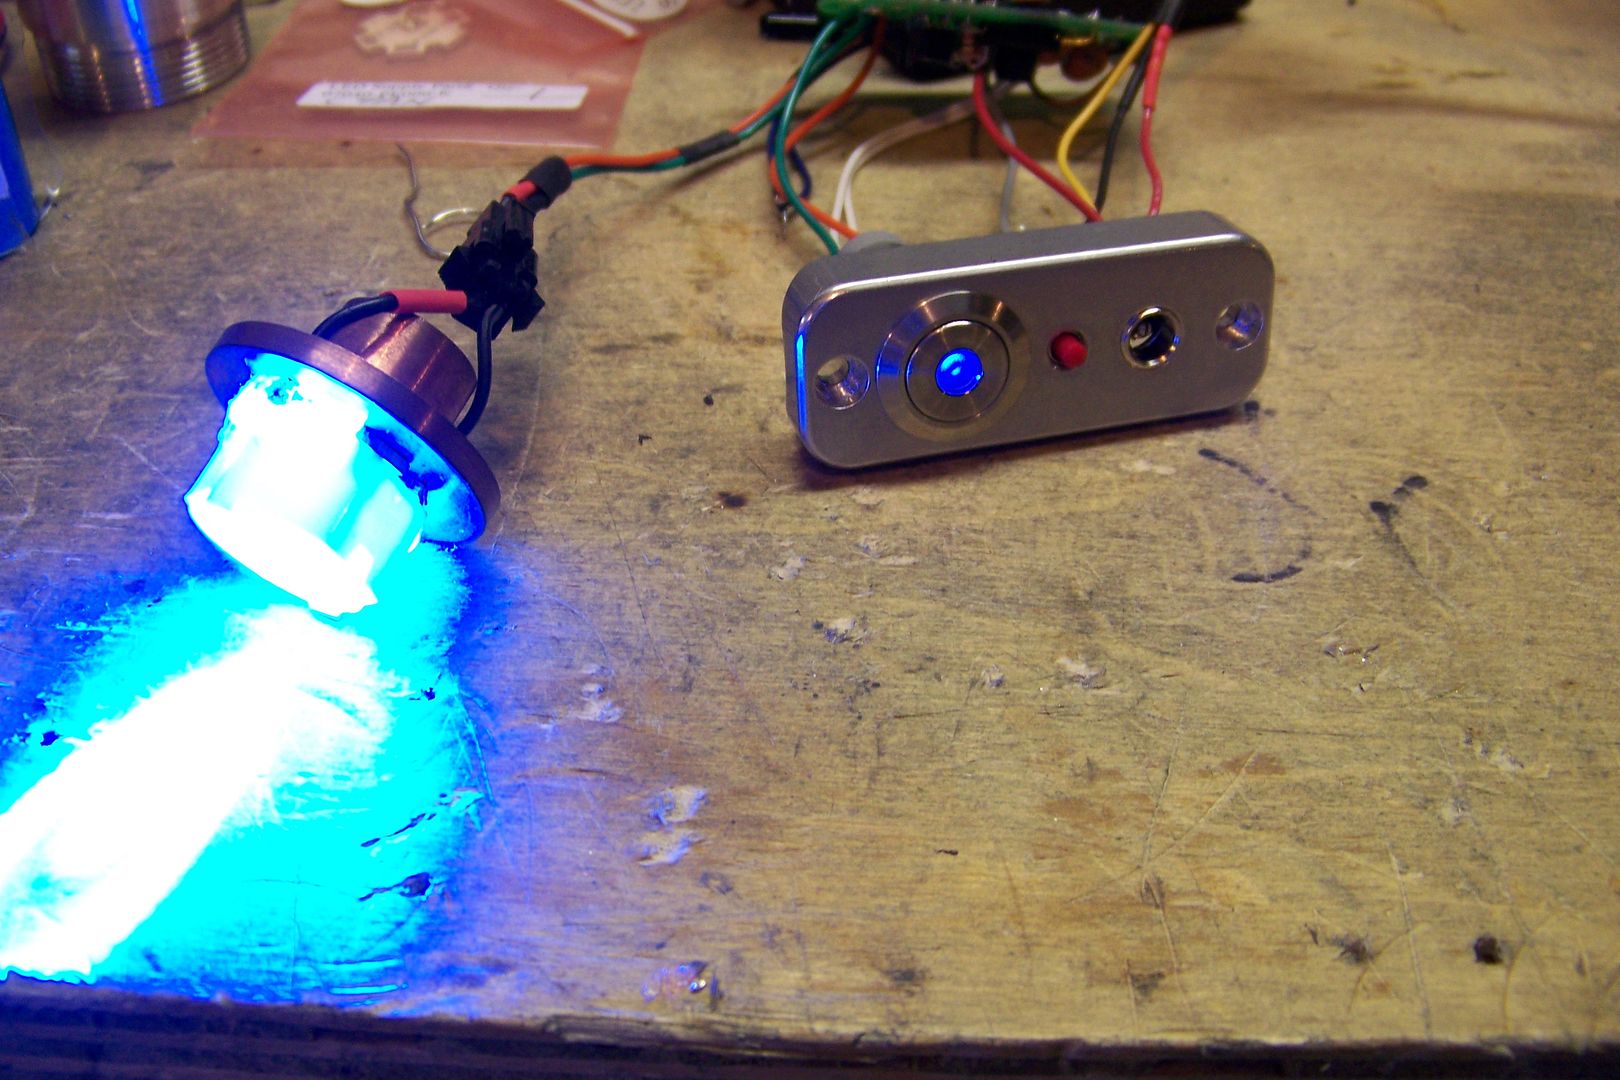
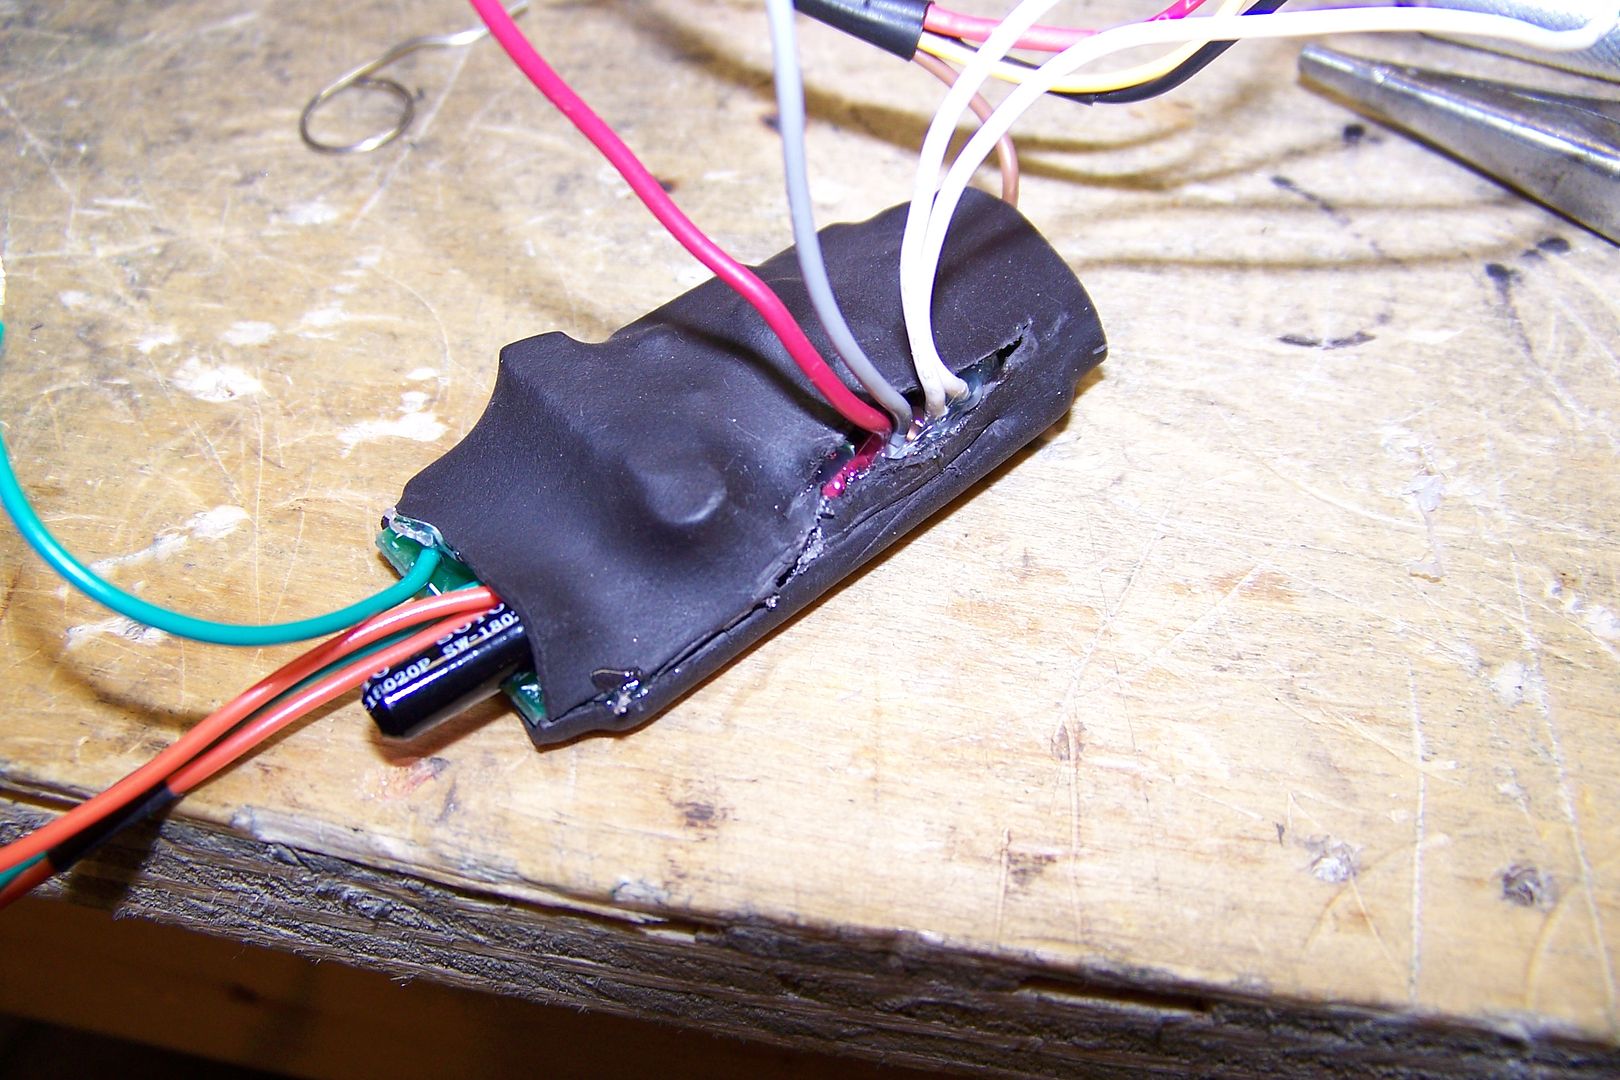
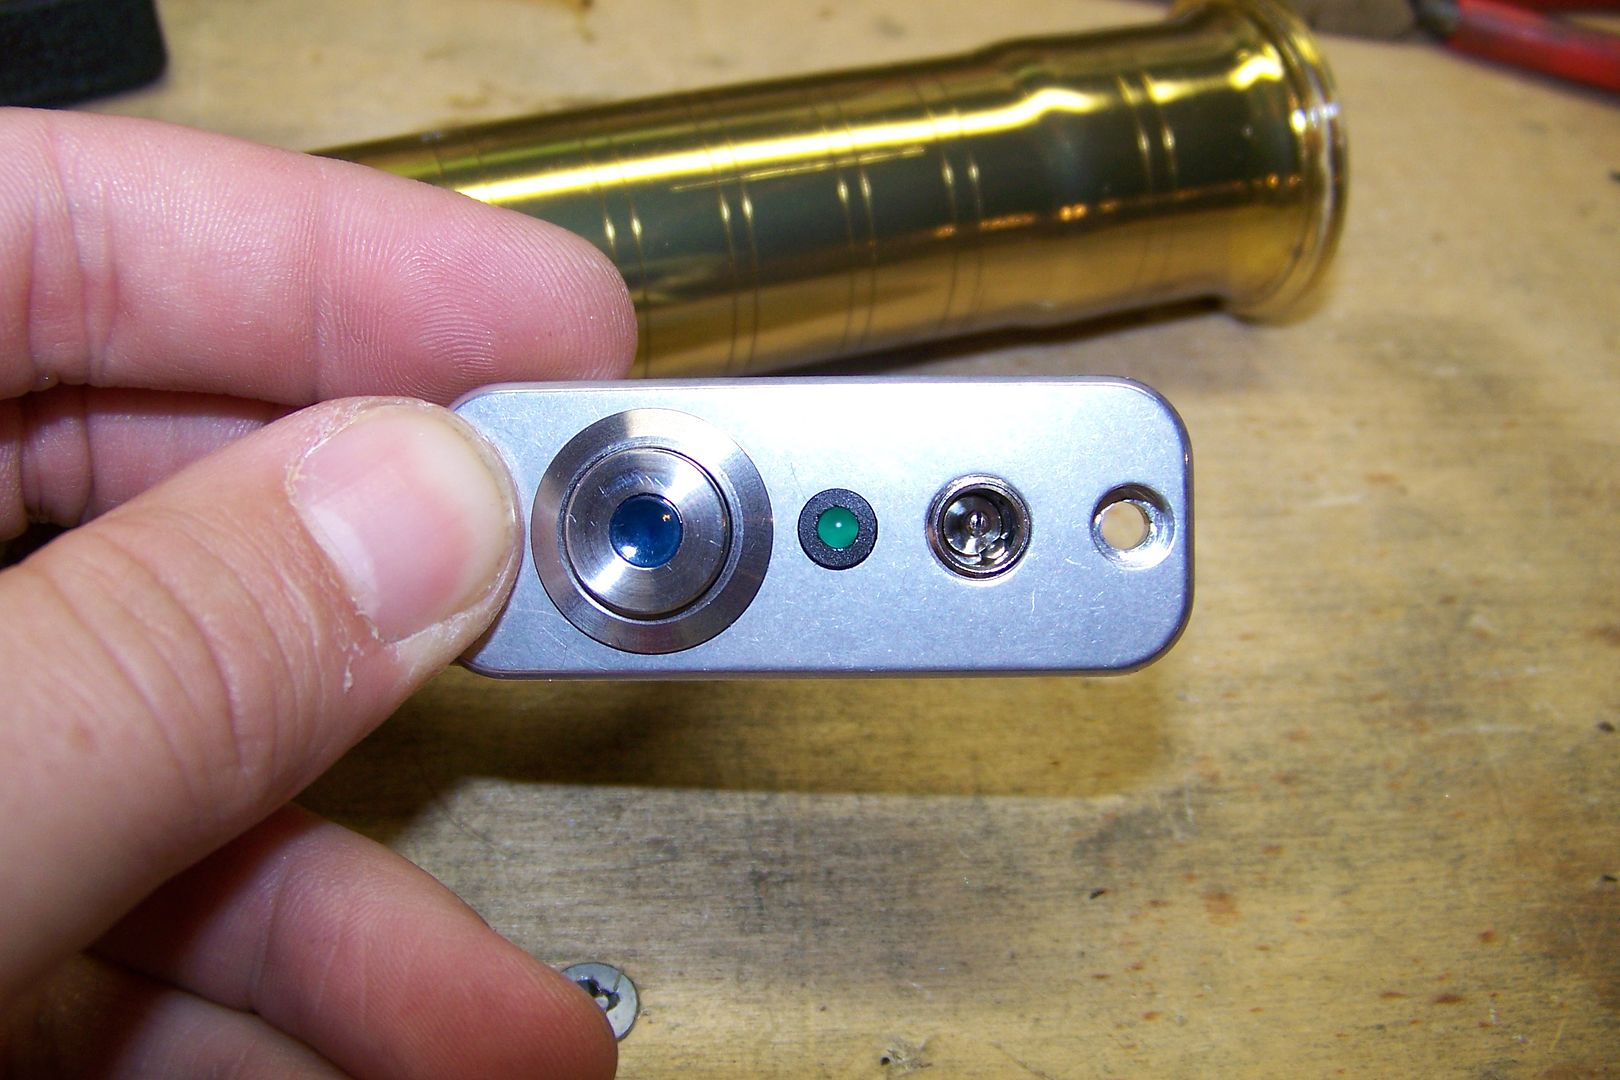
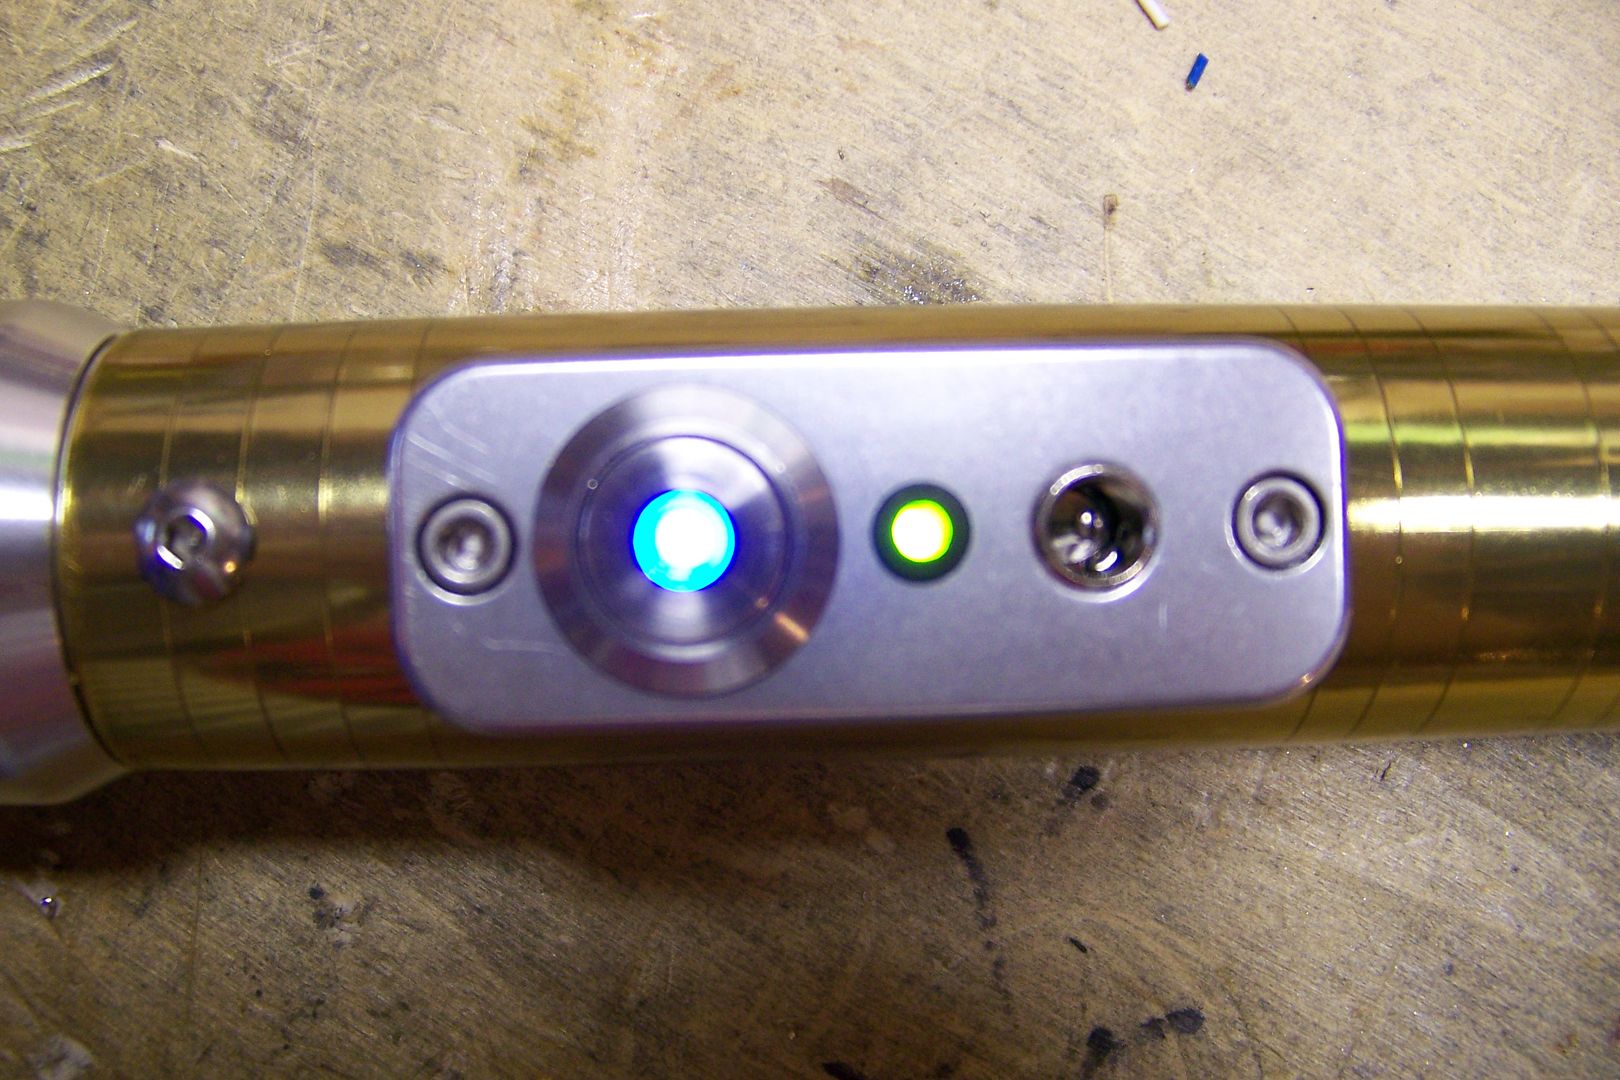
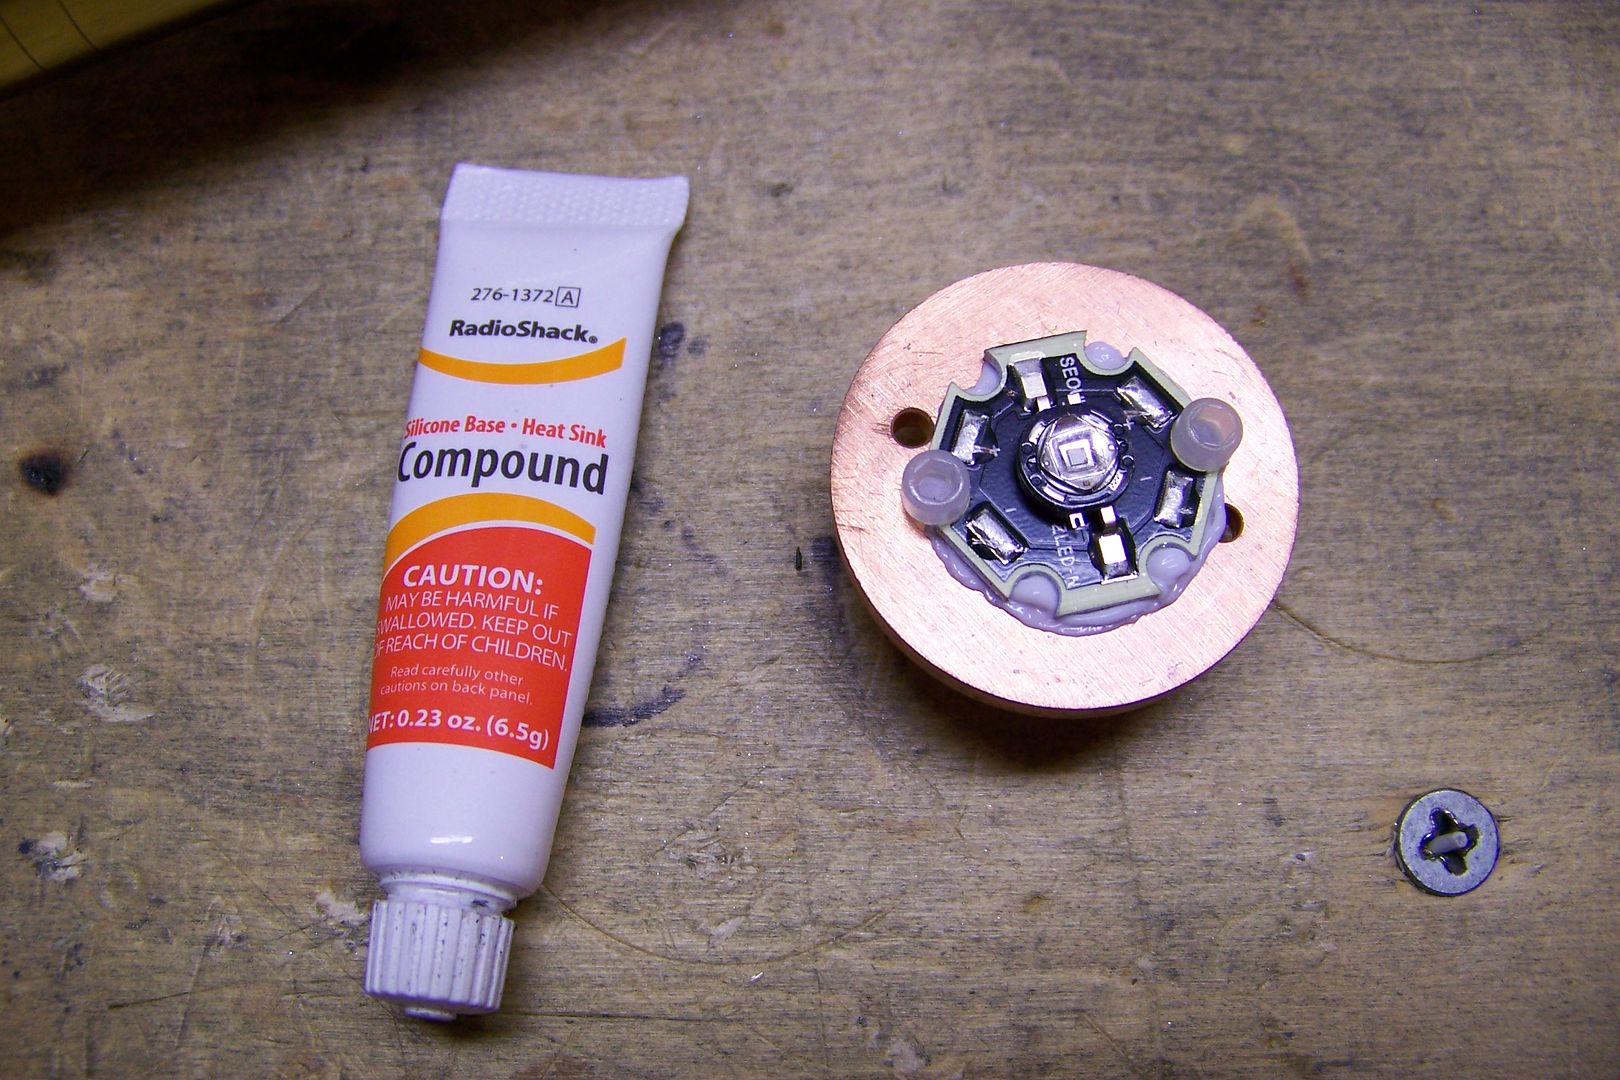
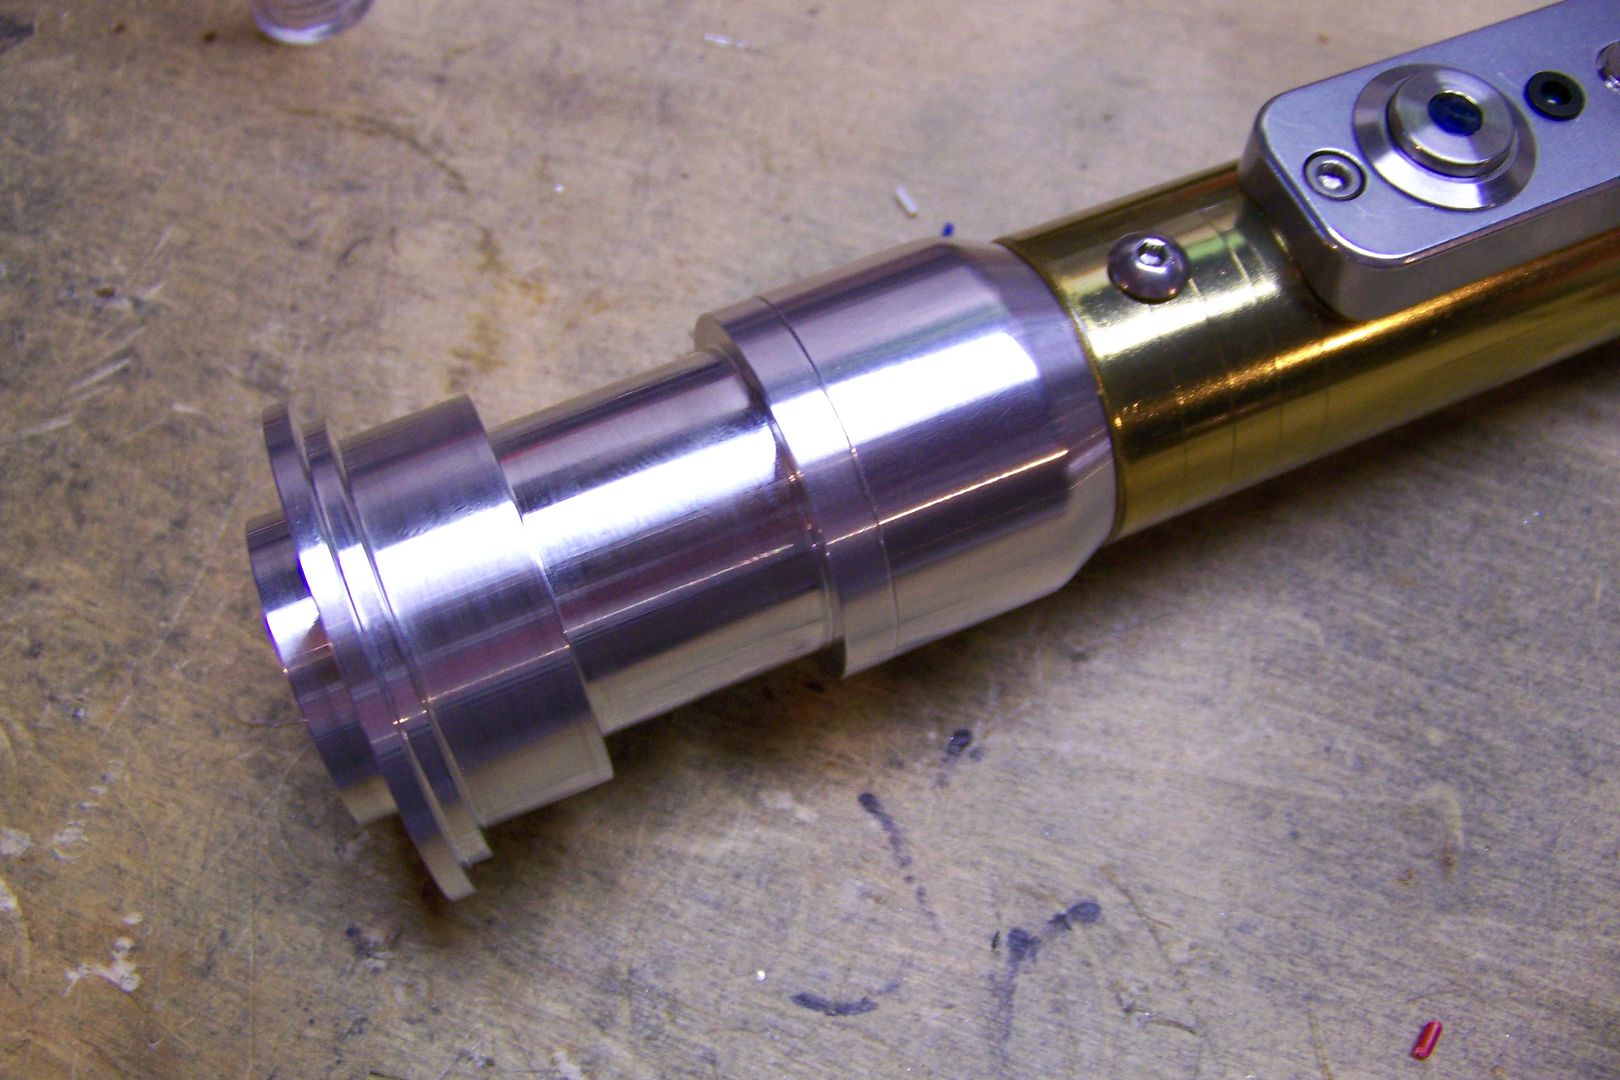
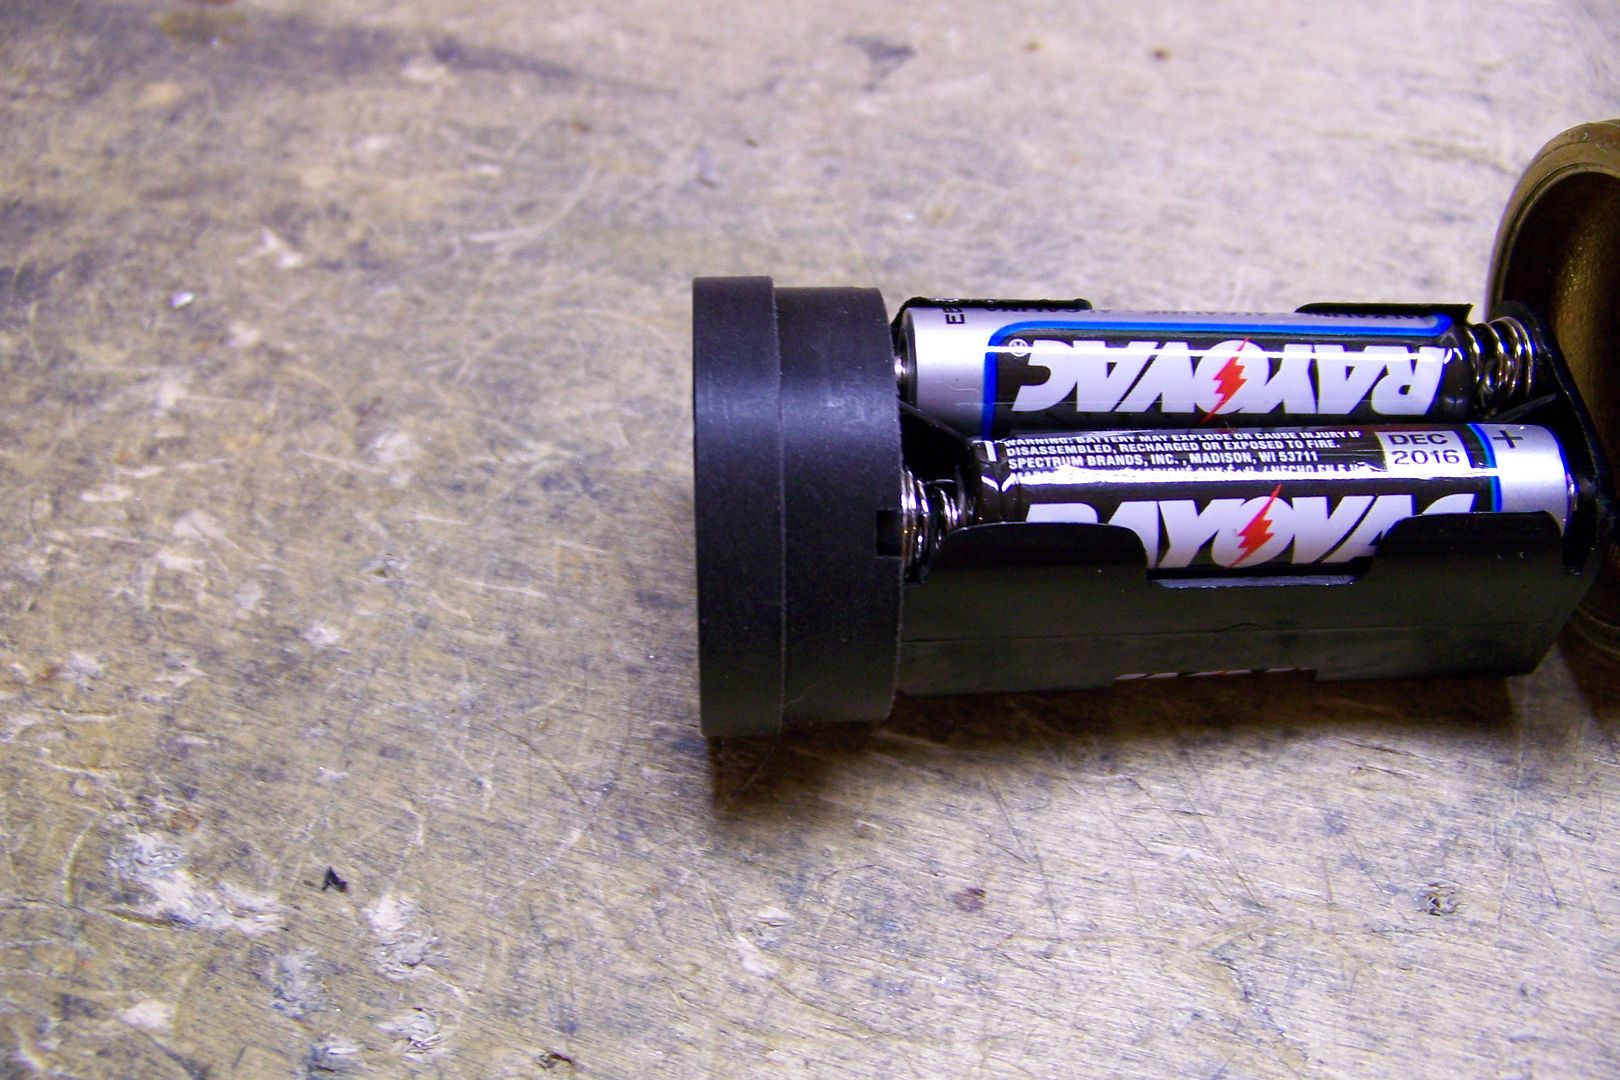
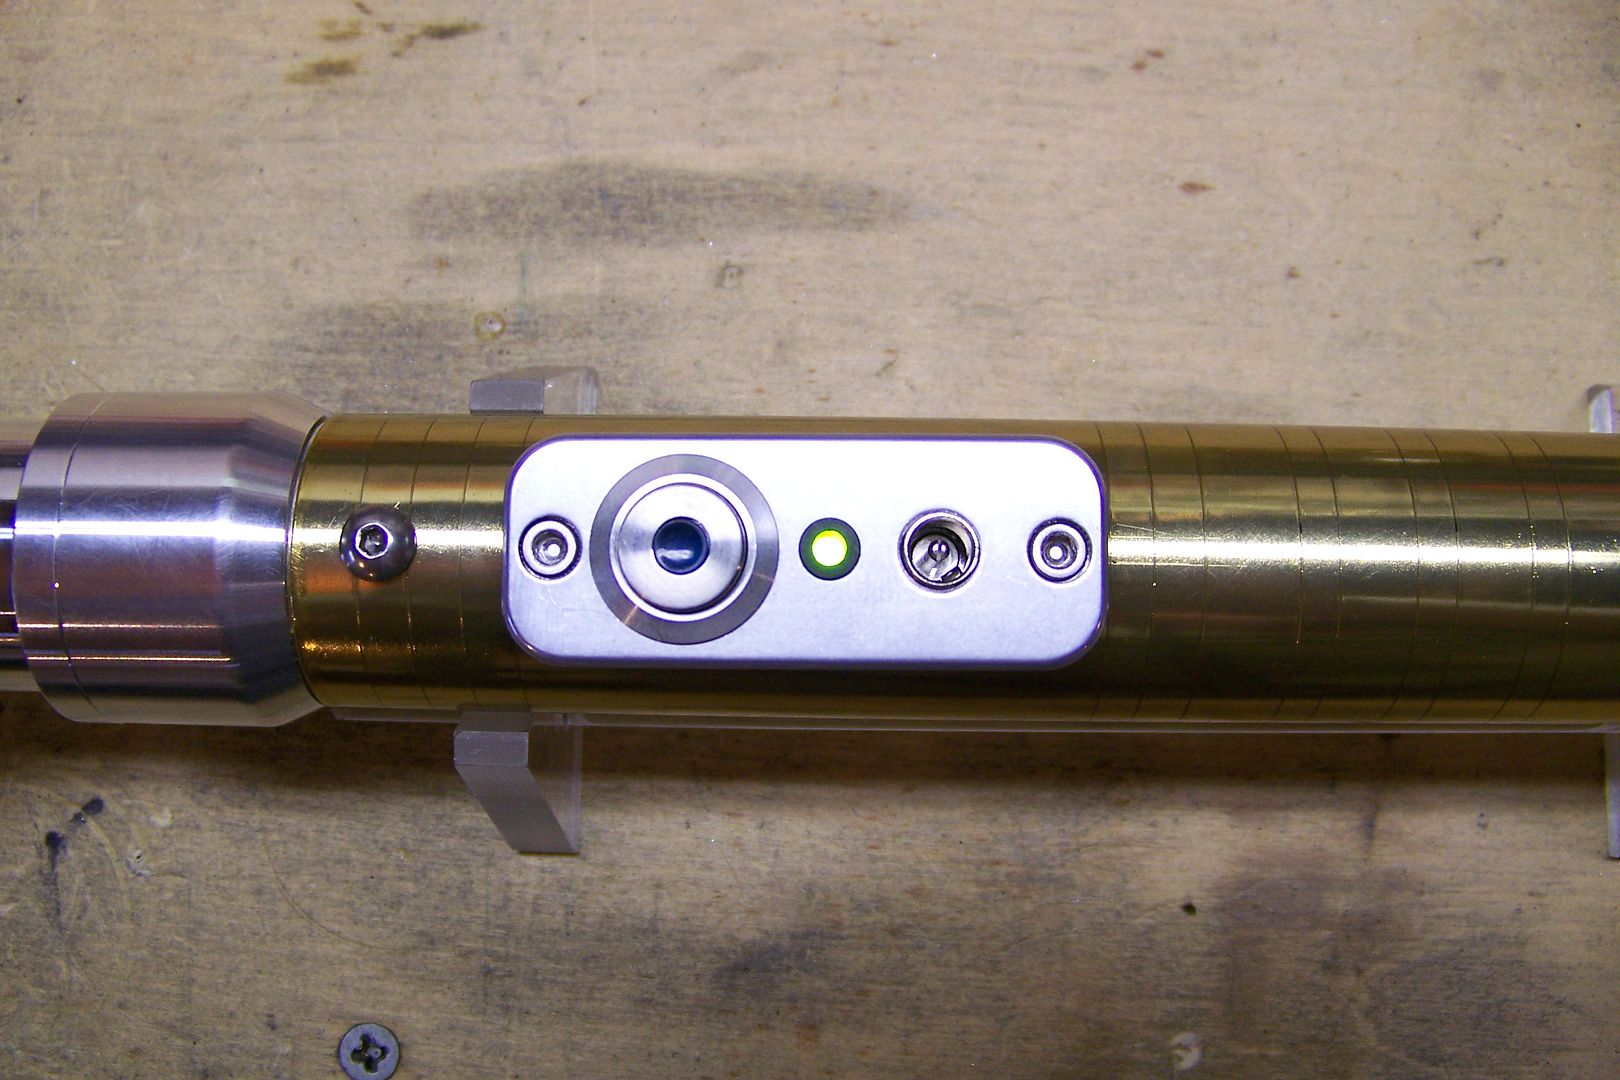
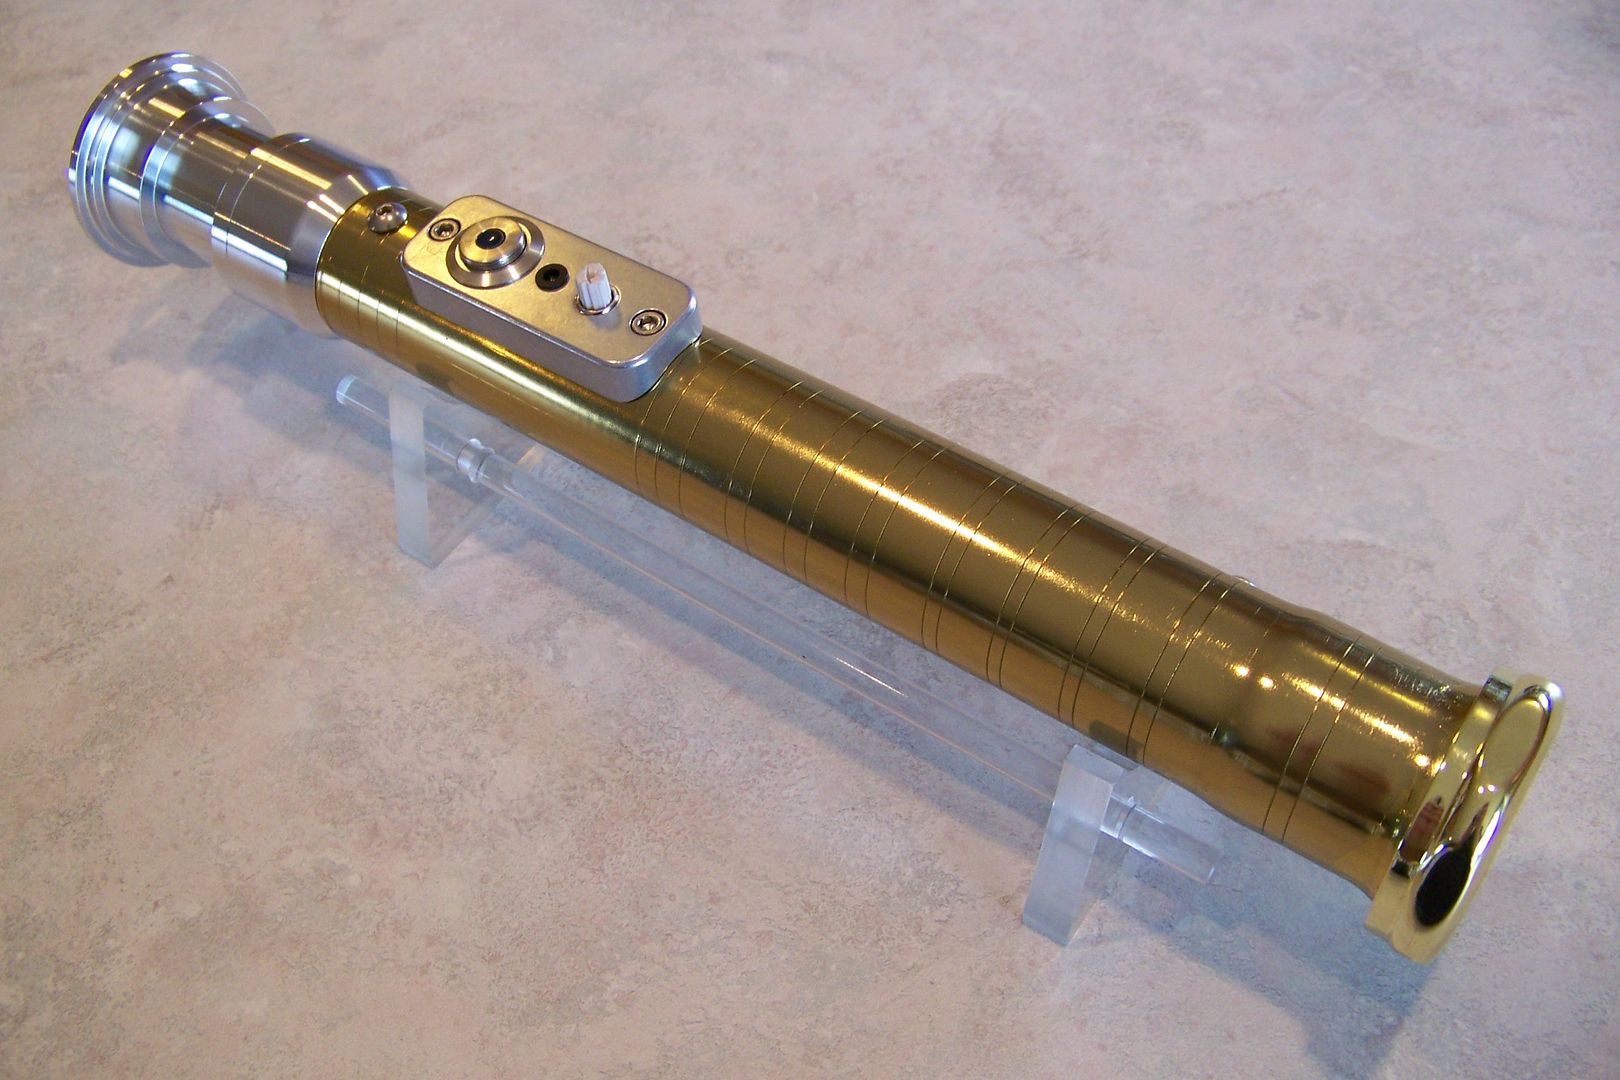
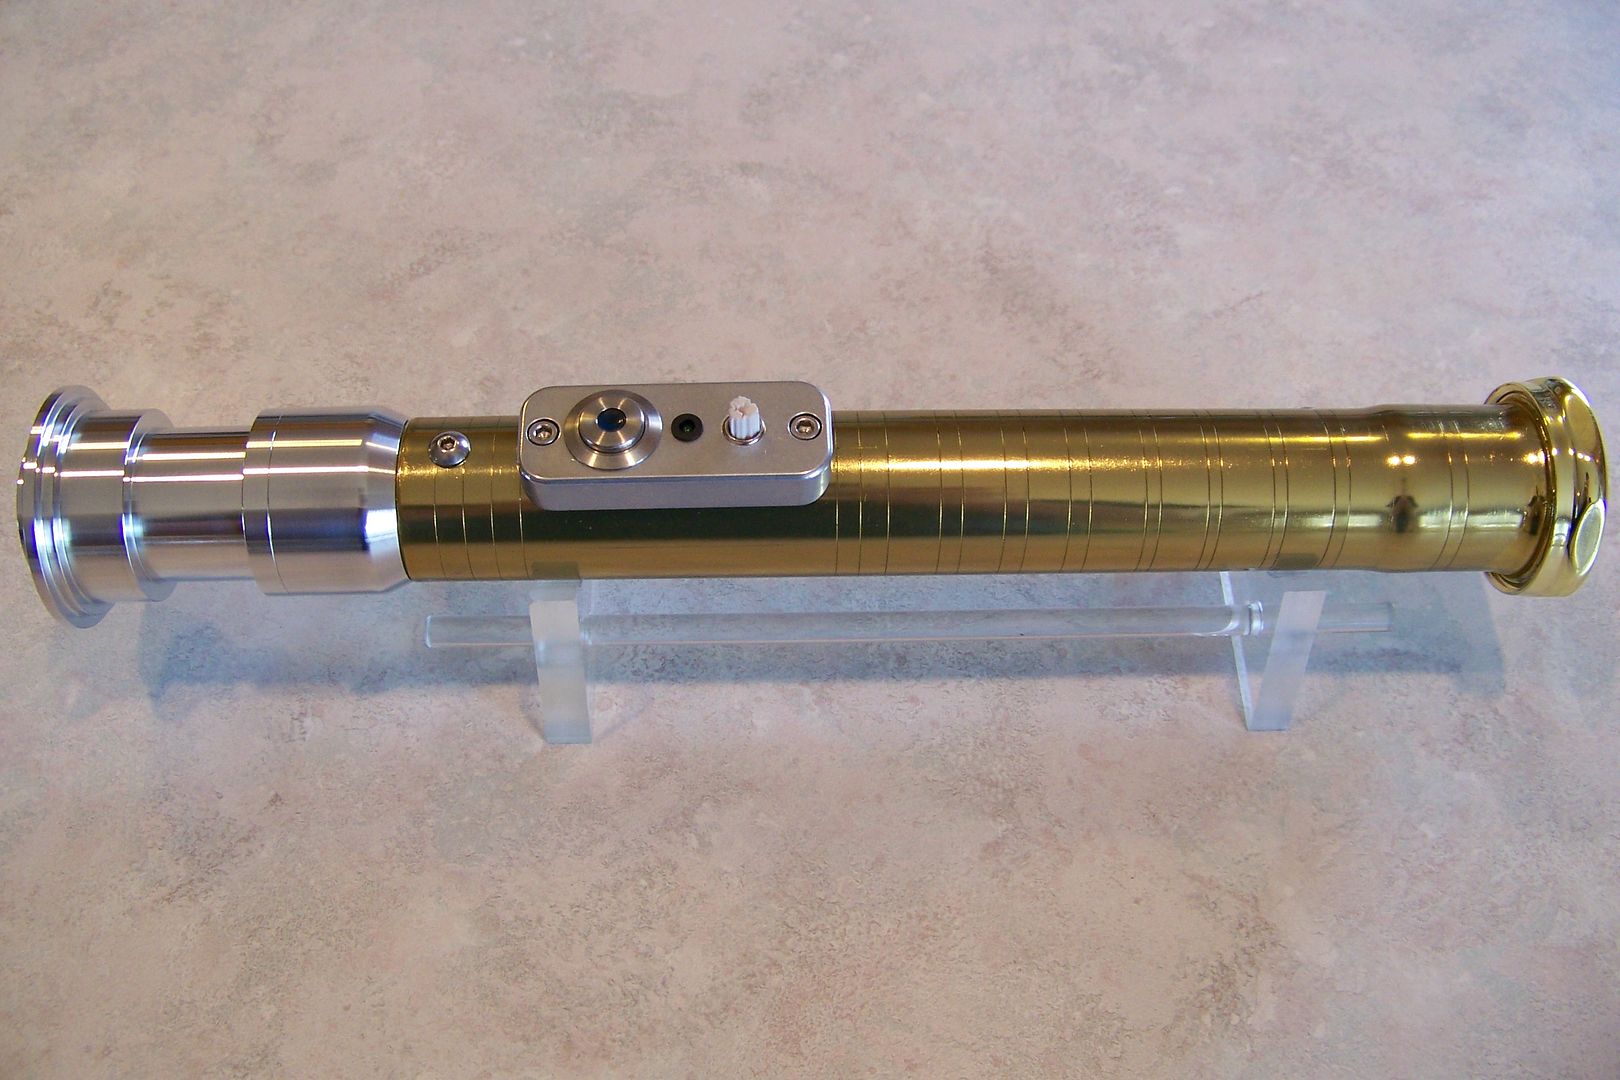
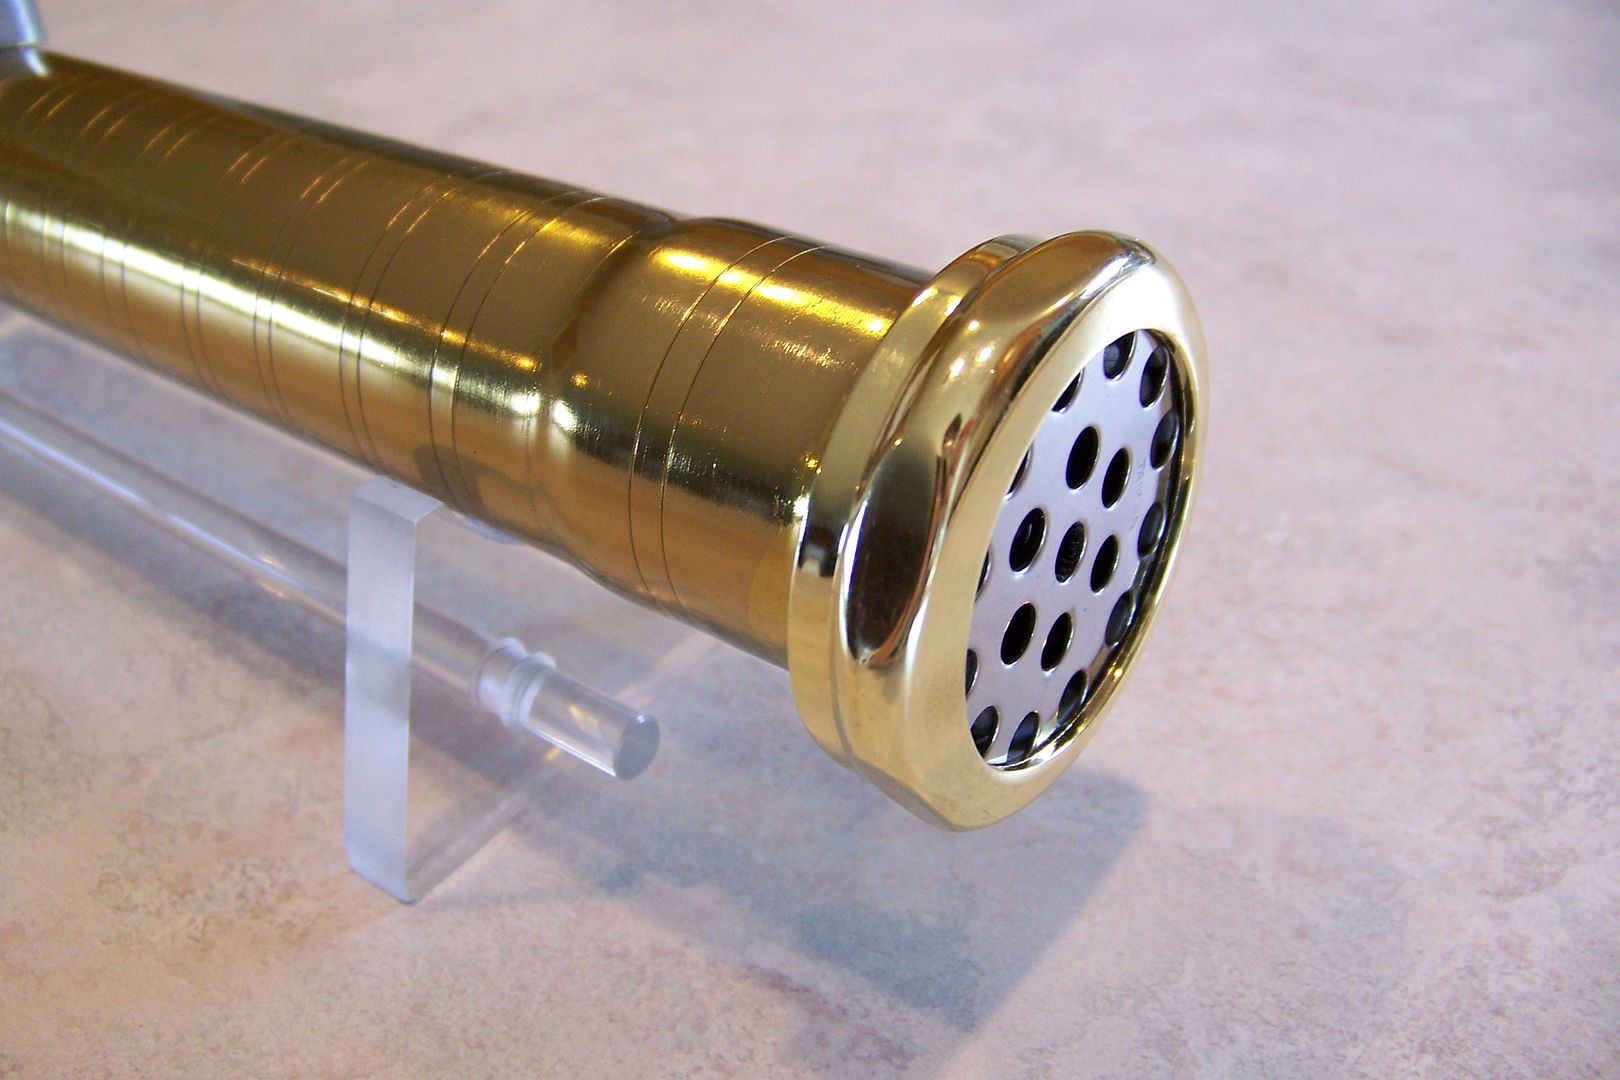
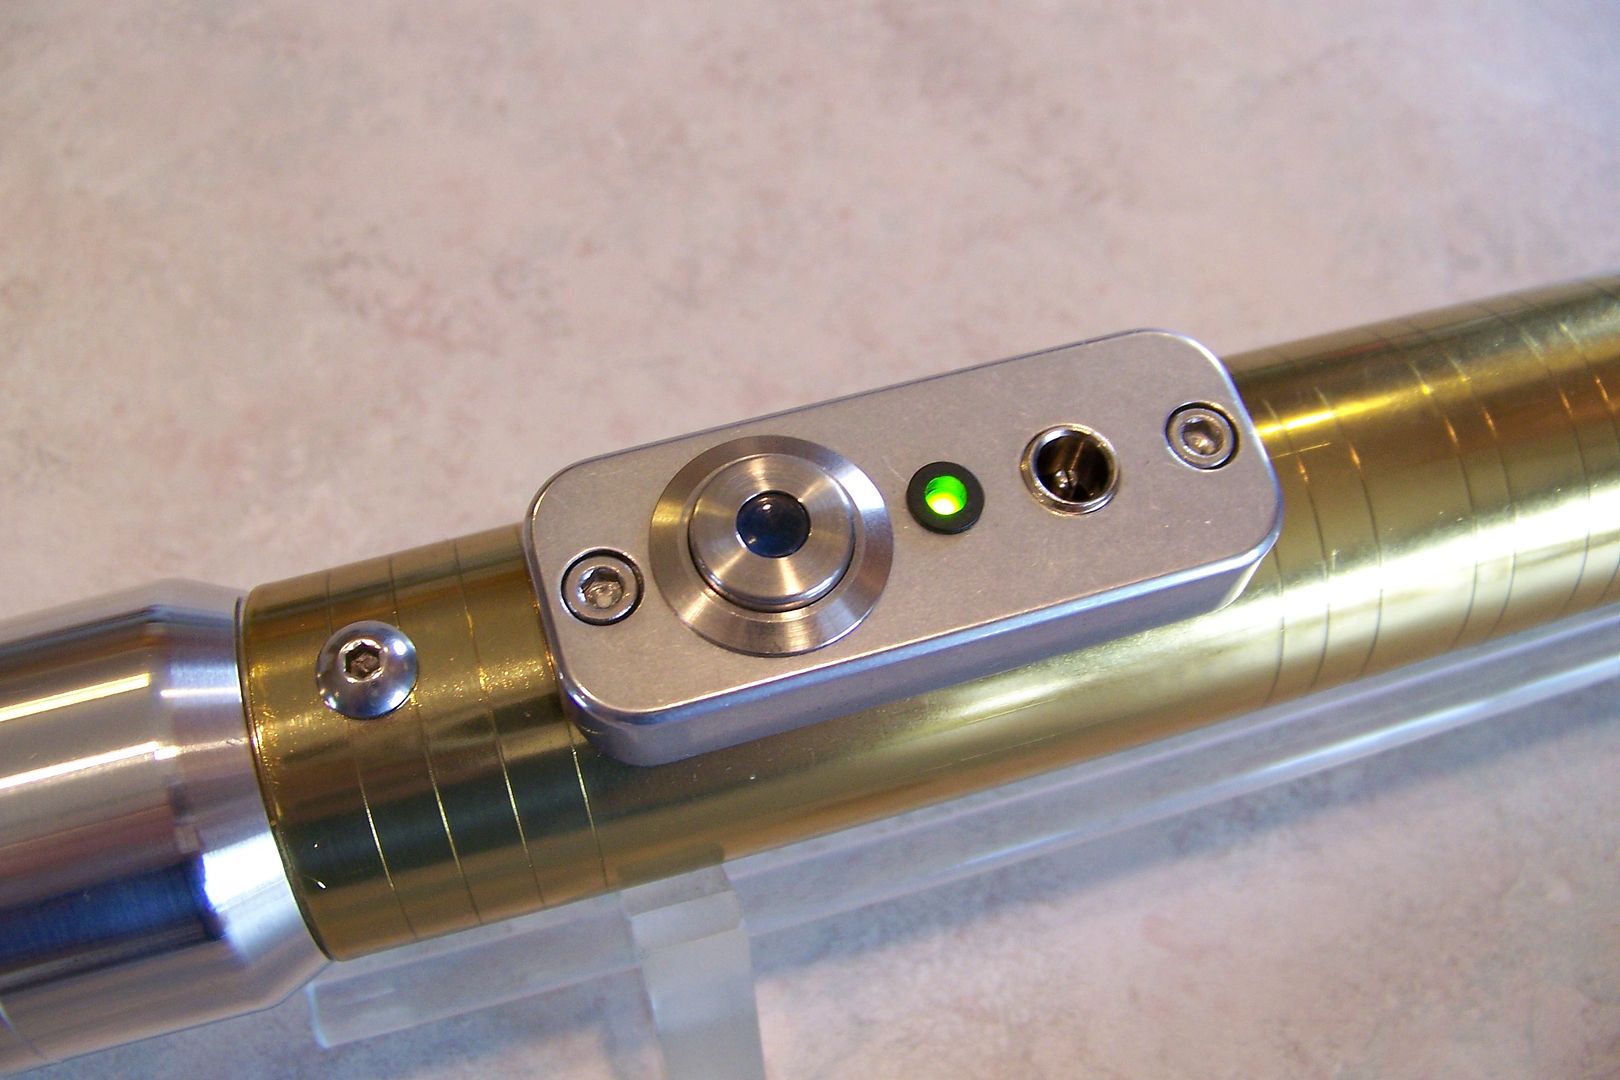
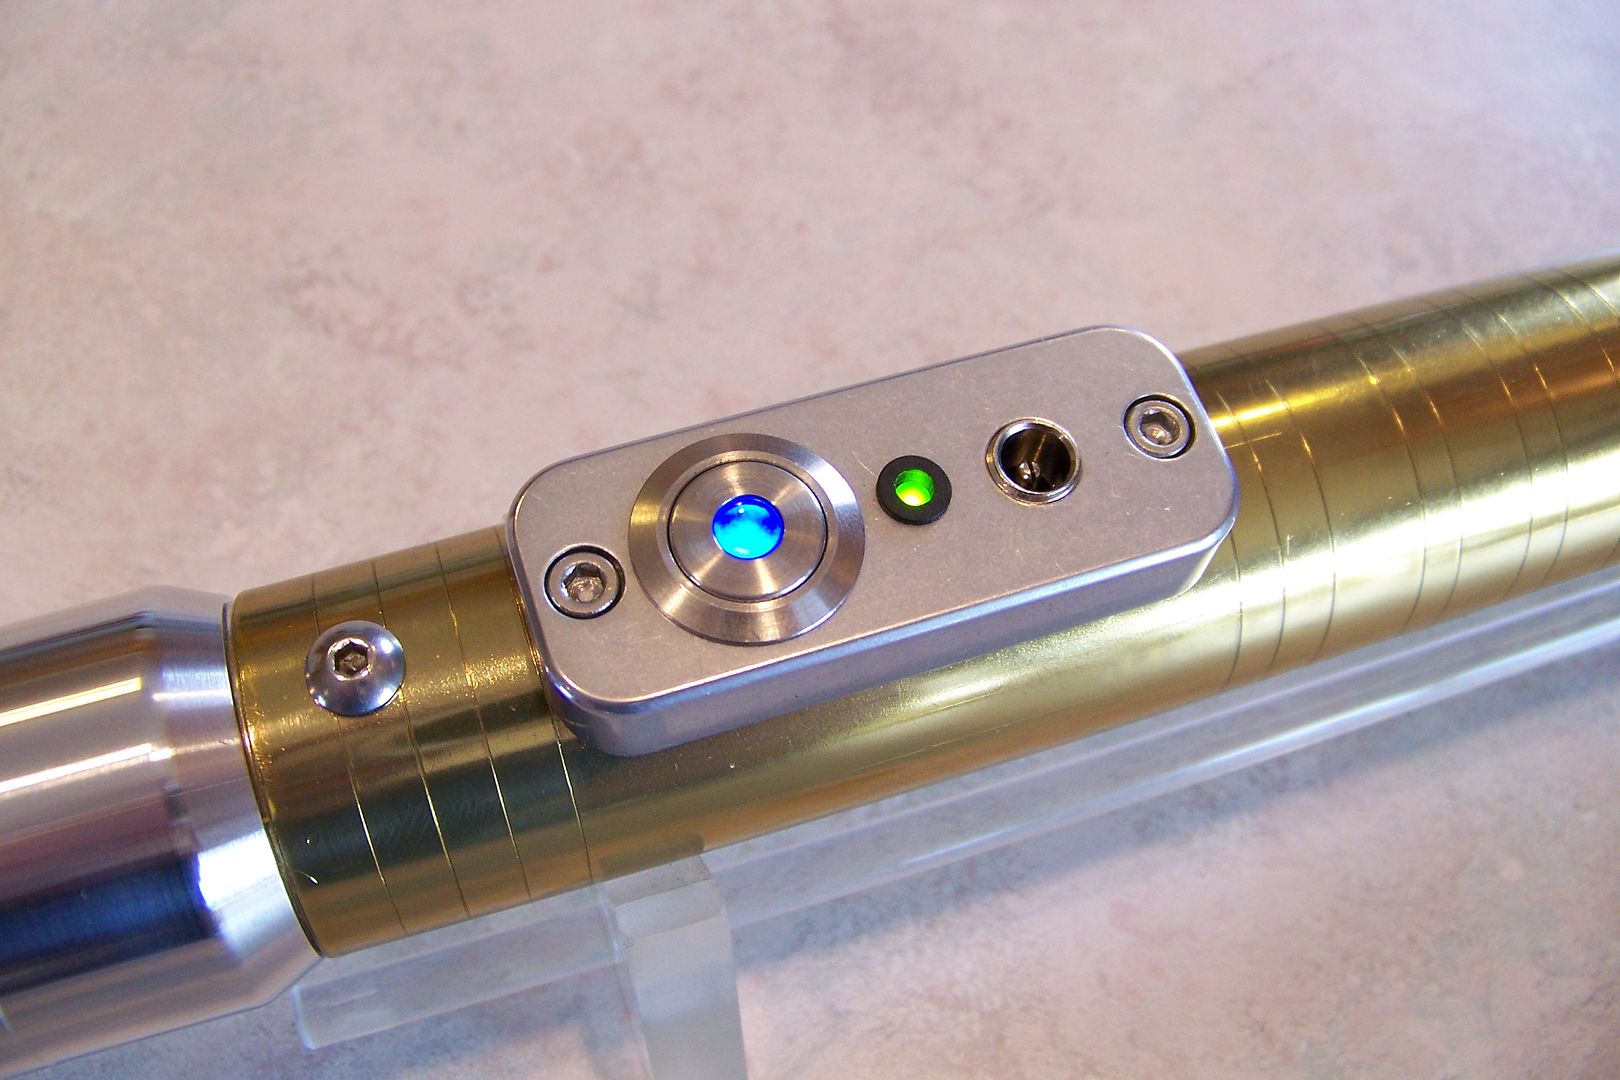
What we have there is a 1 1/4" brass sink drain slip extension, a TCSS MHS to 1 1/4" sink tube adapter, blade holder #14, activation box #2 (a new part!) with an illuminated anti-vandal style switch (blue dot), speaker mount v2, a 1.1", 1-watt, 8ohm speaker, a 4-AA battery holder, 4 rechargeable NiMH batteries, and a Master Replicas/Hasbro Force FX soundboard from I think, a Luke ANH FX saber, and a blue Seoul P4 high-power led.

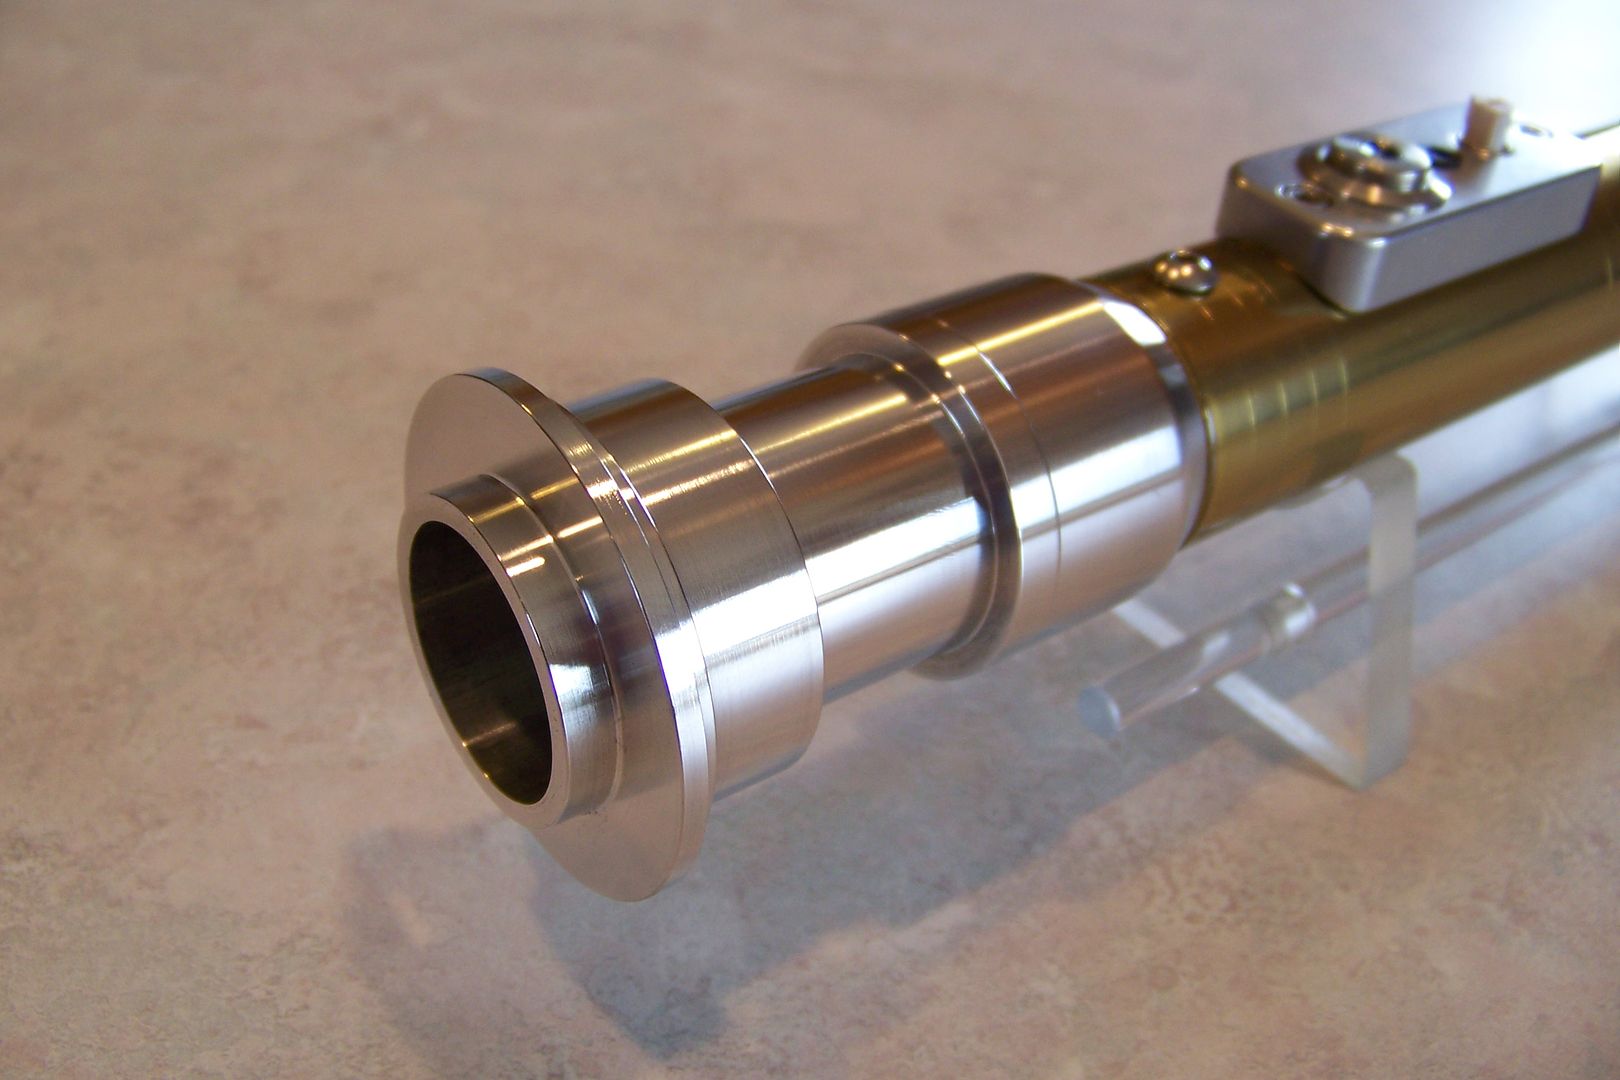
The adapter will fit into the sink tube like this:
Image

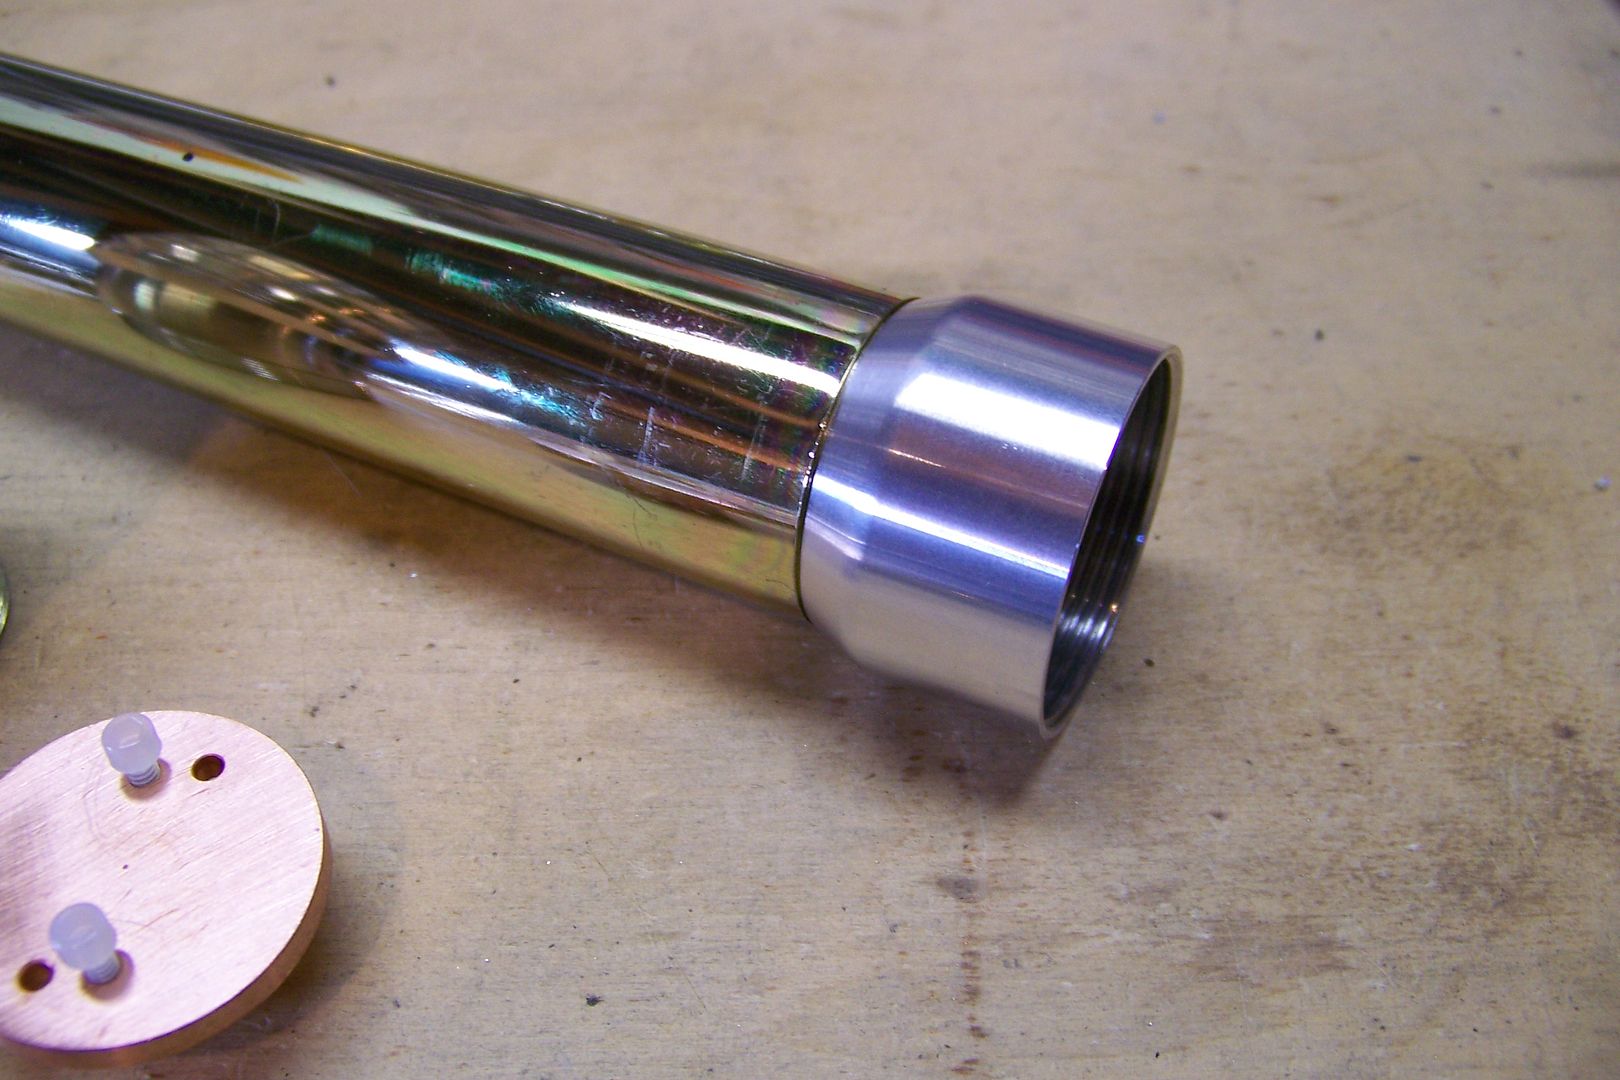
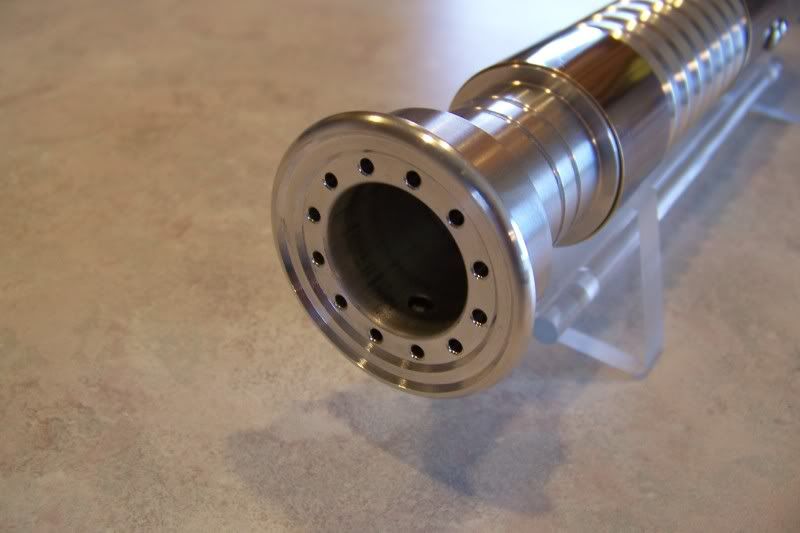
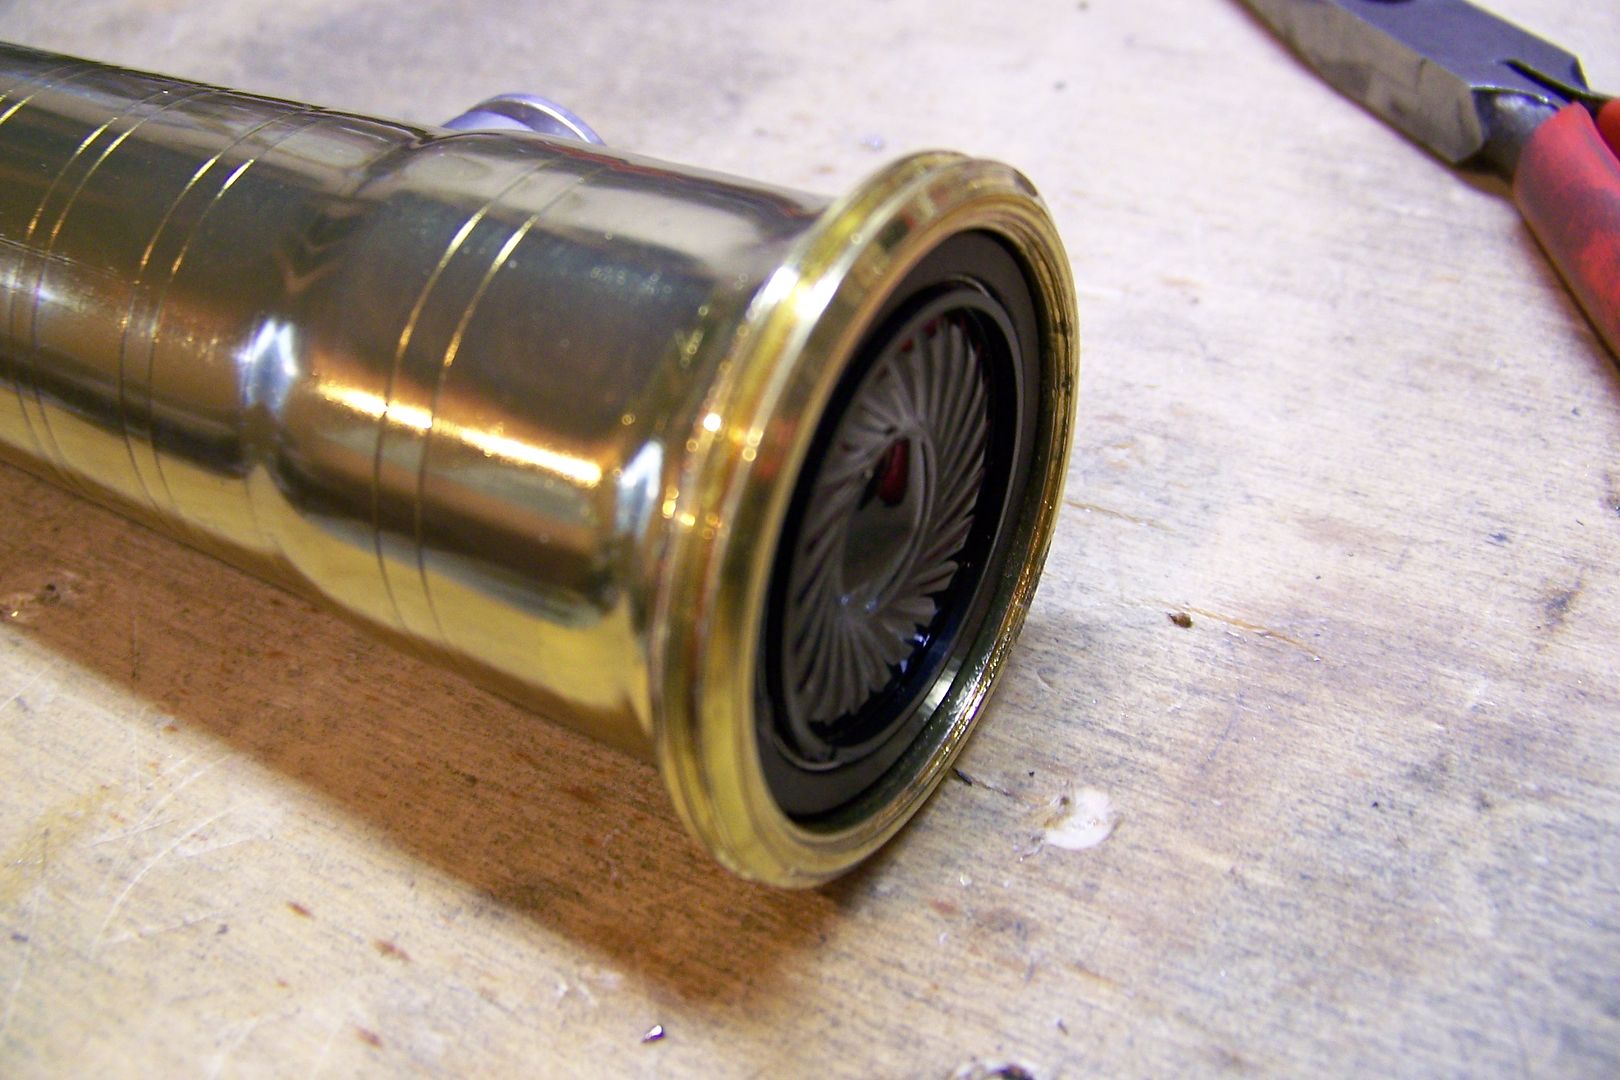
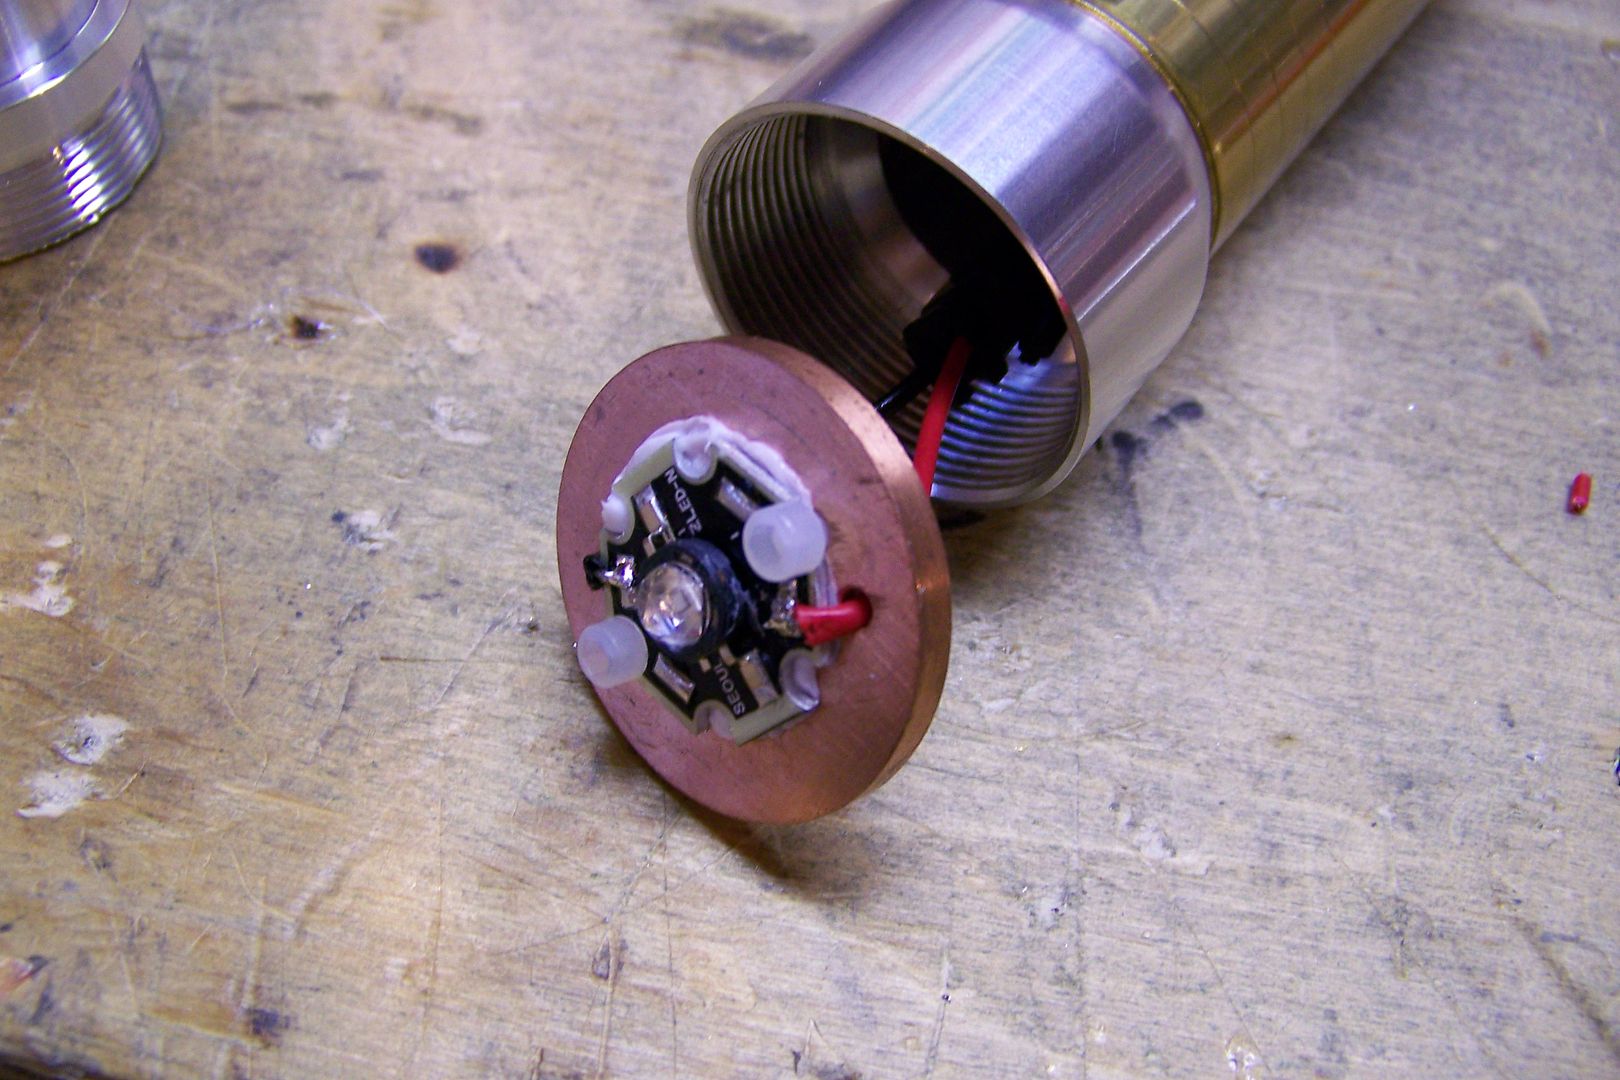
Then the heatsink for the led will go in there:
Image

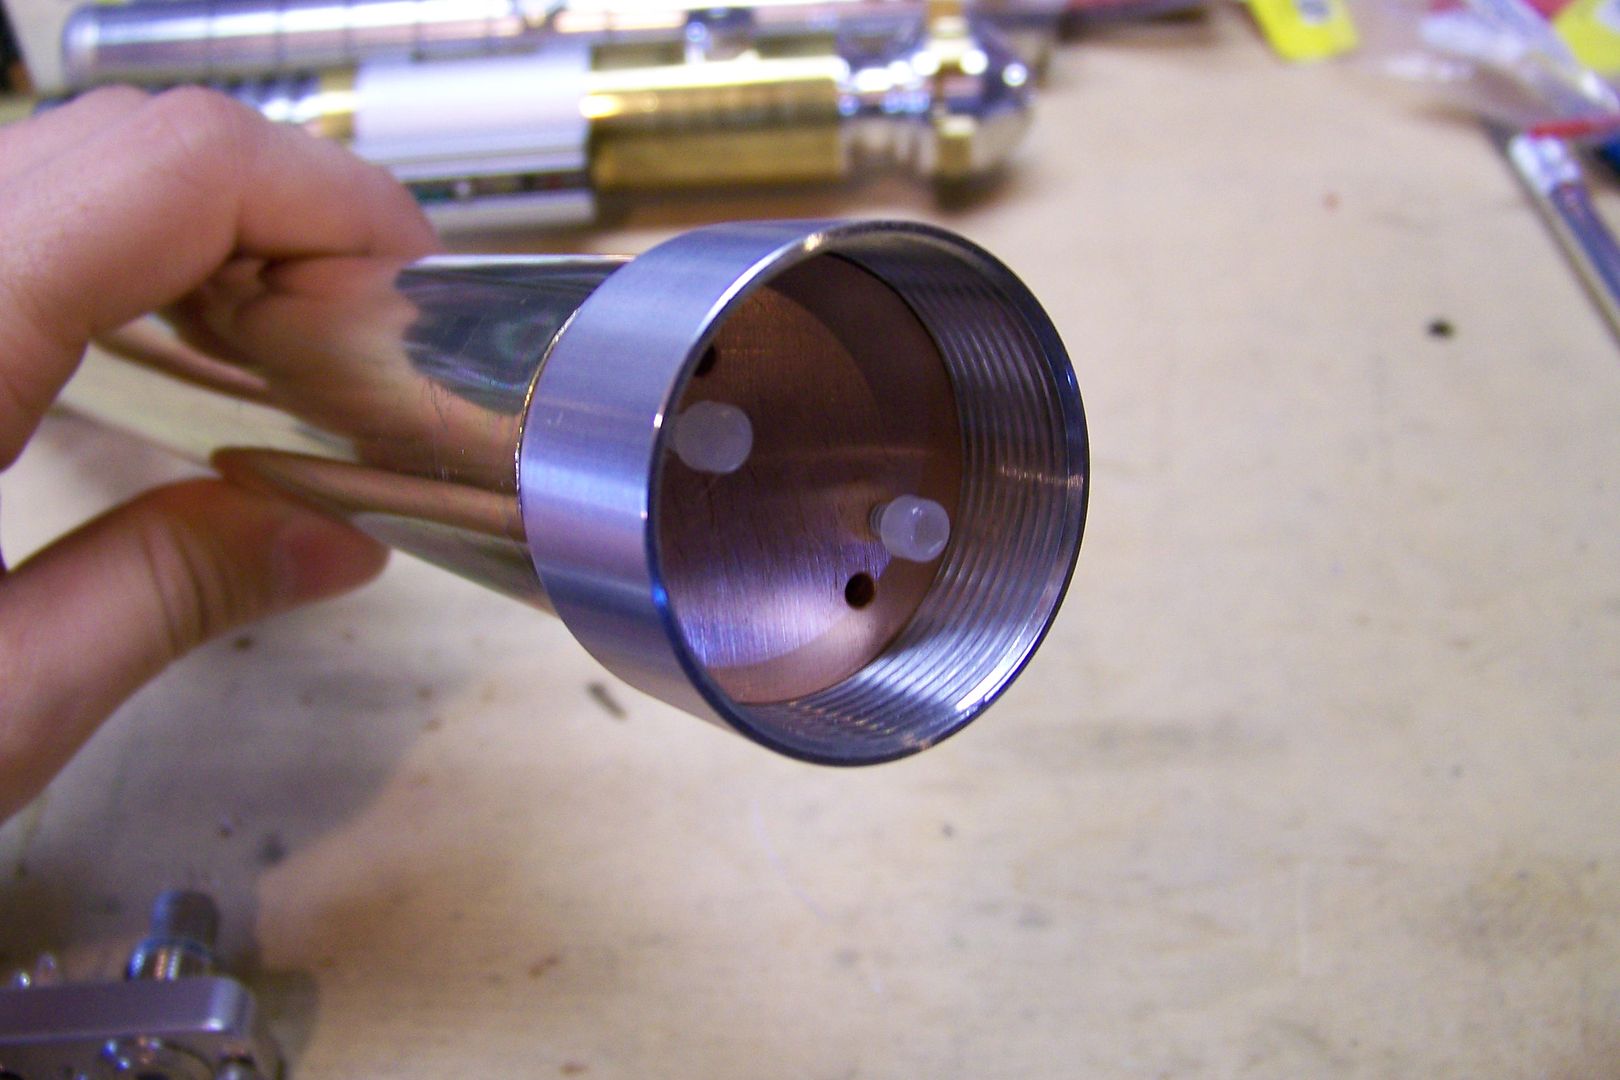
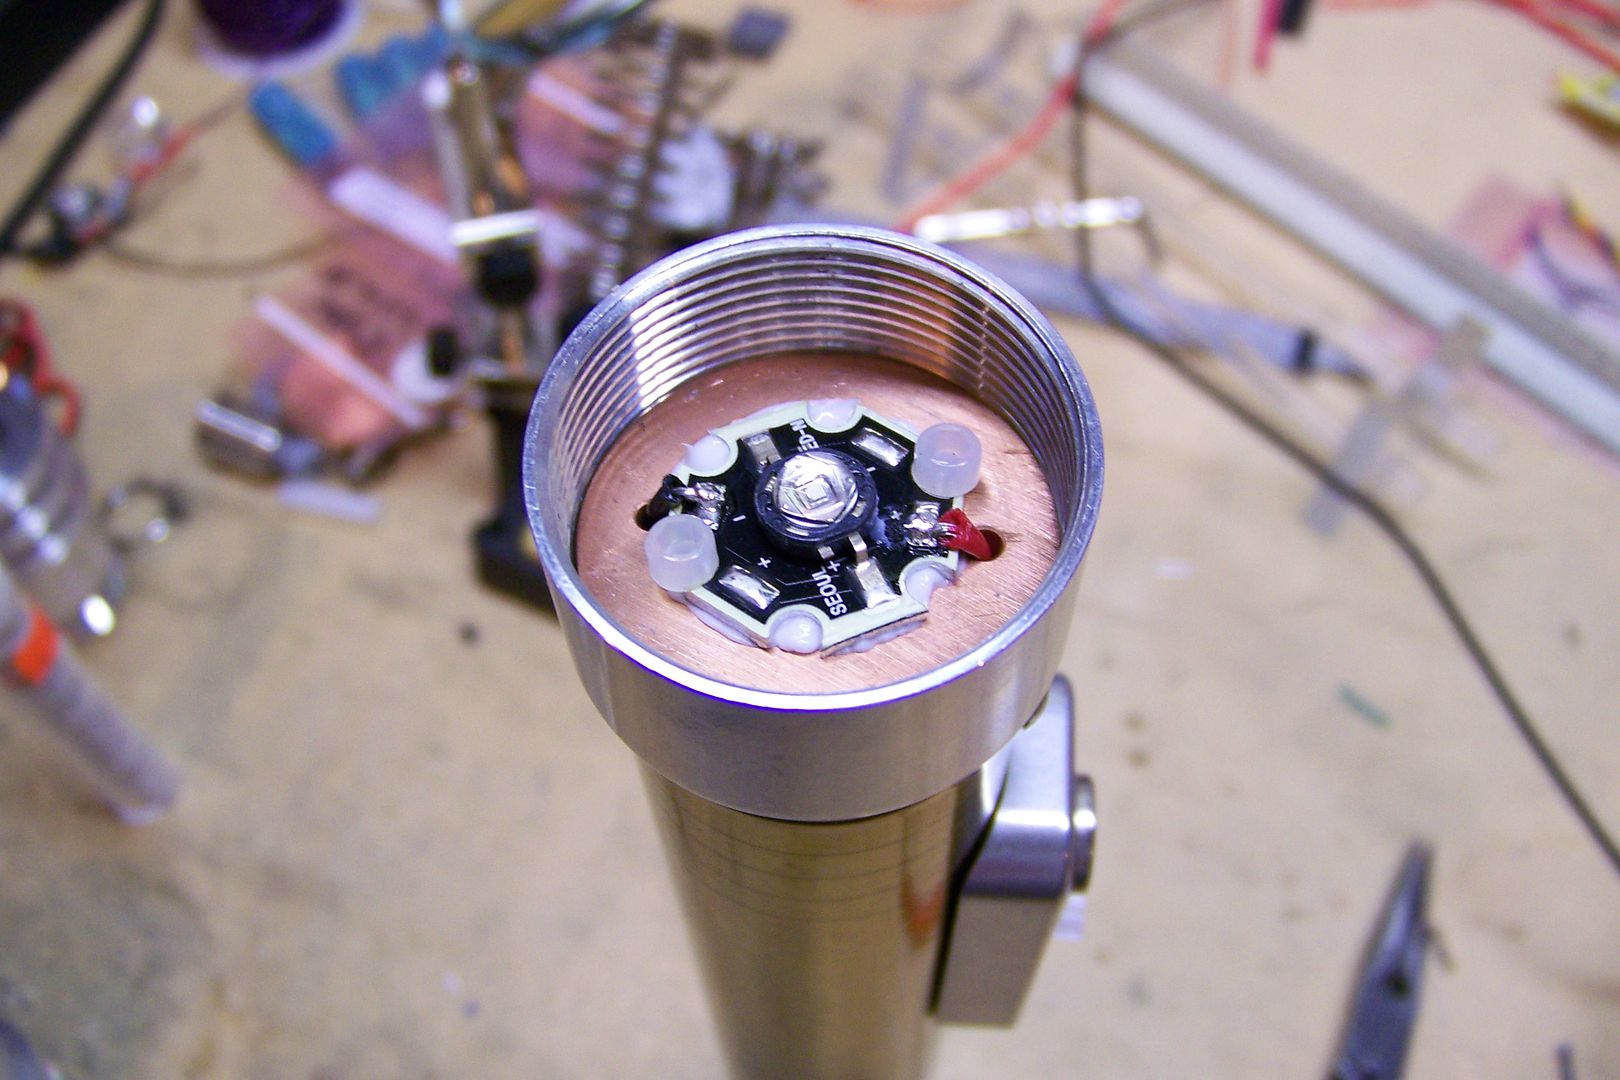
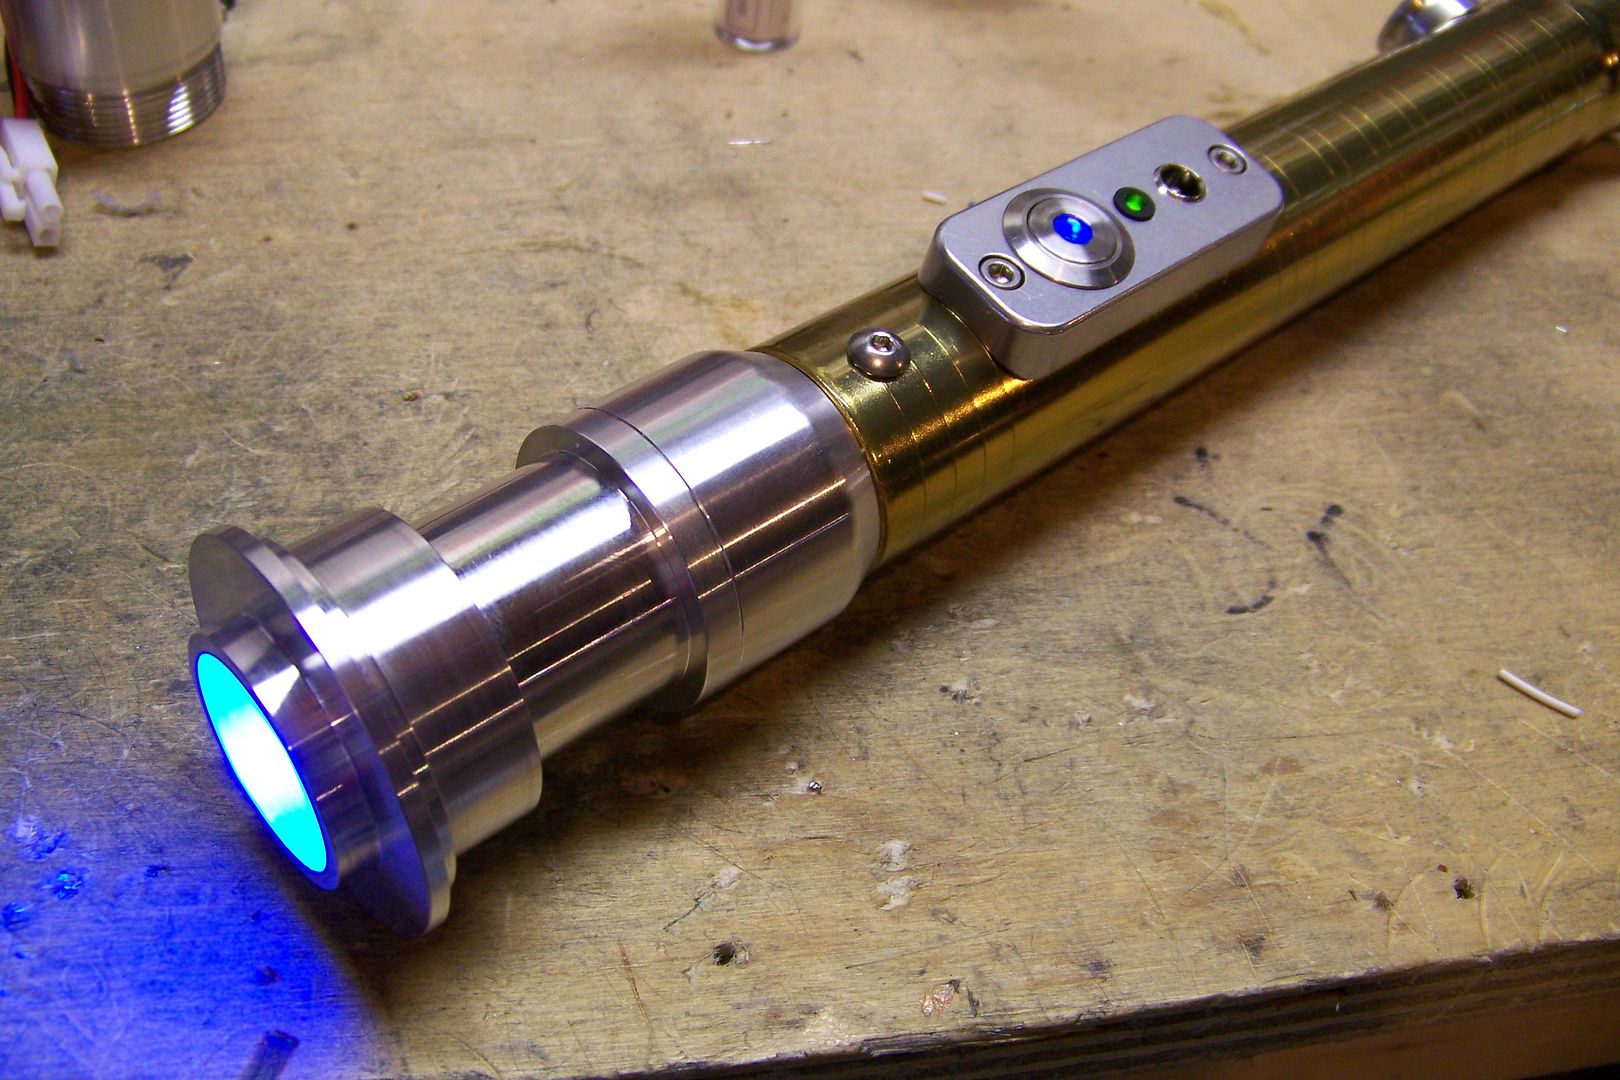
And then the emitter will screw into the adapter like this:
Image

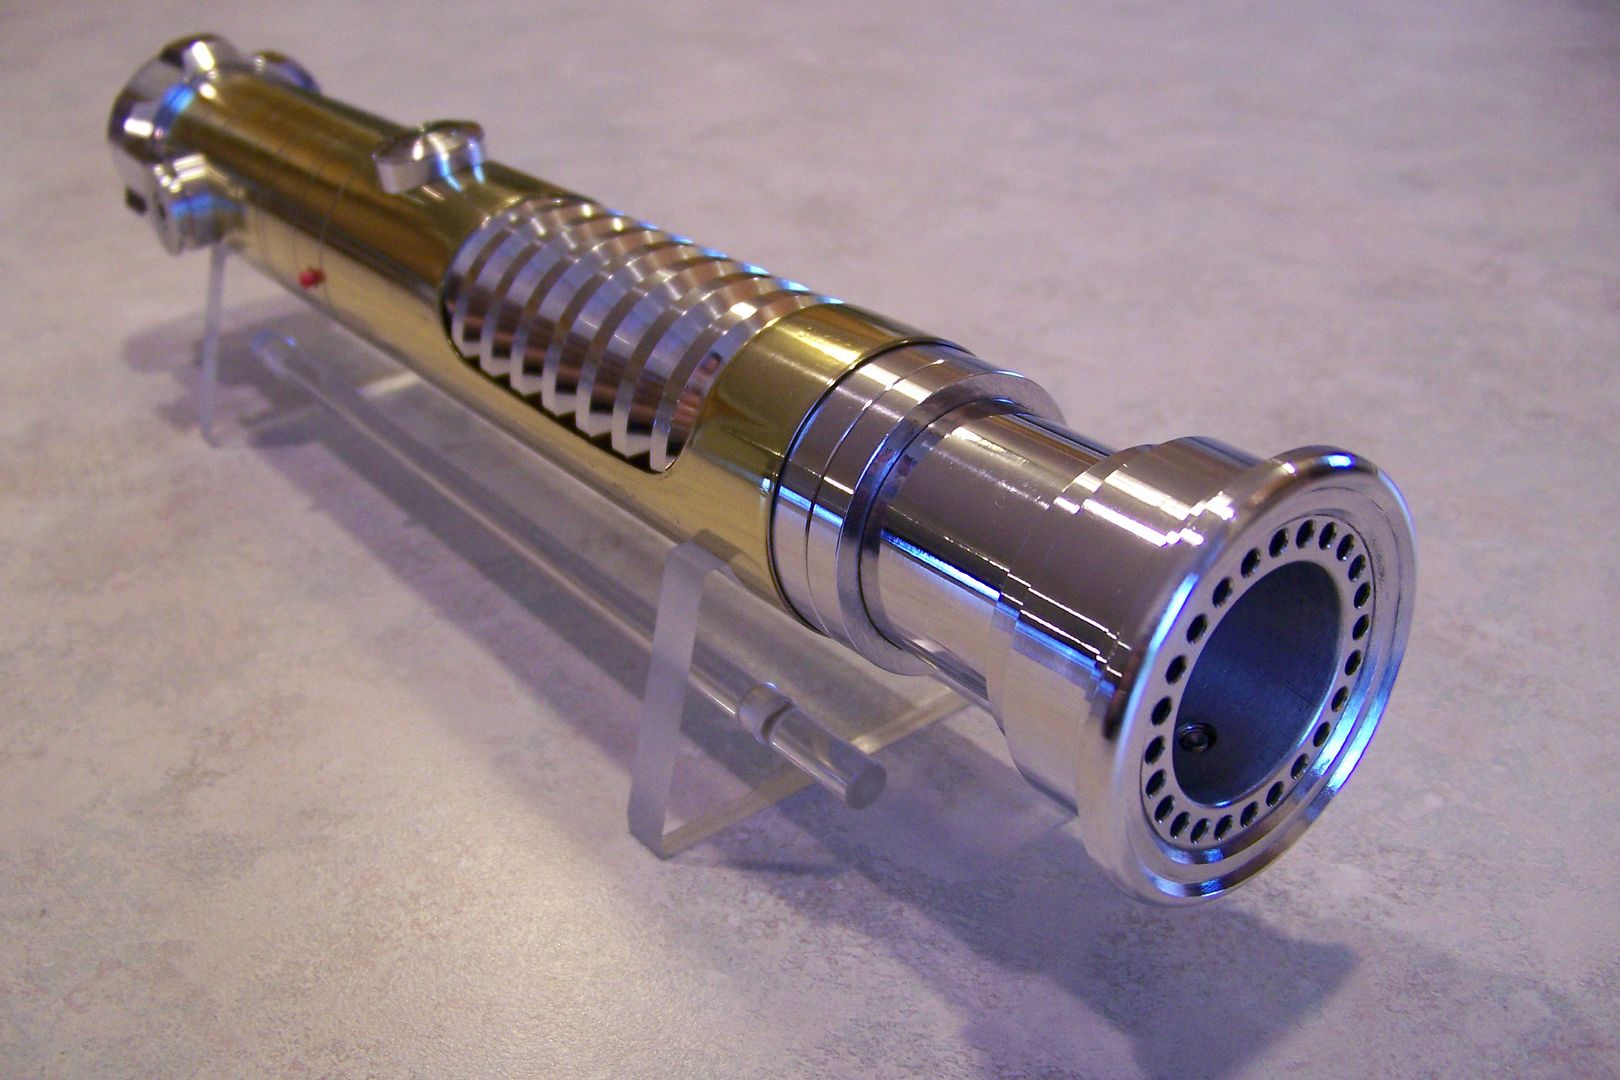
As is, this is a super long saber, so I'll be shortening the brass tube:
Image
That's my Brass saber, and it's a little over 12" long.....this one will need to be about 10.5-11" long to look right, I think......
Image

I'll cut it off right about there:
Image

Image
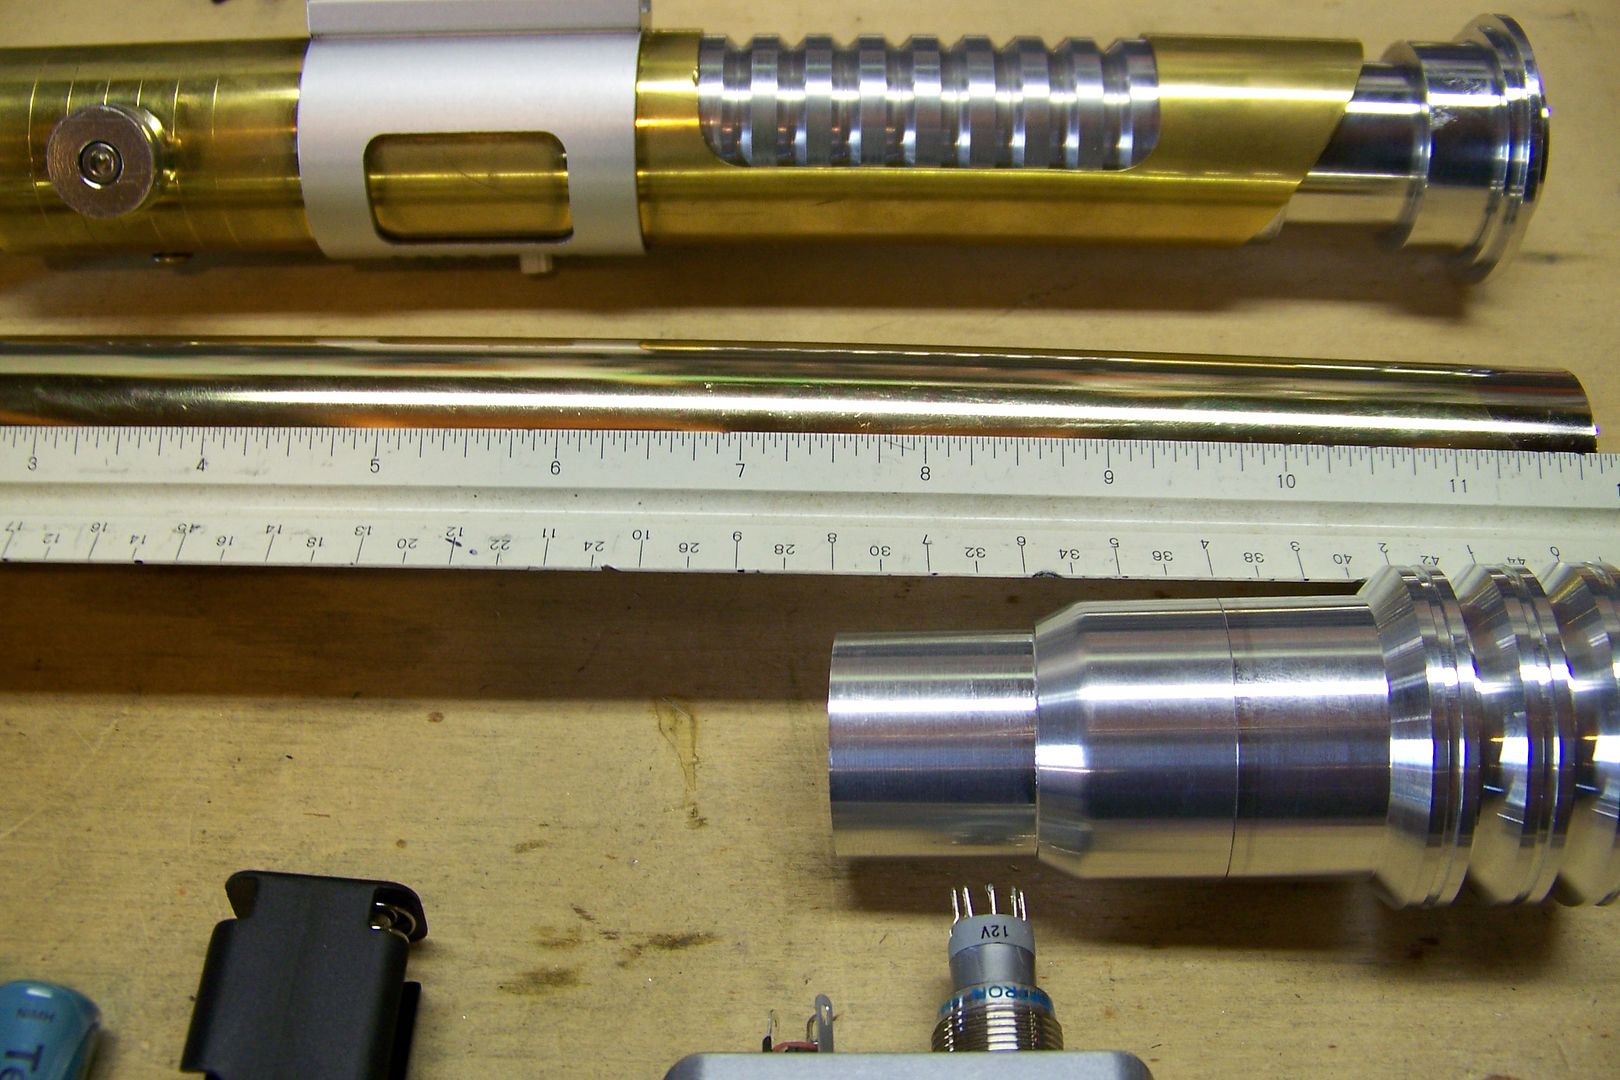
I marked it off at 9" .....with the addition of the adapter and blade holder, it'll be about 12" long.

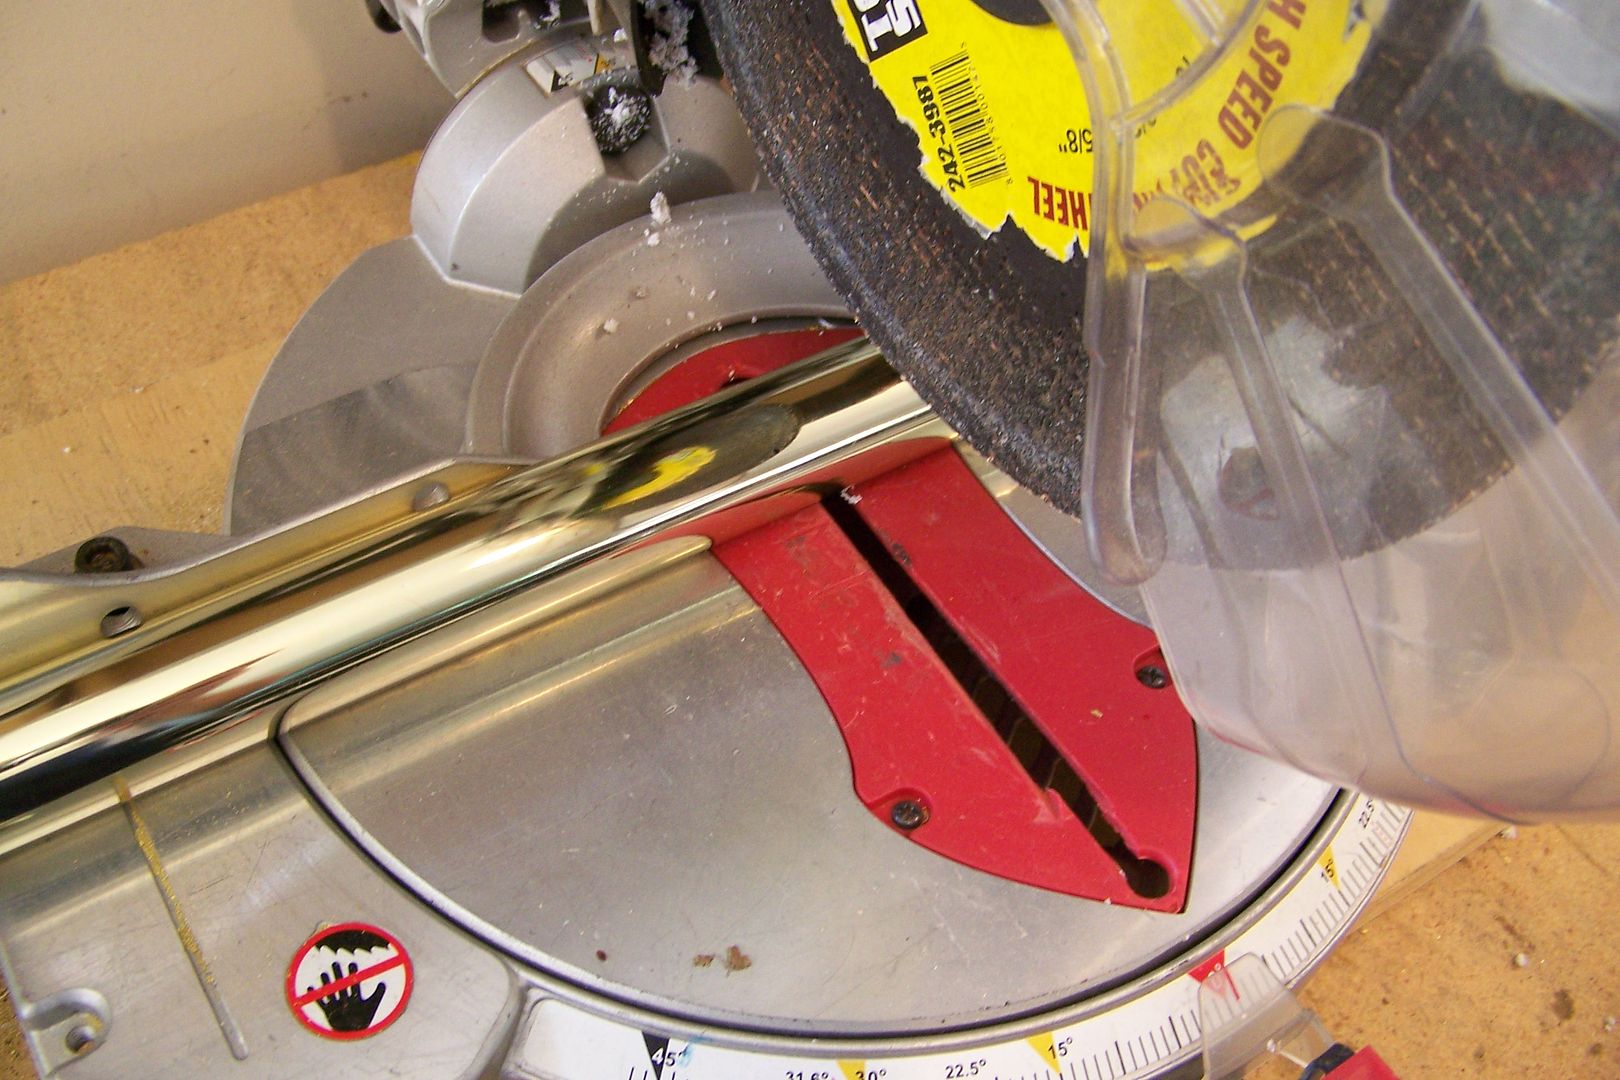
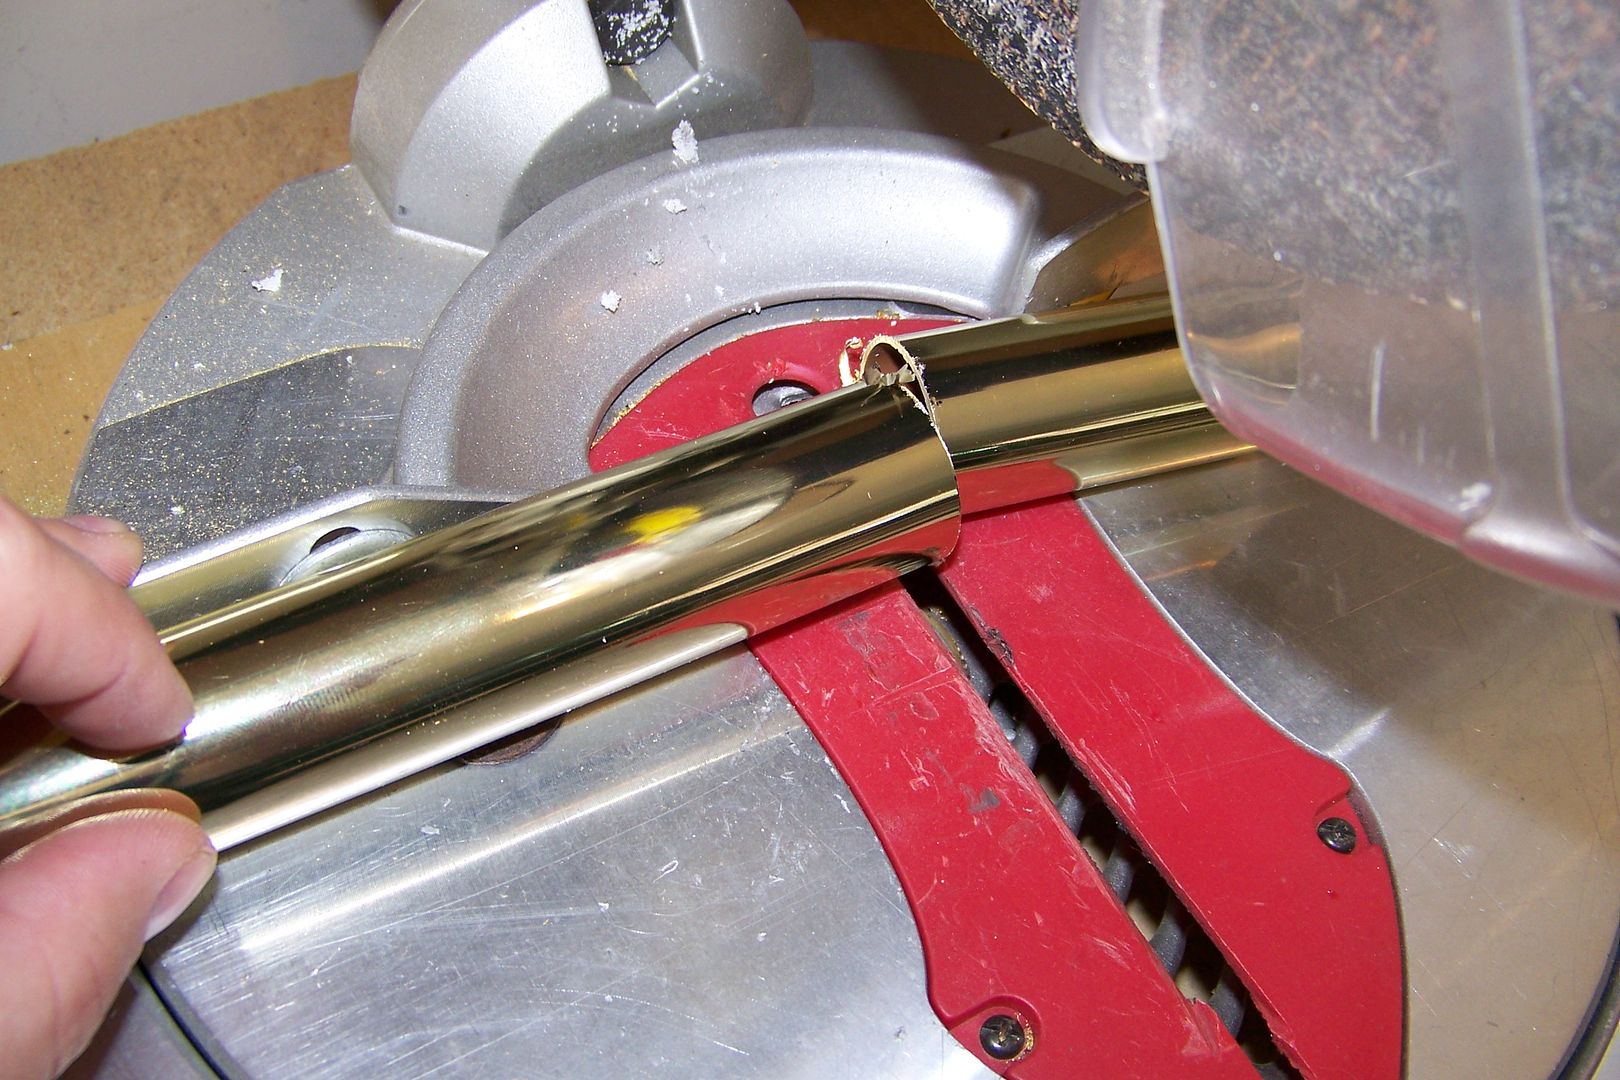
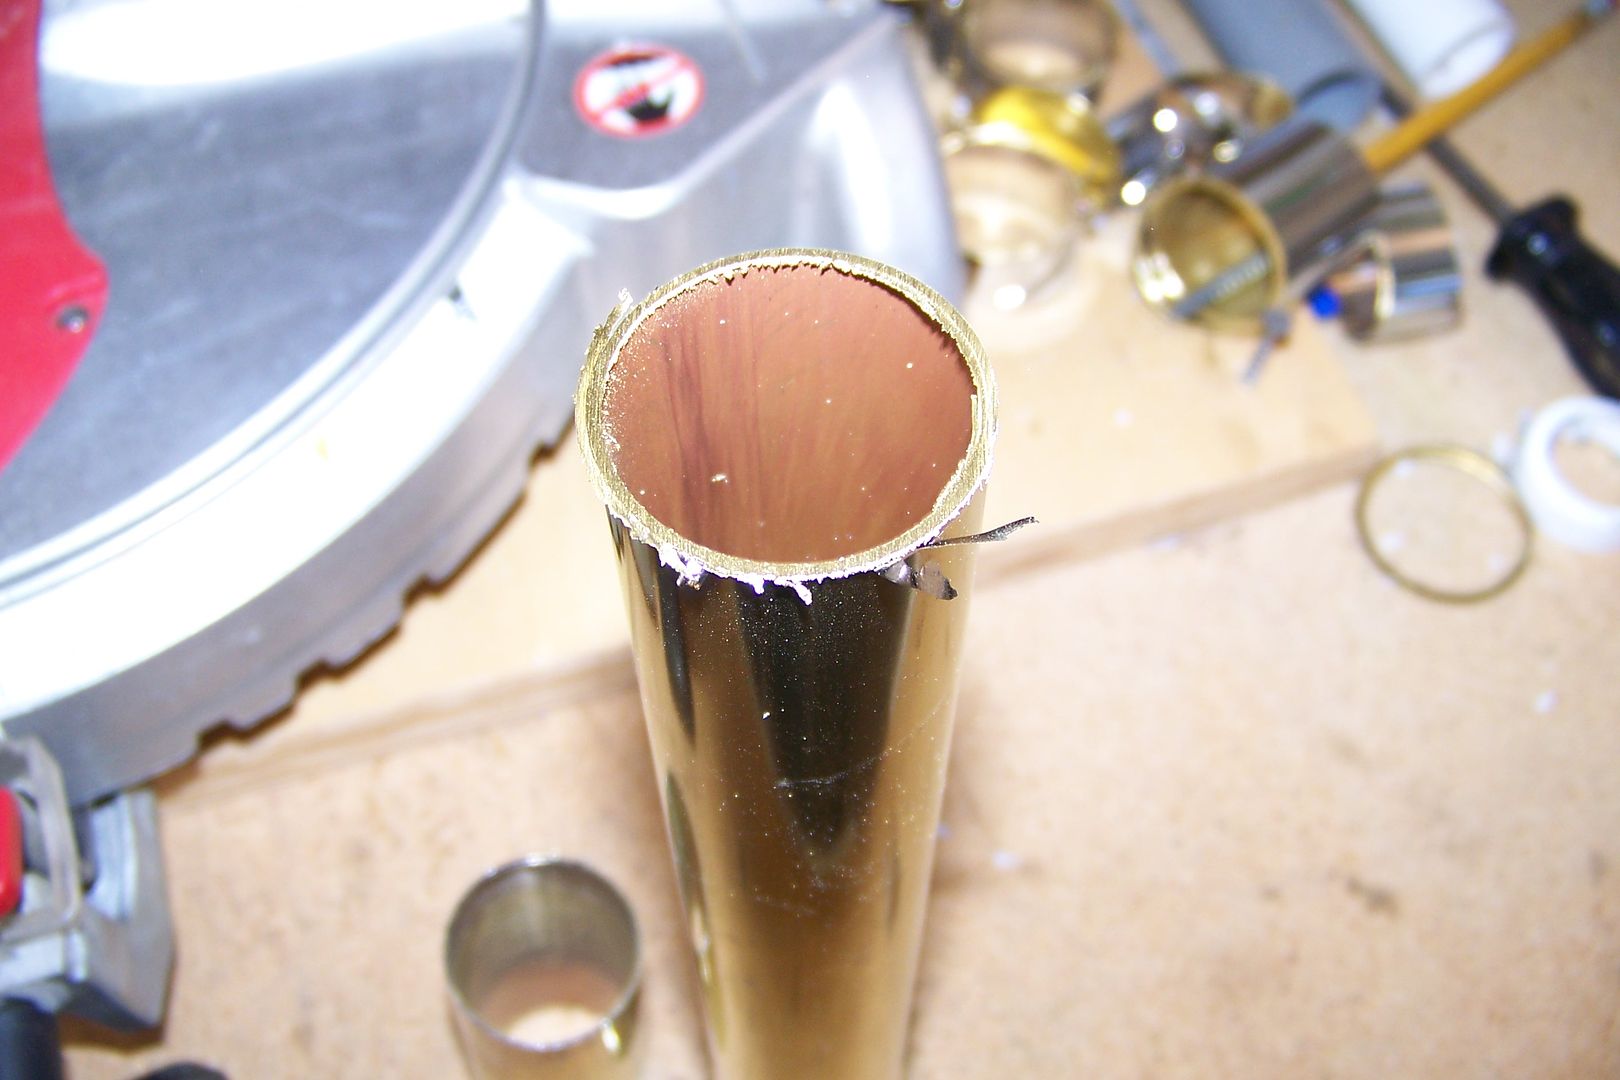
I took the tube up to the garage where the compound miter saw is, and cut it off:
Image

Image

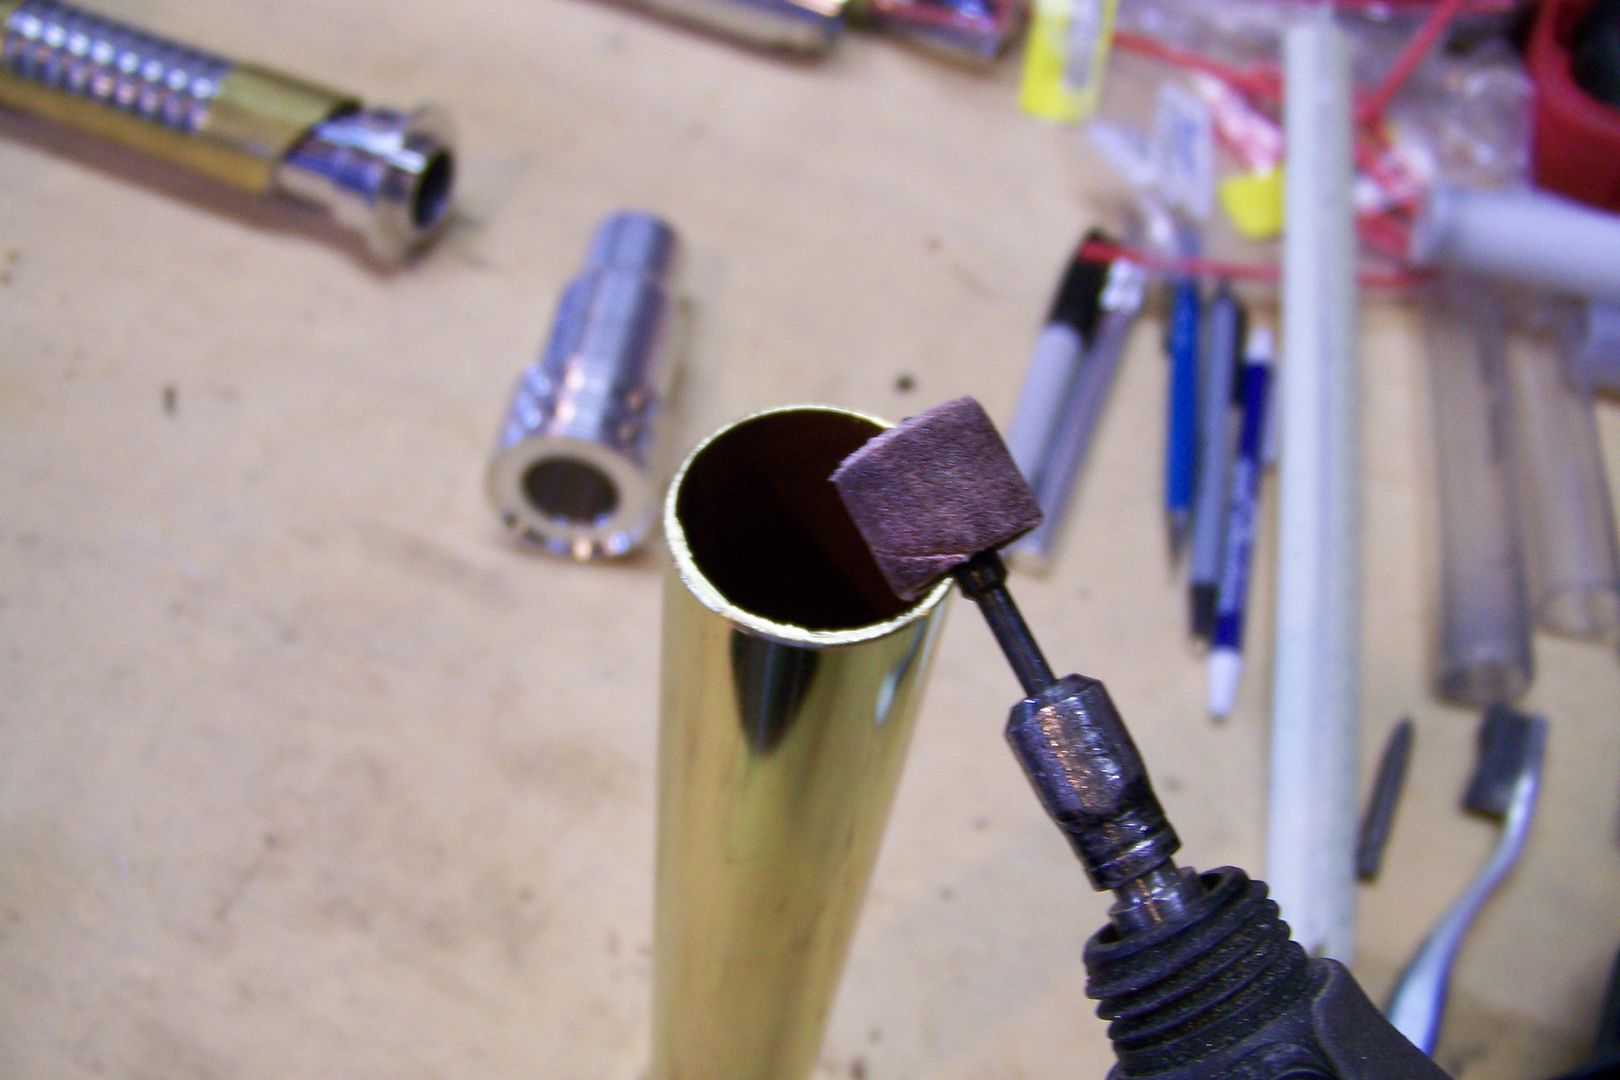
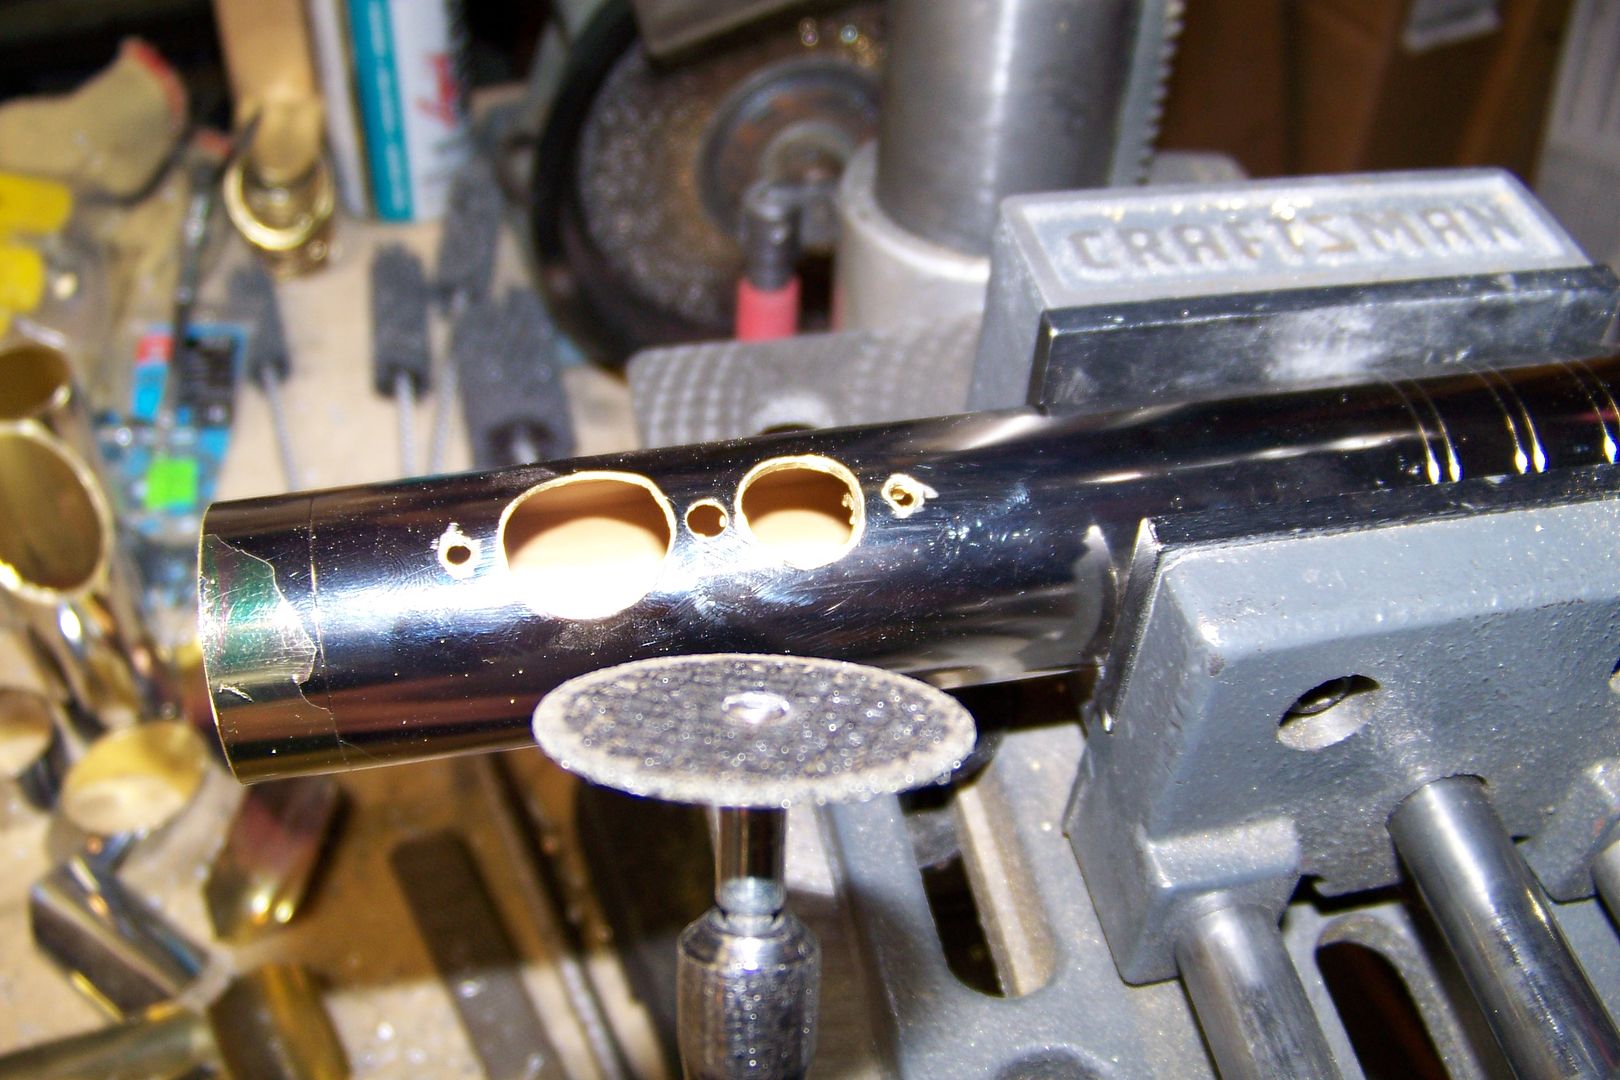
This will need to de-burred:
Image

I'll use the 60 grit sanding drum on the rotary tool for this:
Image

As I was de-burring the tube, I noticed a problem.....the "brass" coloring was coming off in flakes....I've had this same problem before with these brass tubes from the place i got this one....
Image
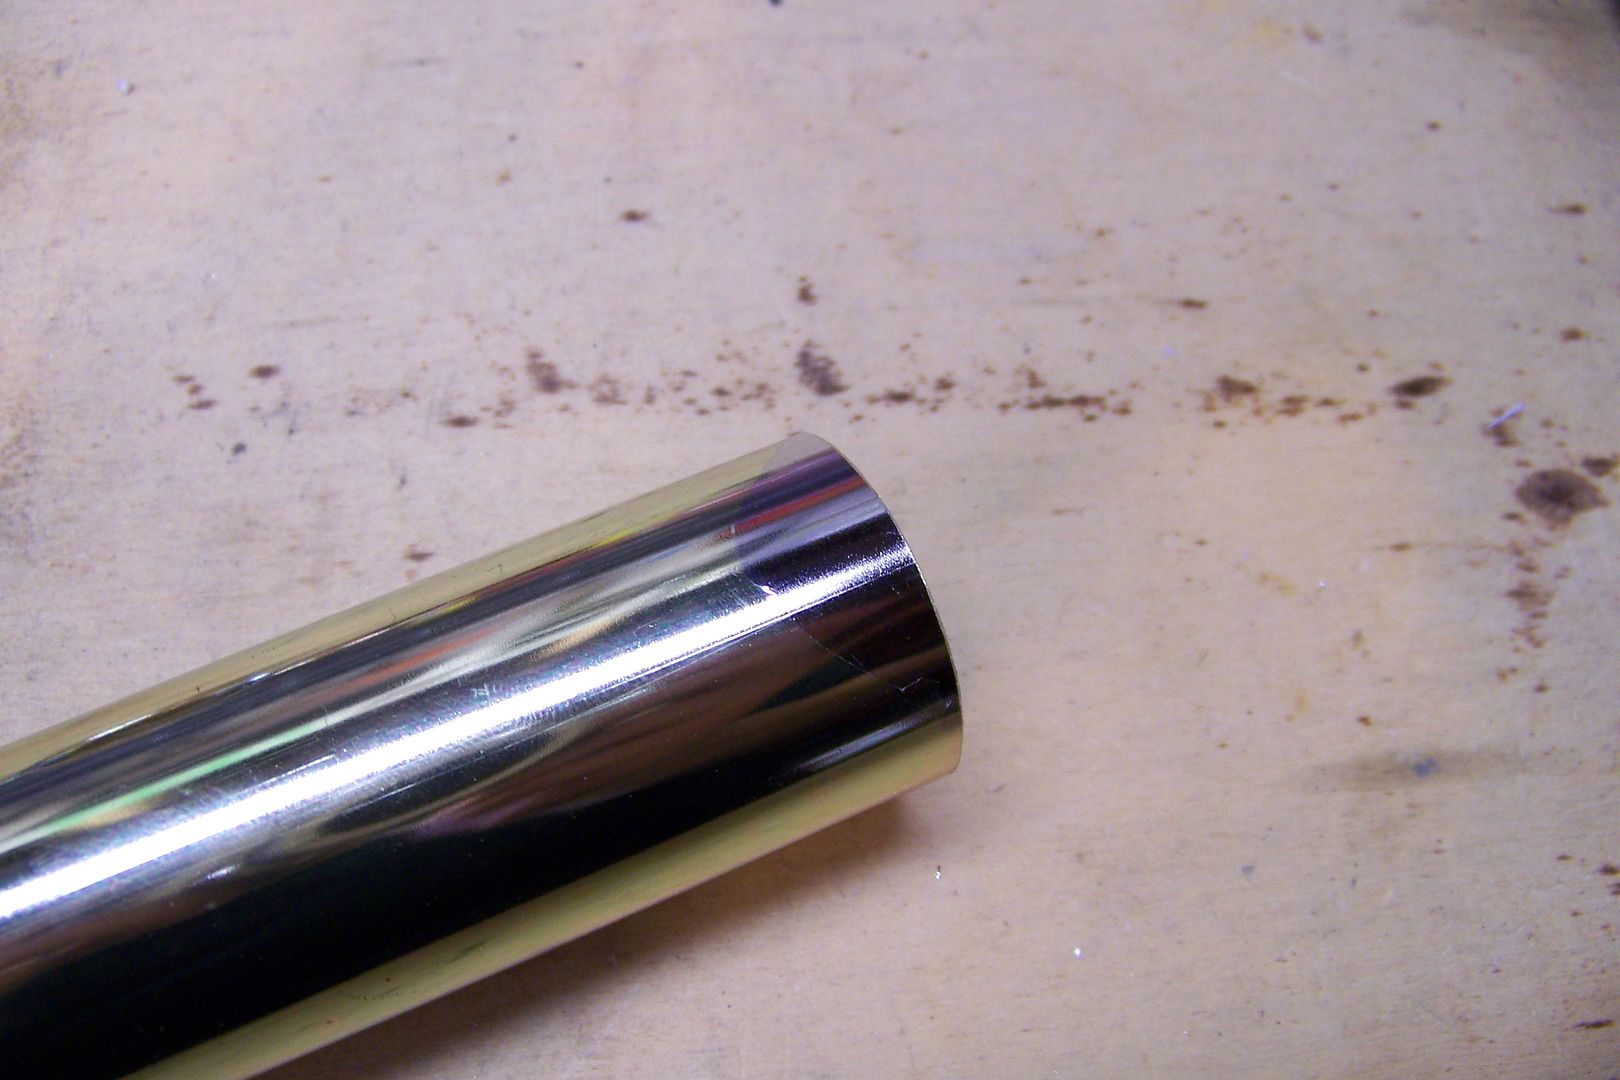
I may have to order another tube, or send this one out to be powder coated in translucent gold.....I'll continue working with this one and see what happens with it.

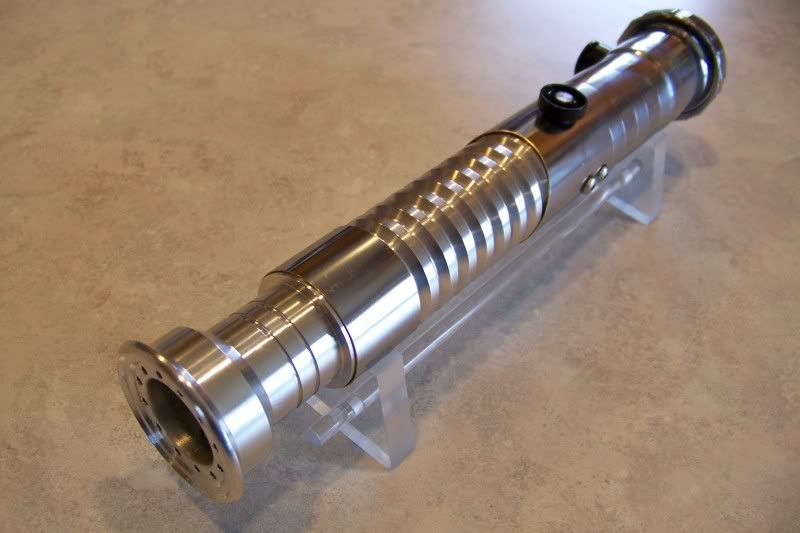
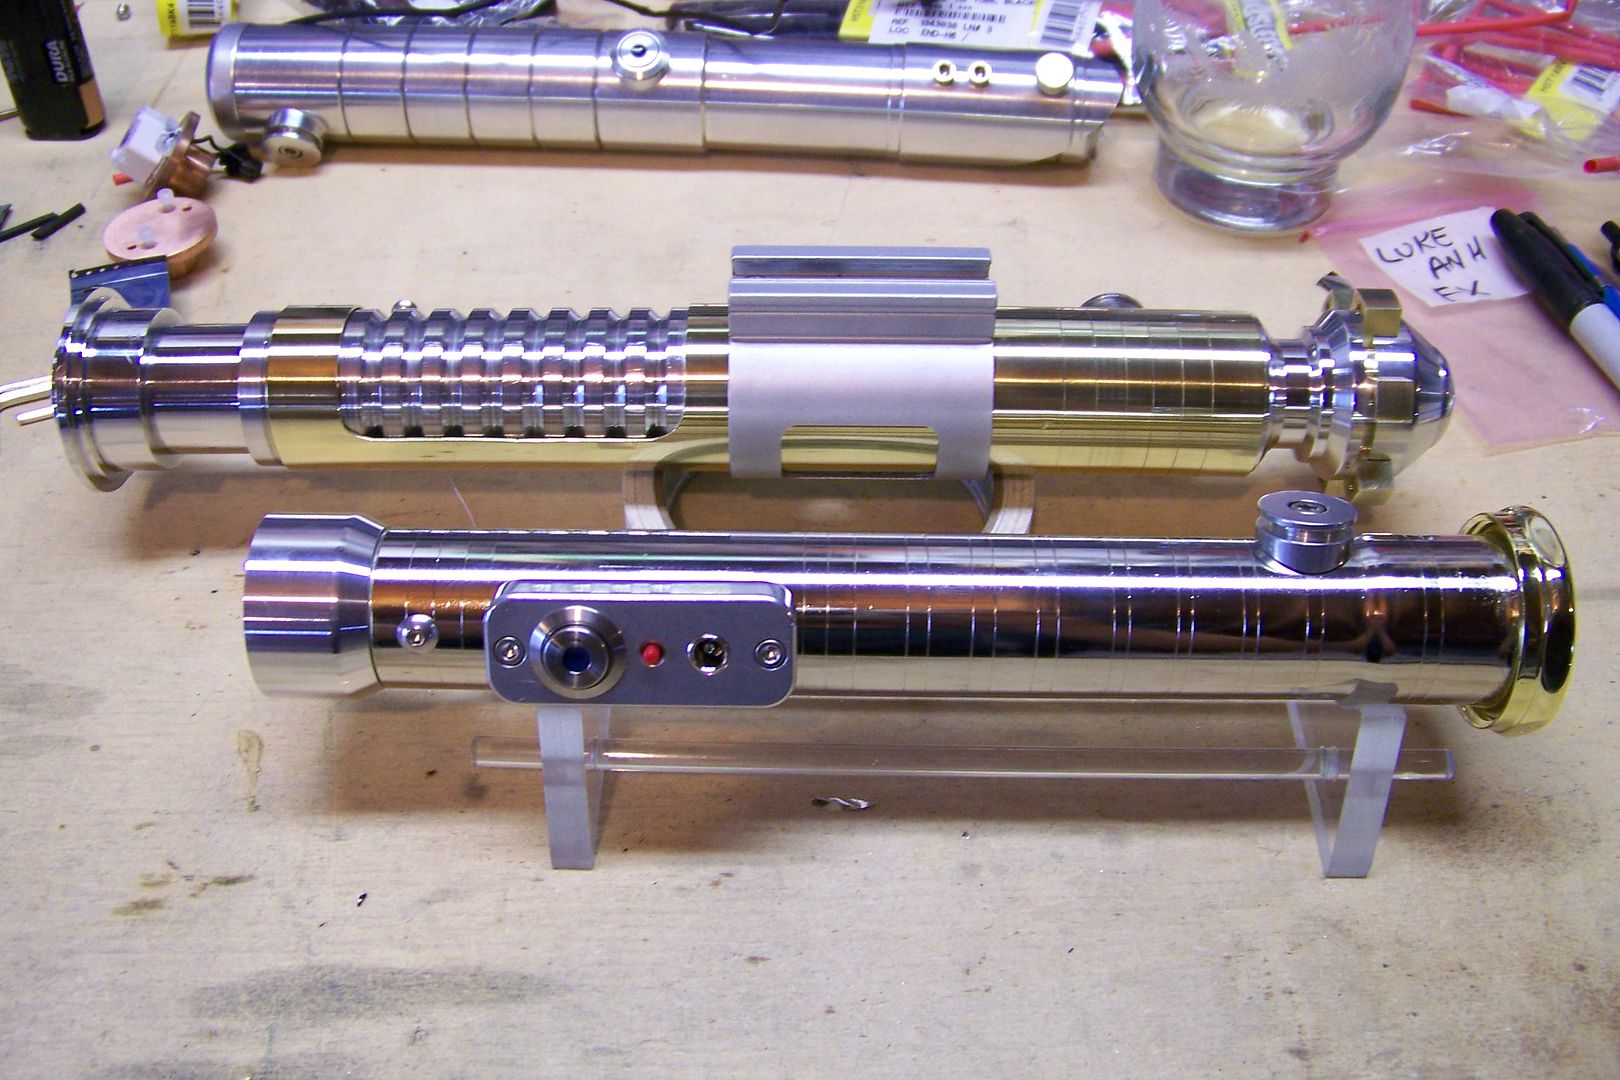
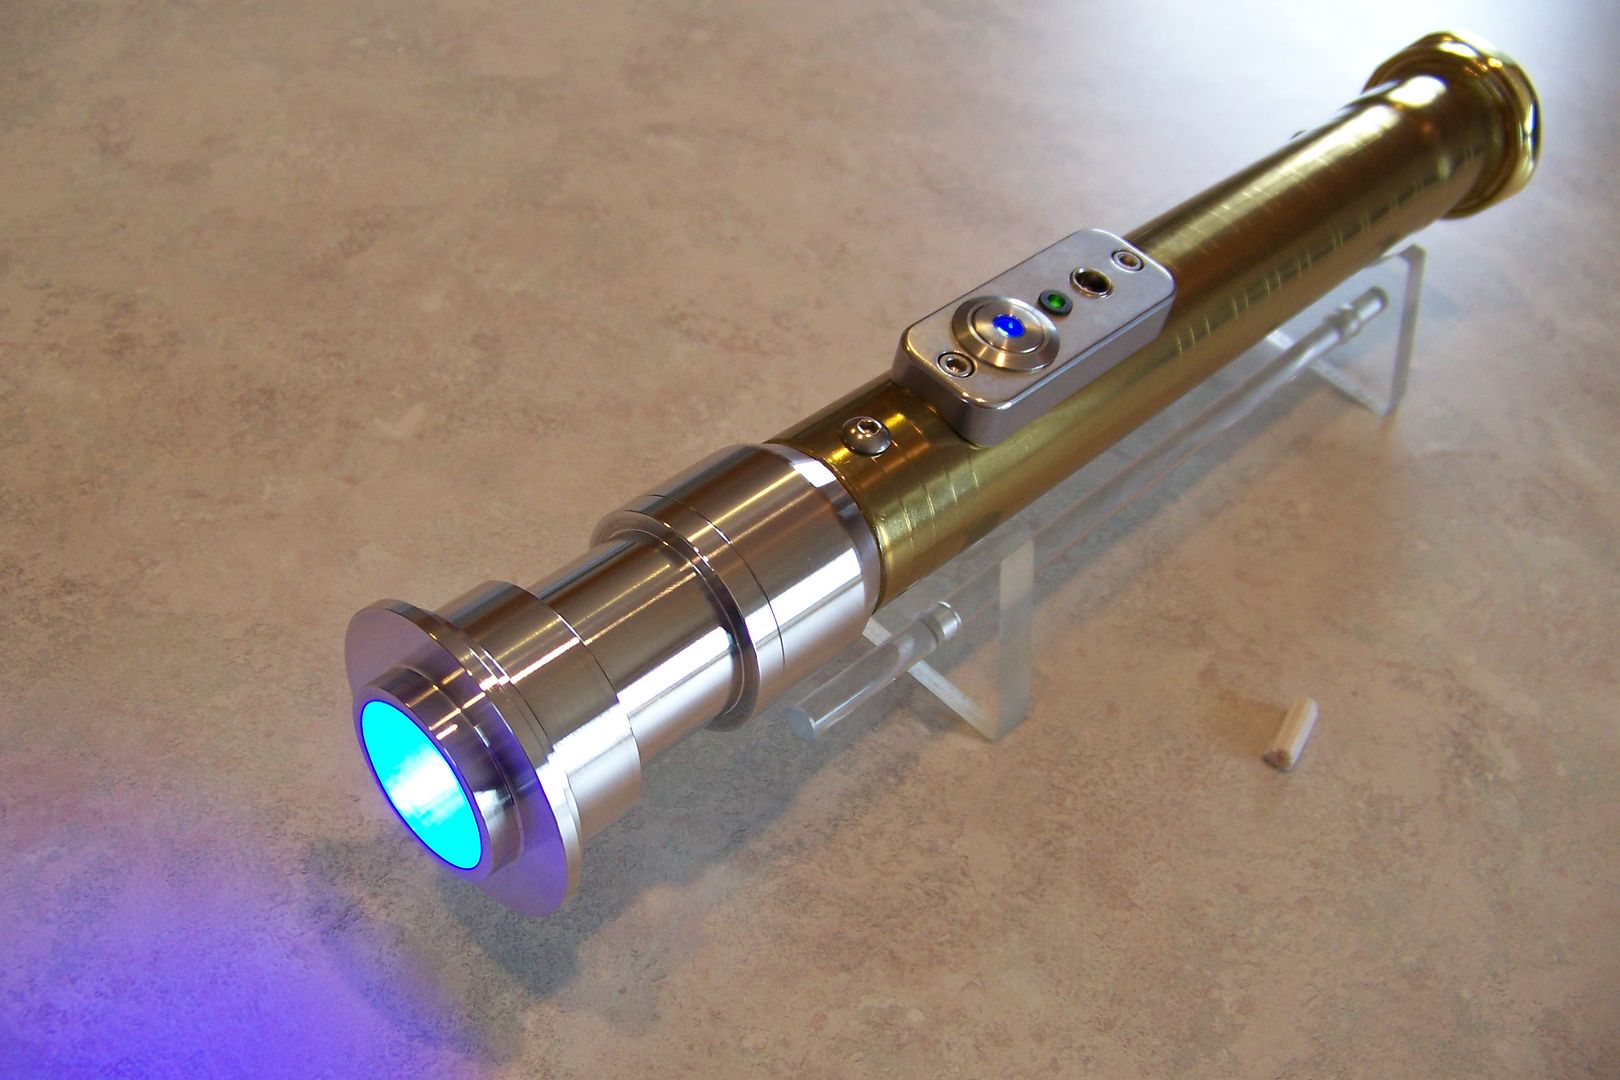
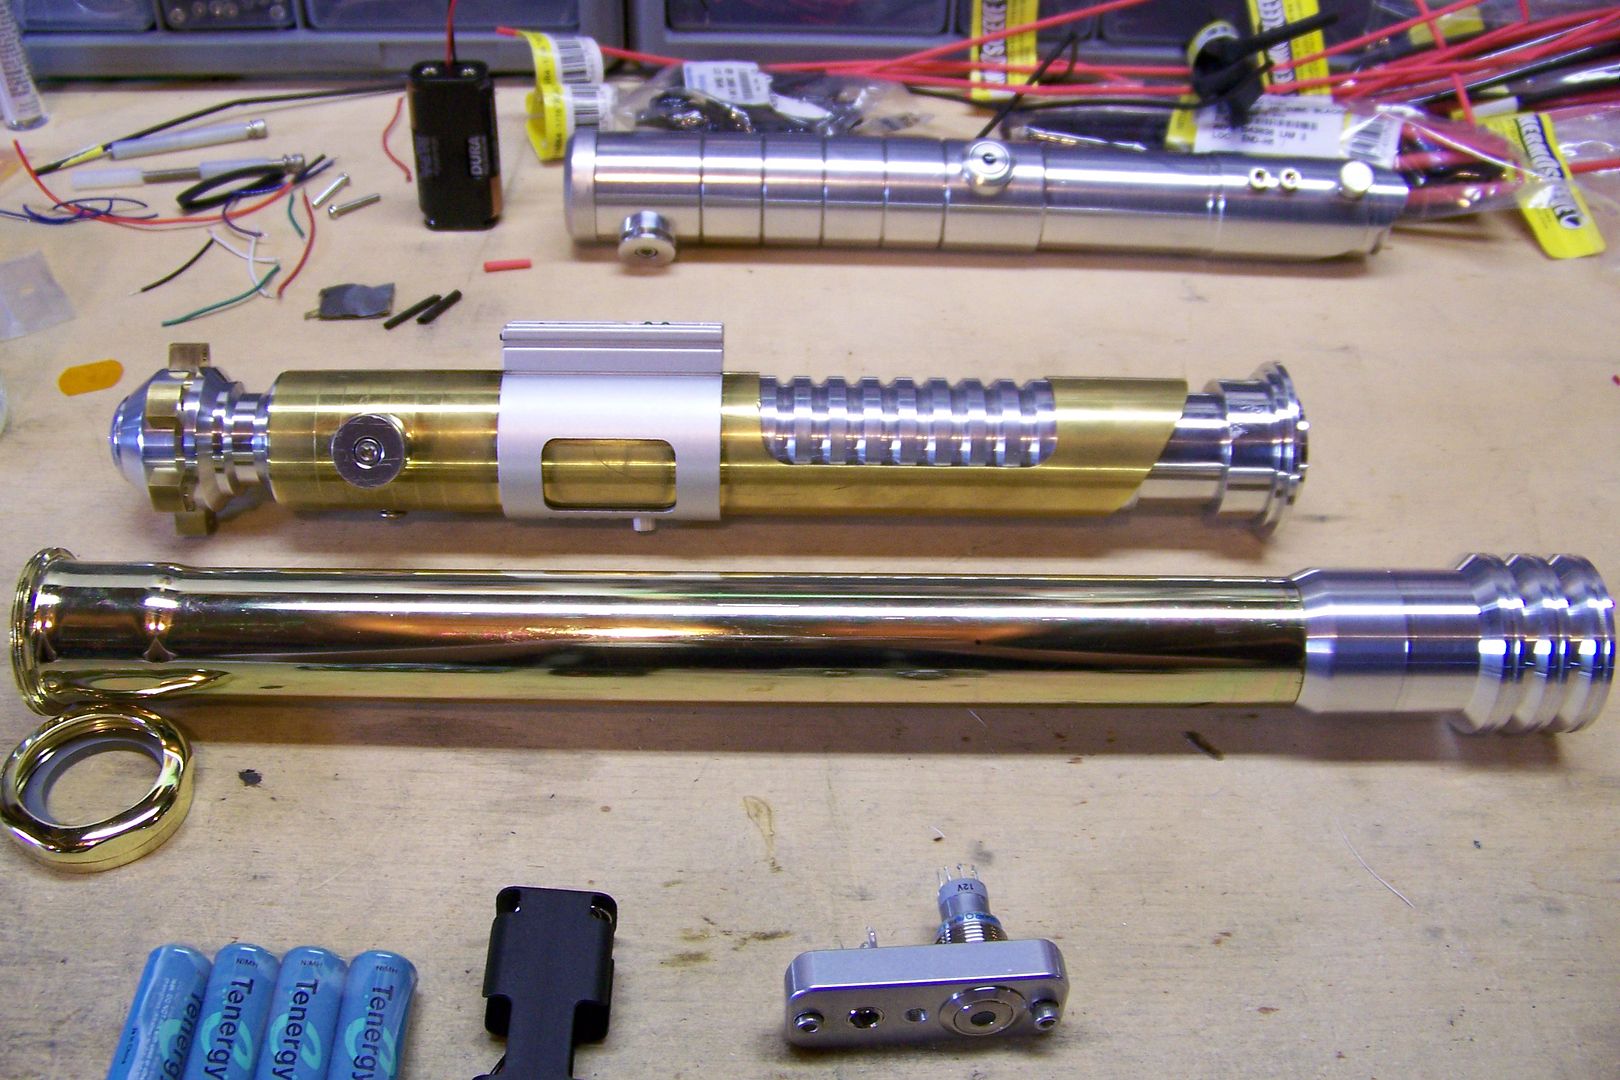
Here's how long it is now compared my brass saber:
Image
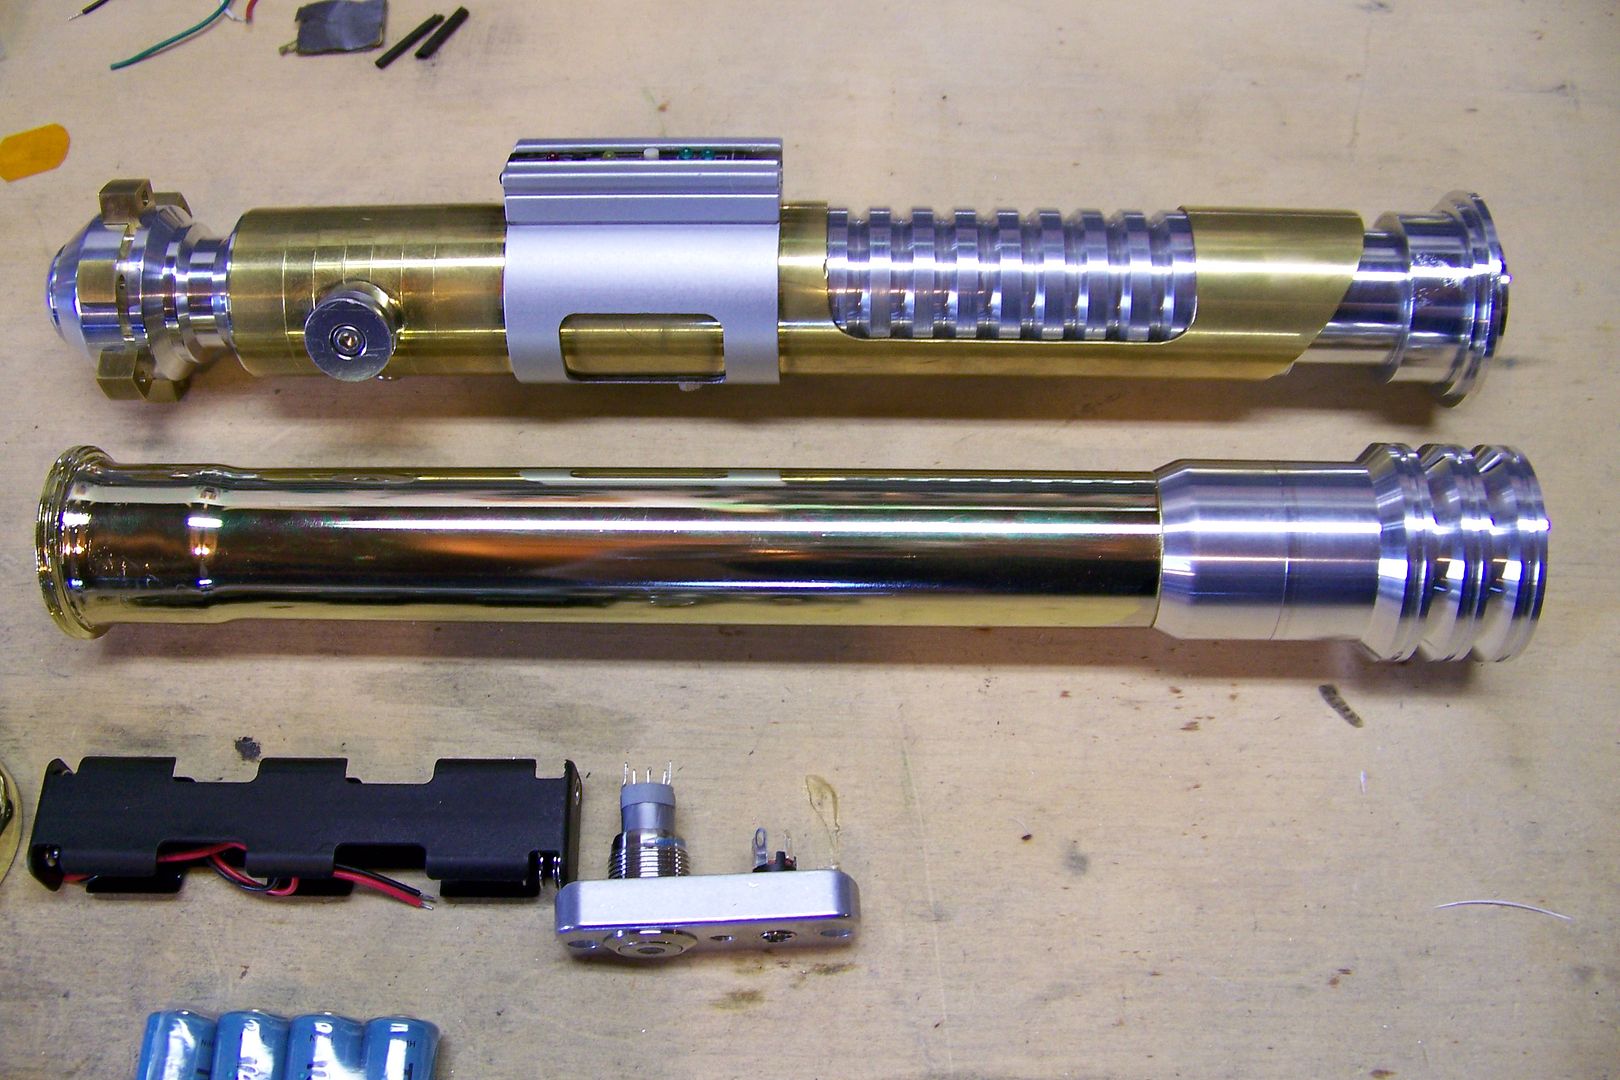
That looks like it should work....I can't go any shorter with it due to the space requirements of the 4-AA battery holder.

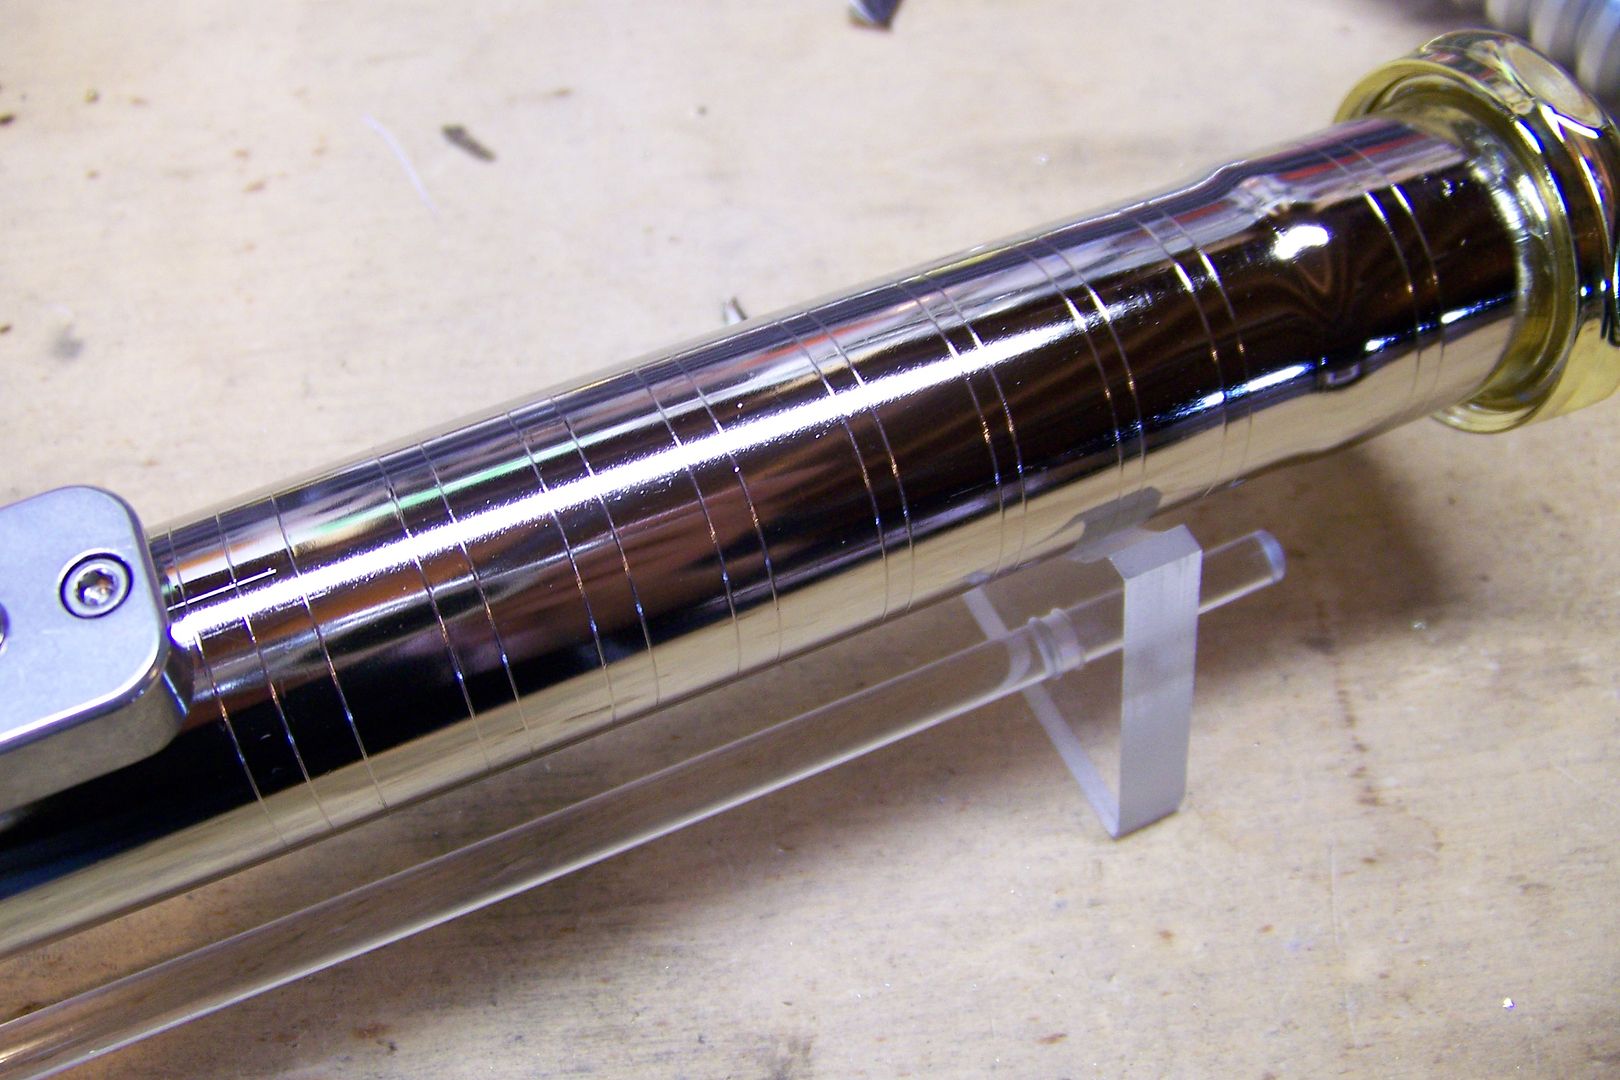
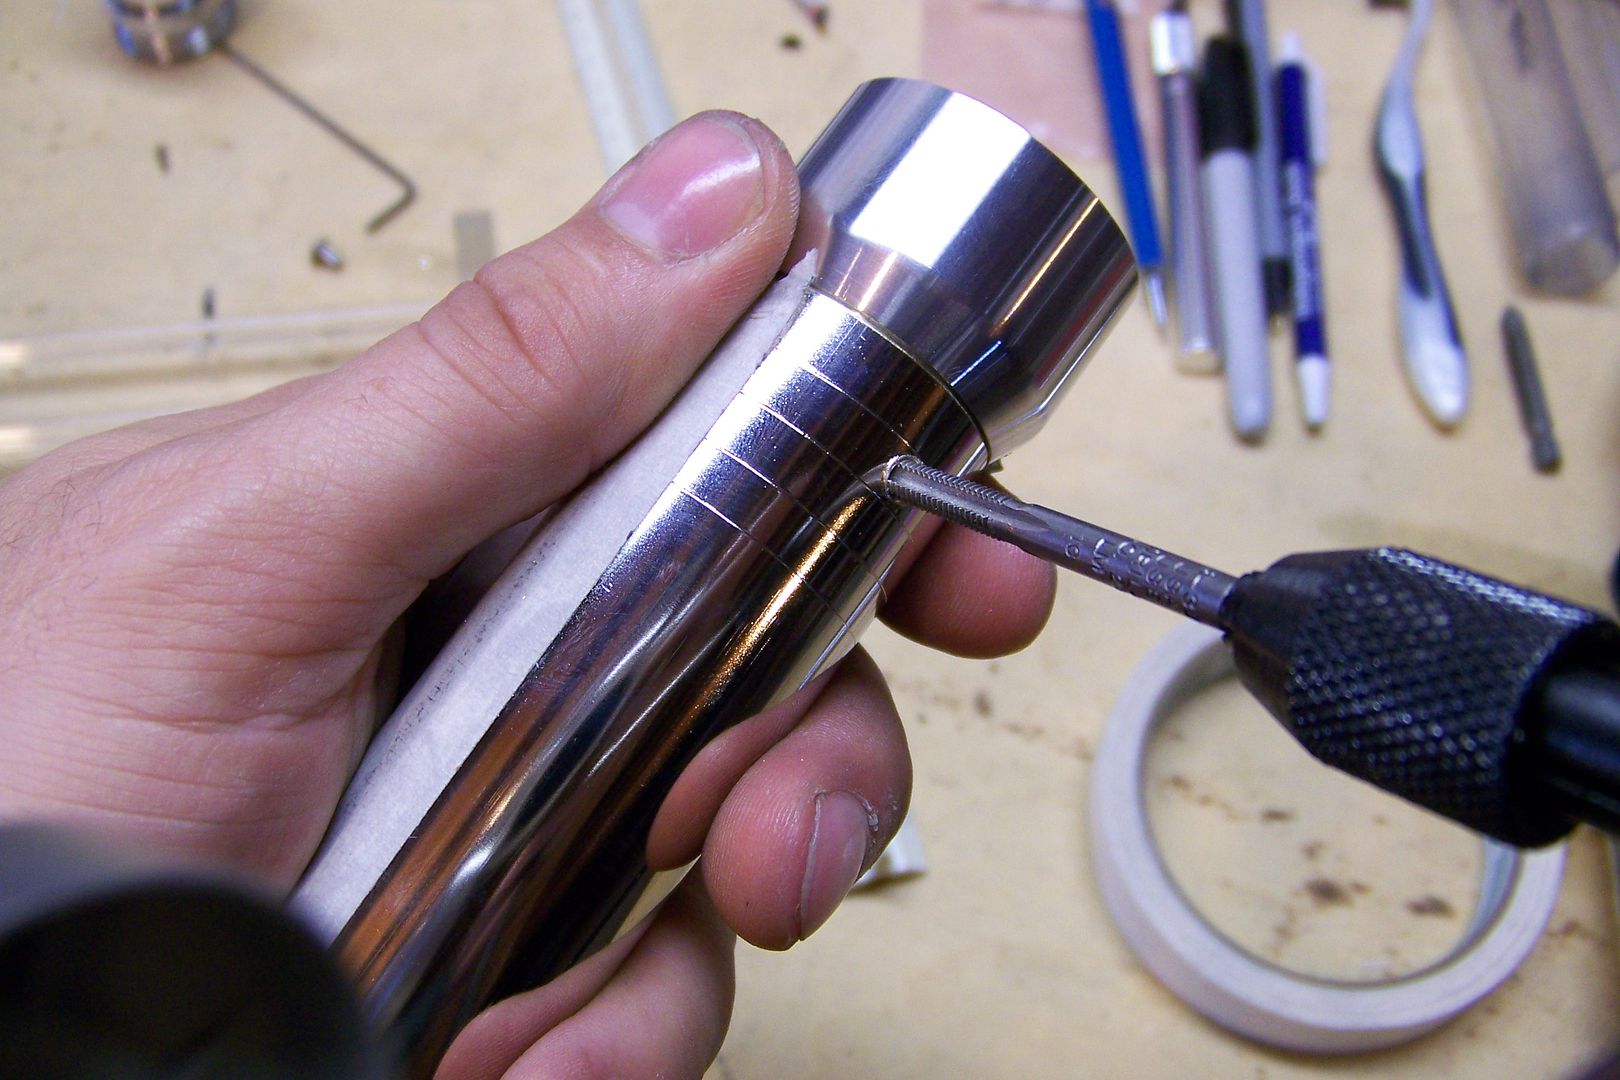
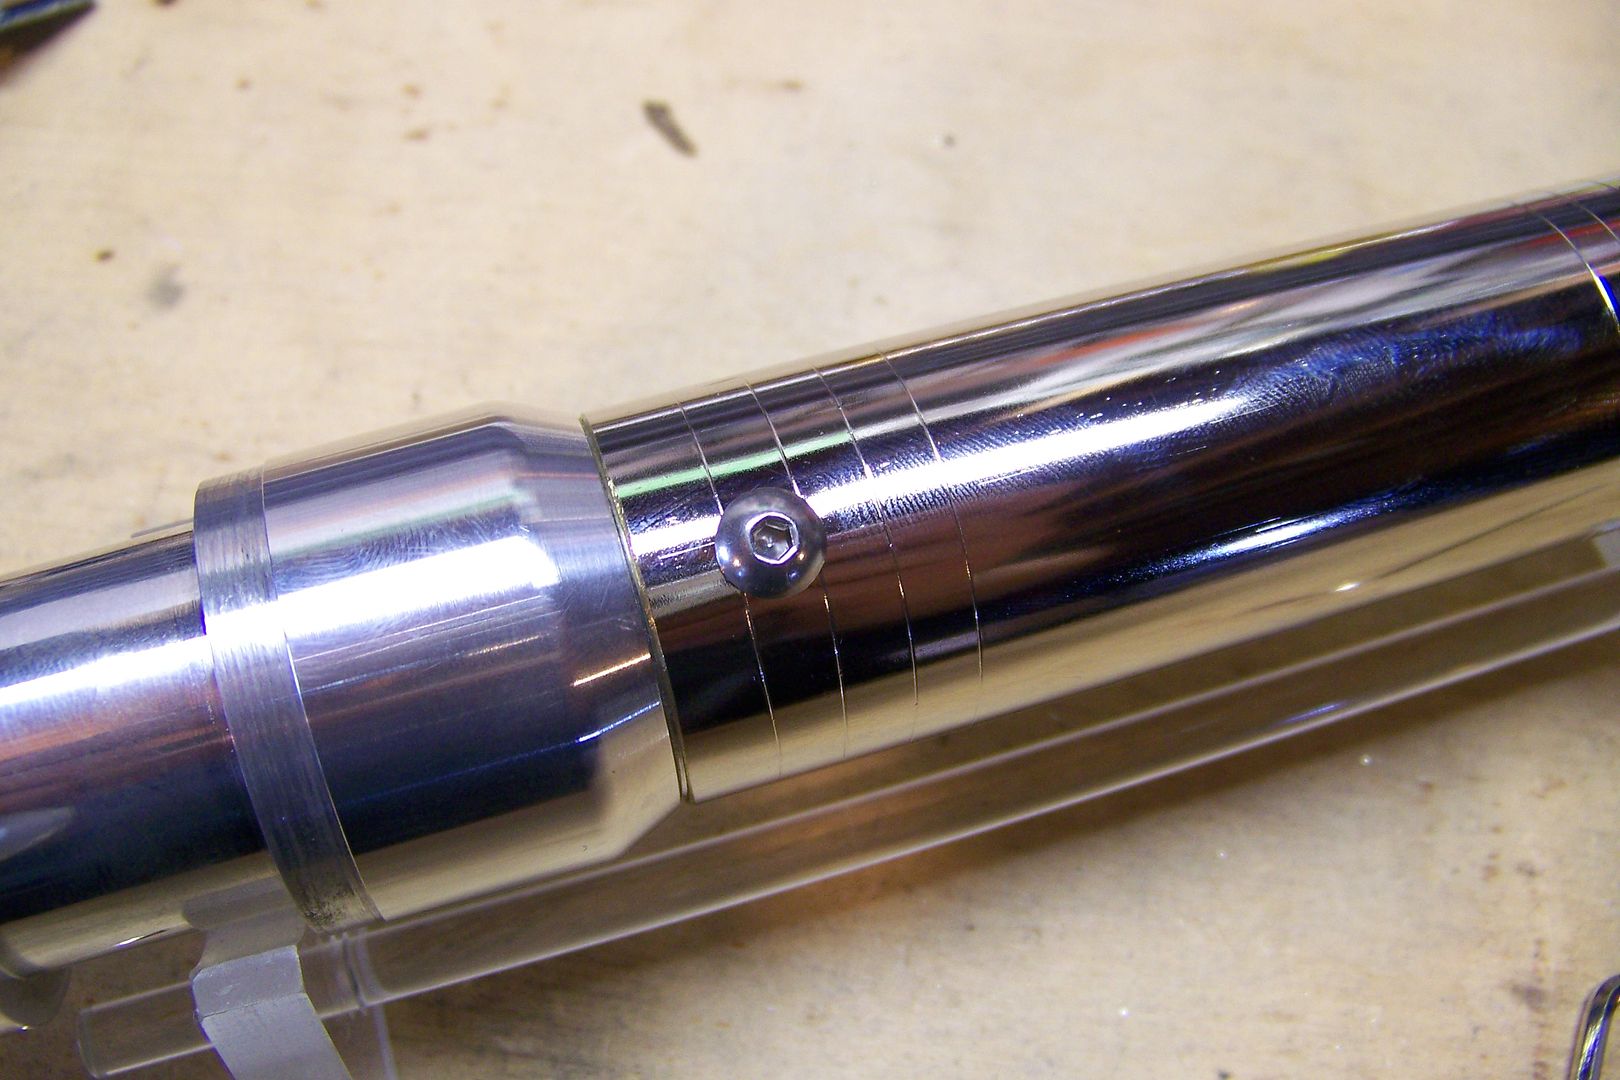
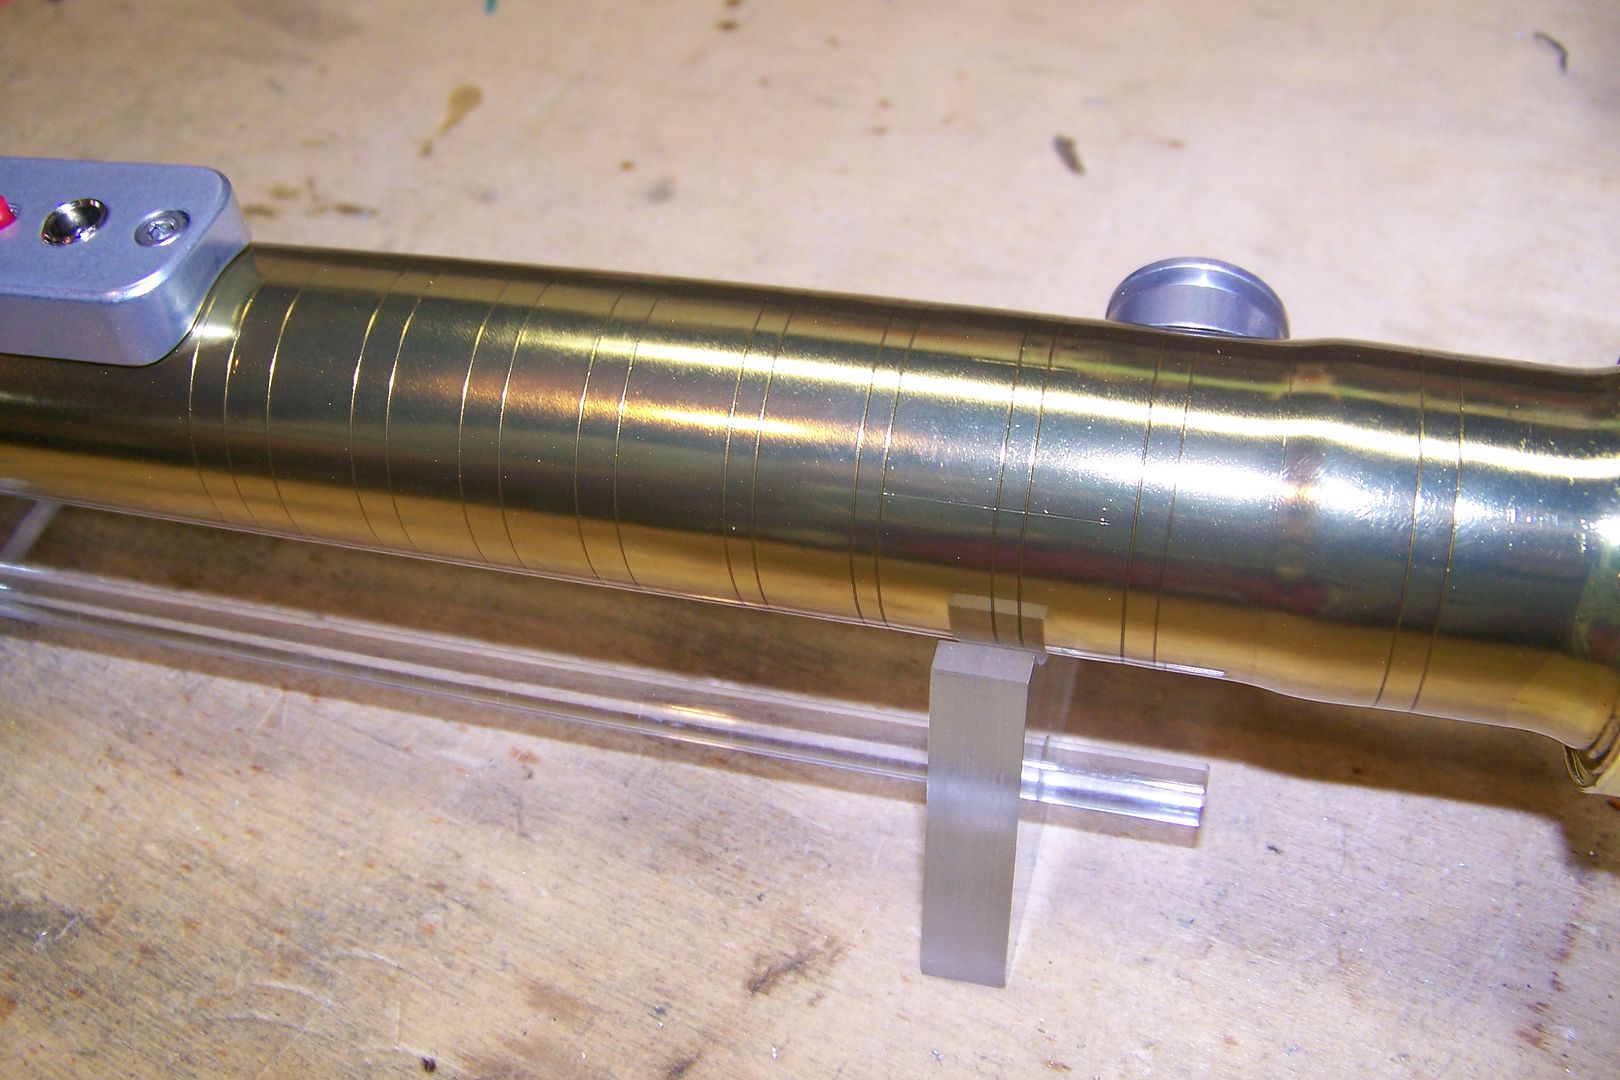
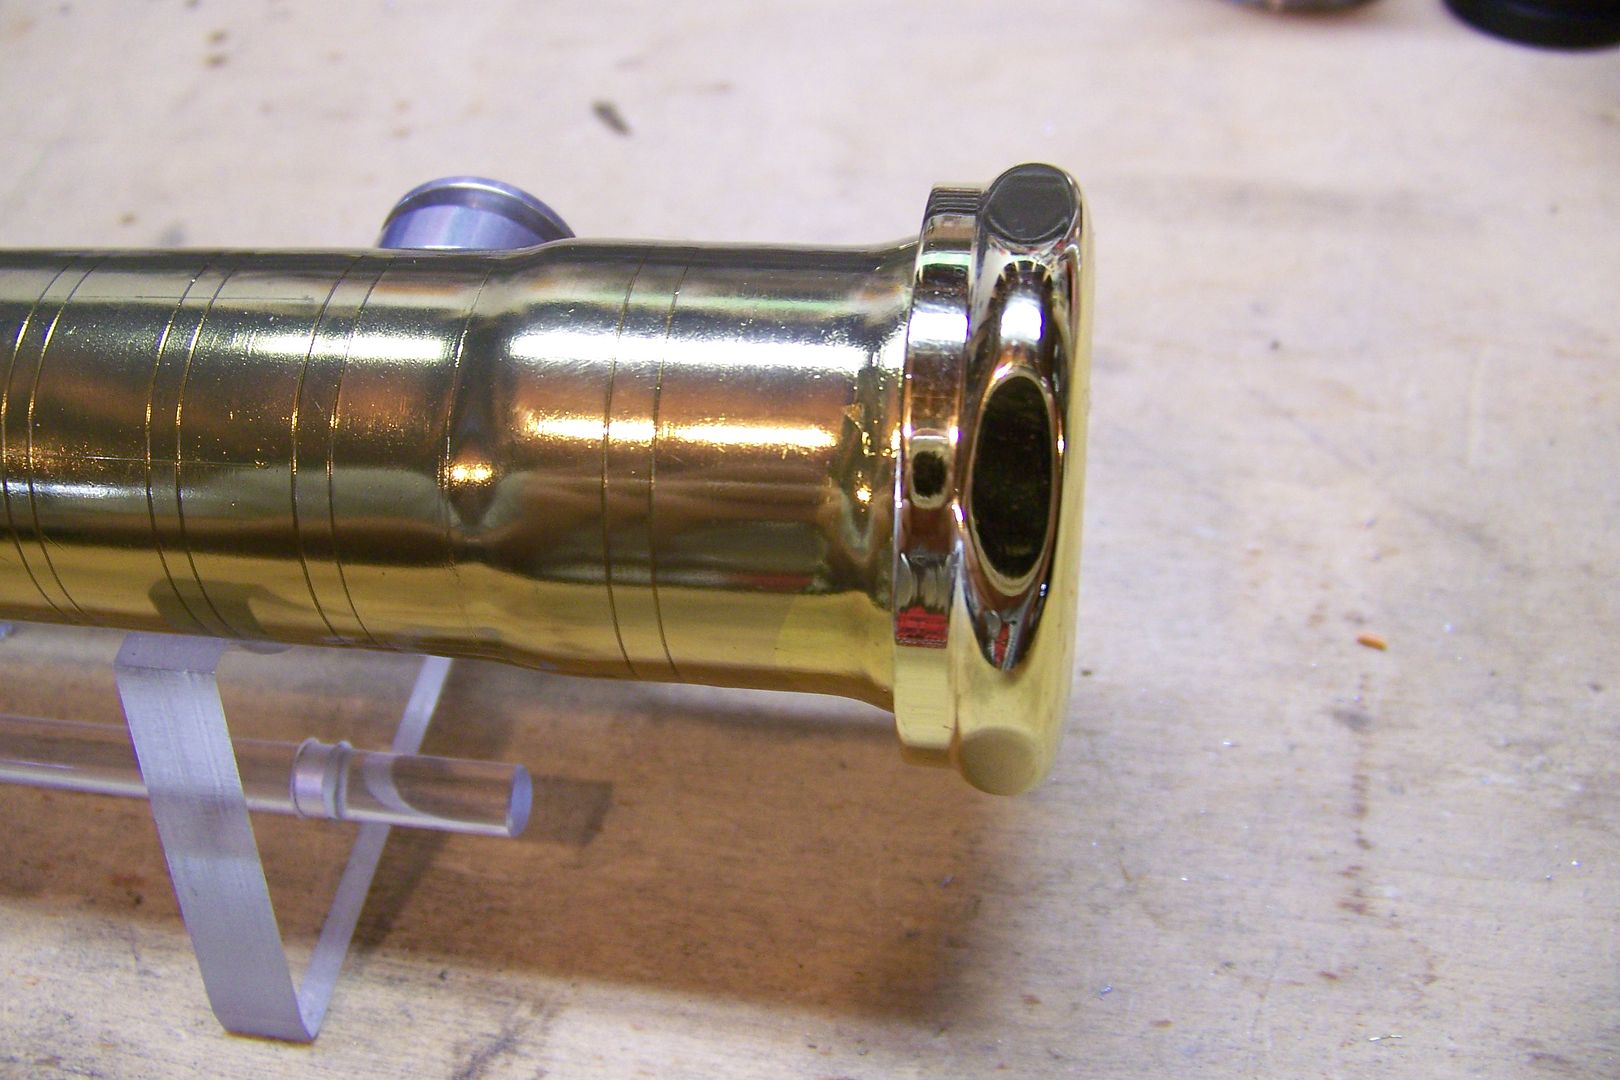
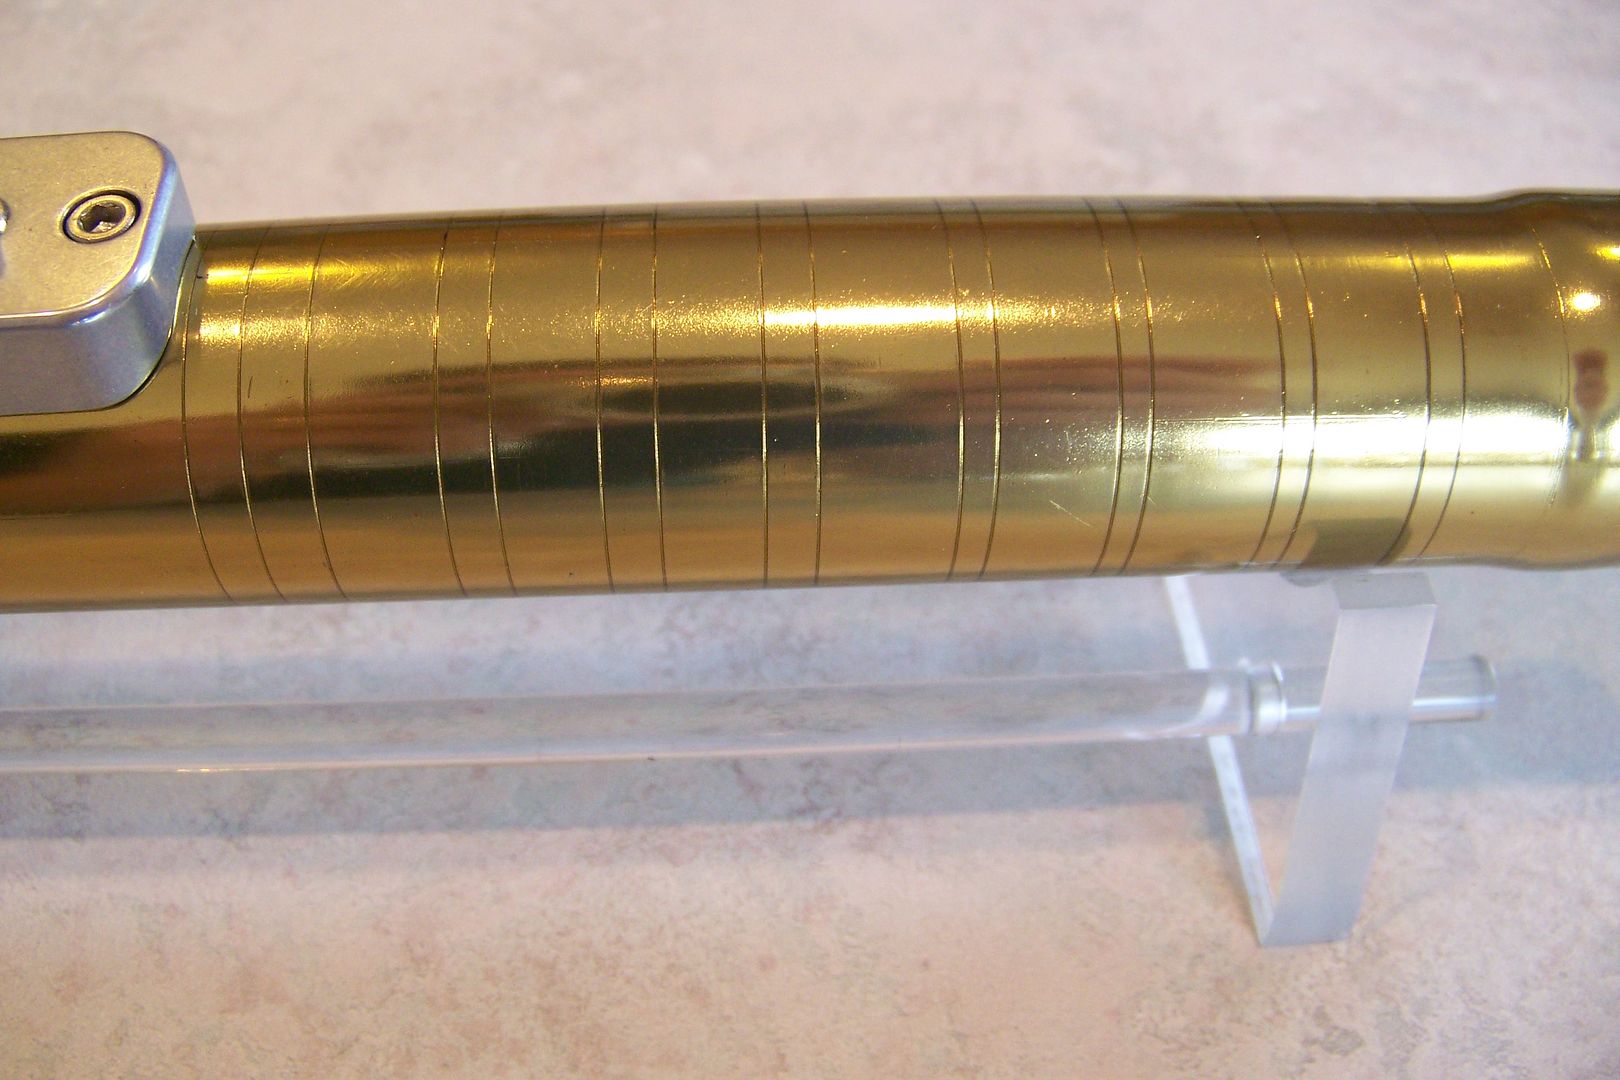
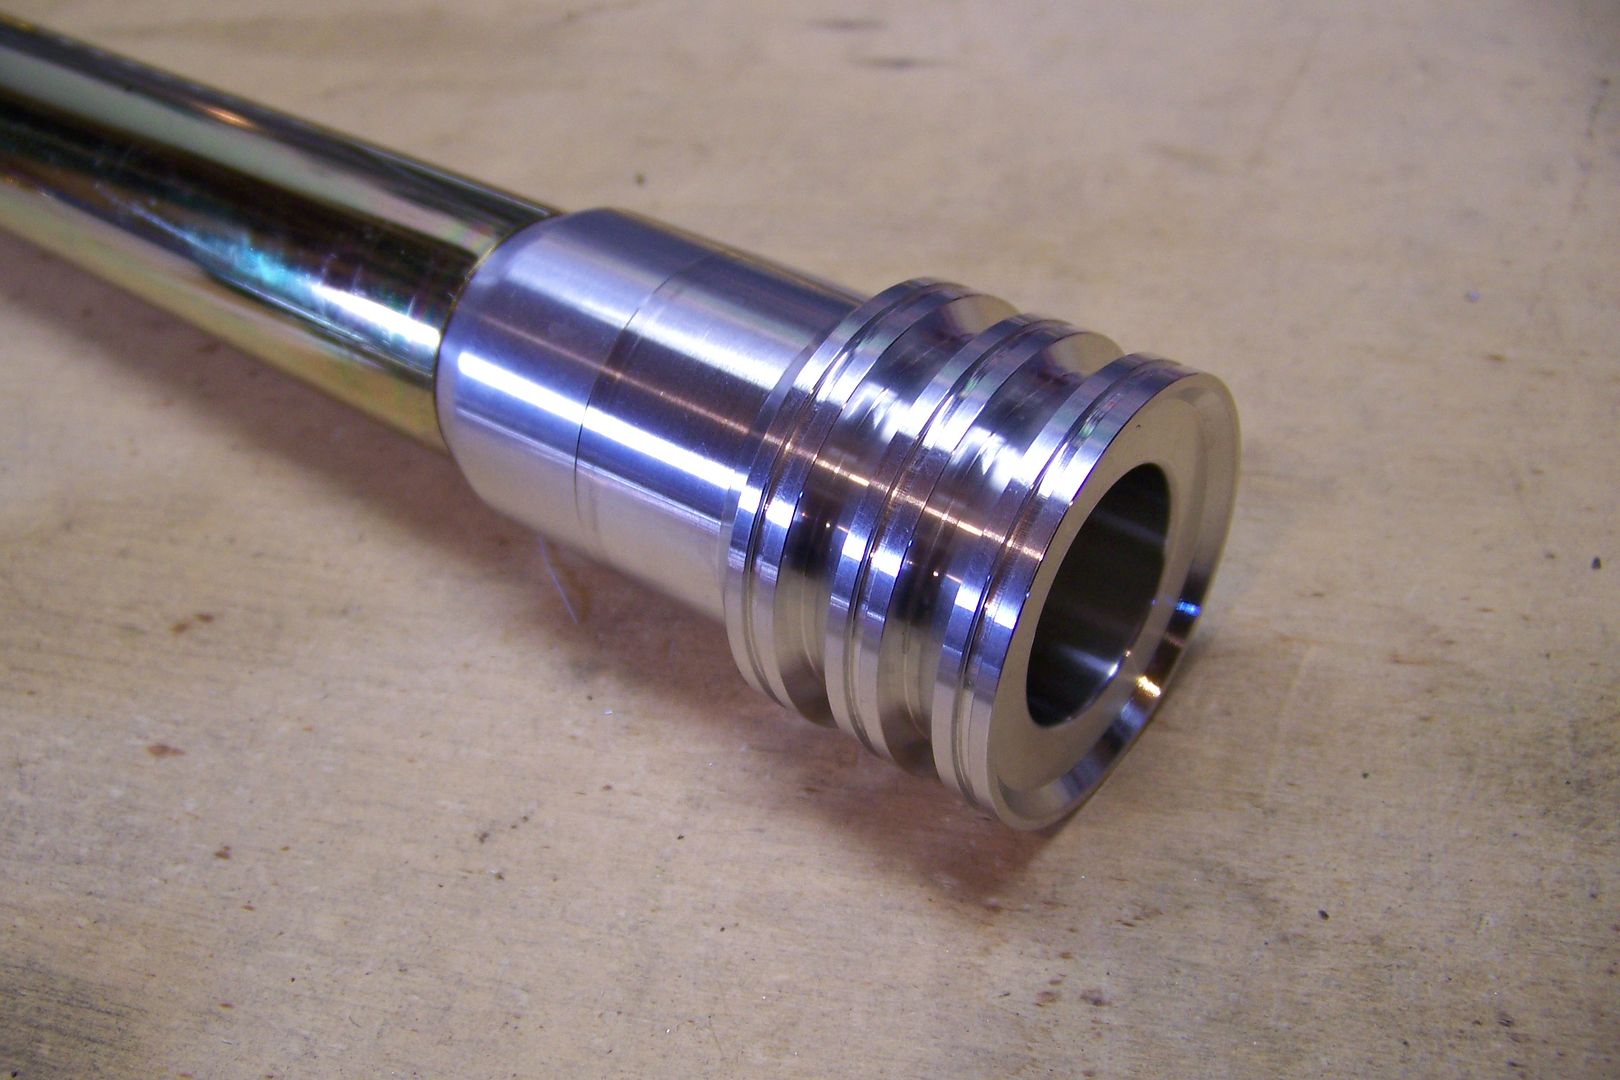
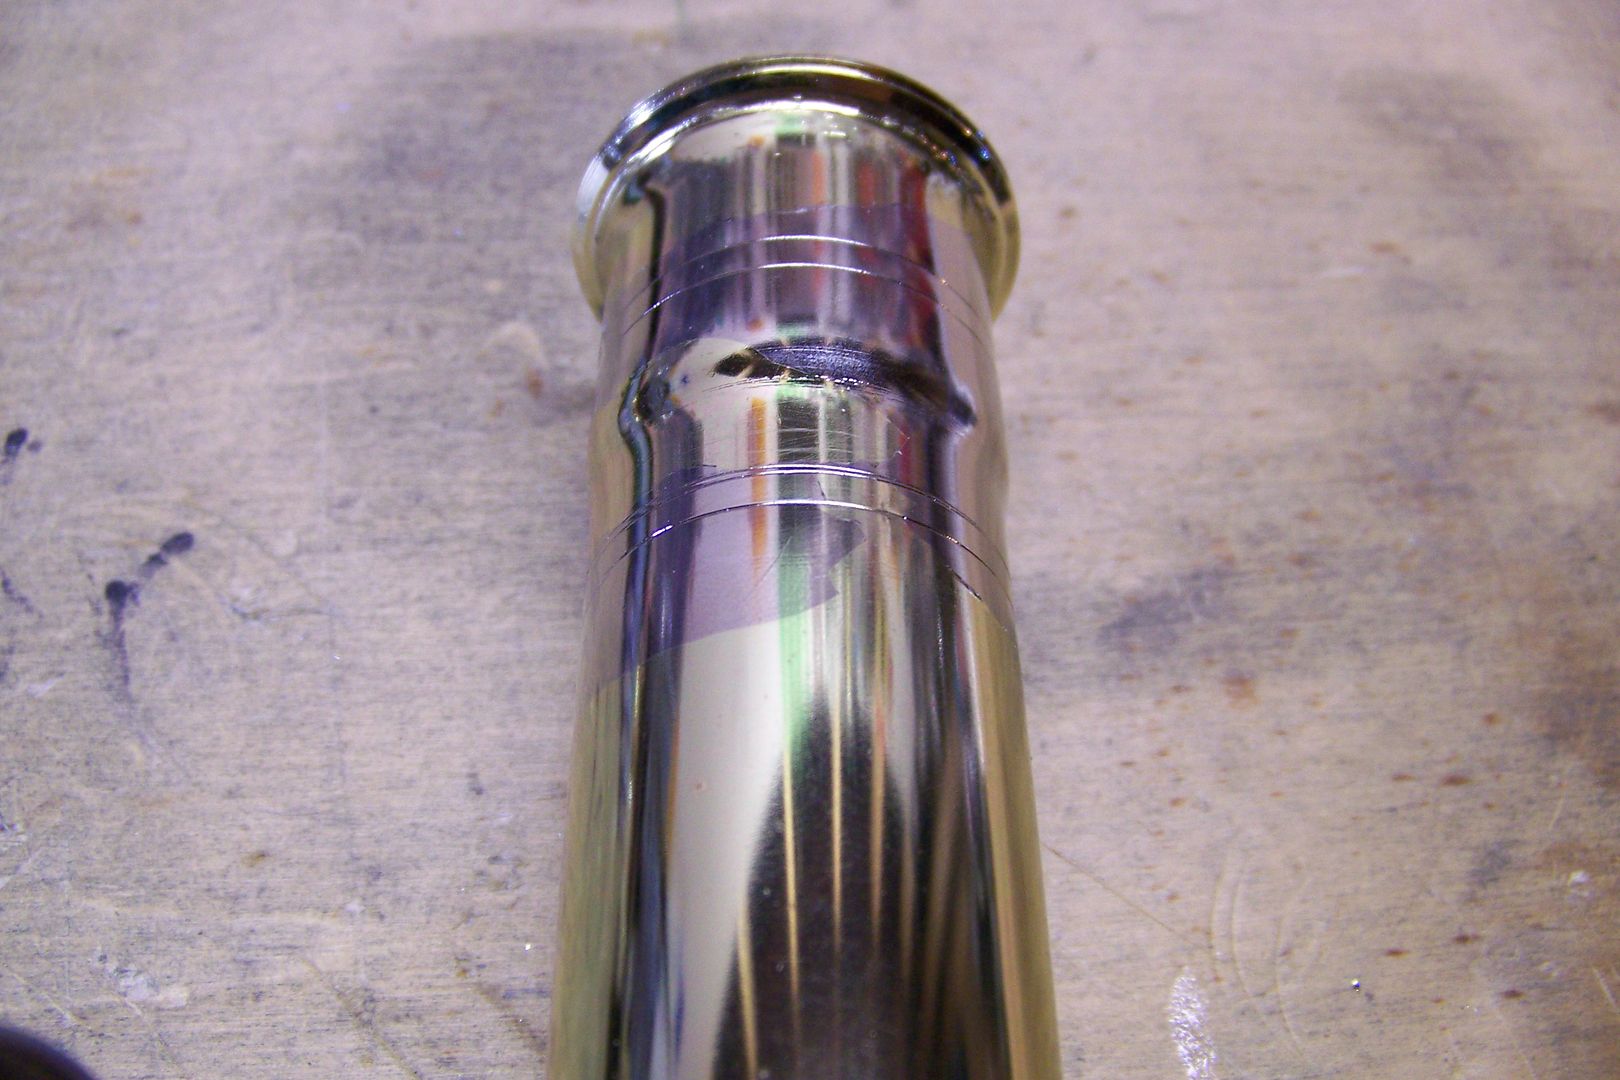
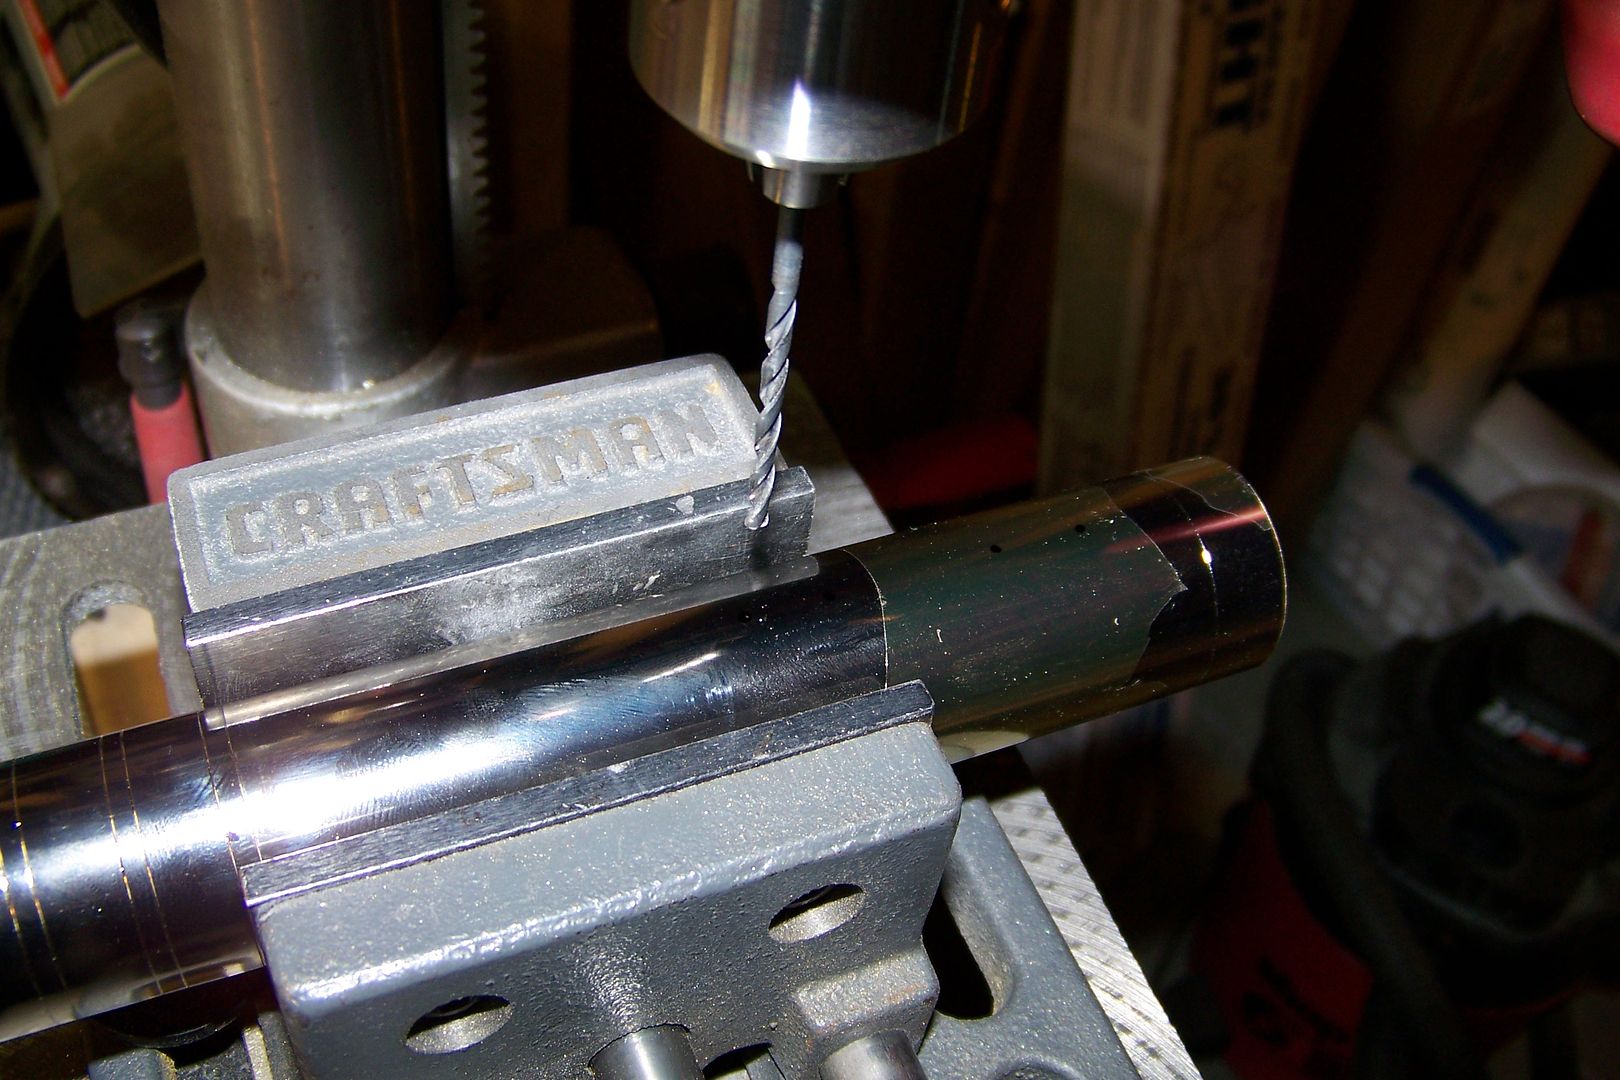
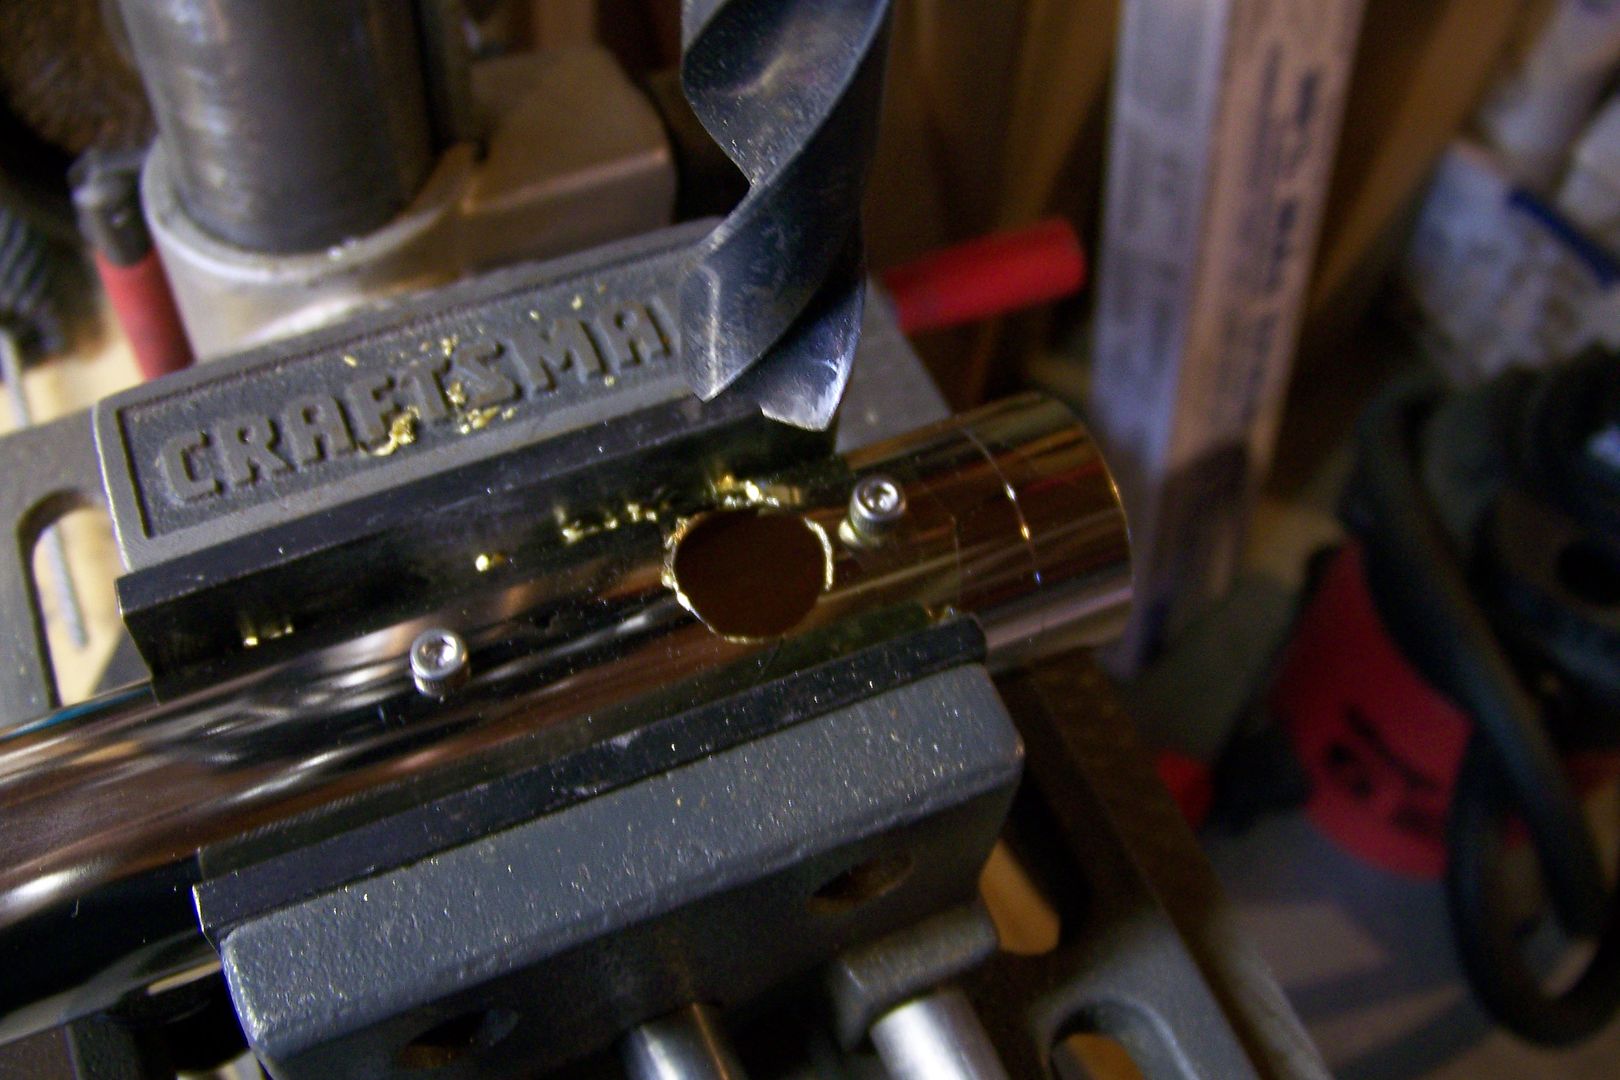
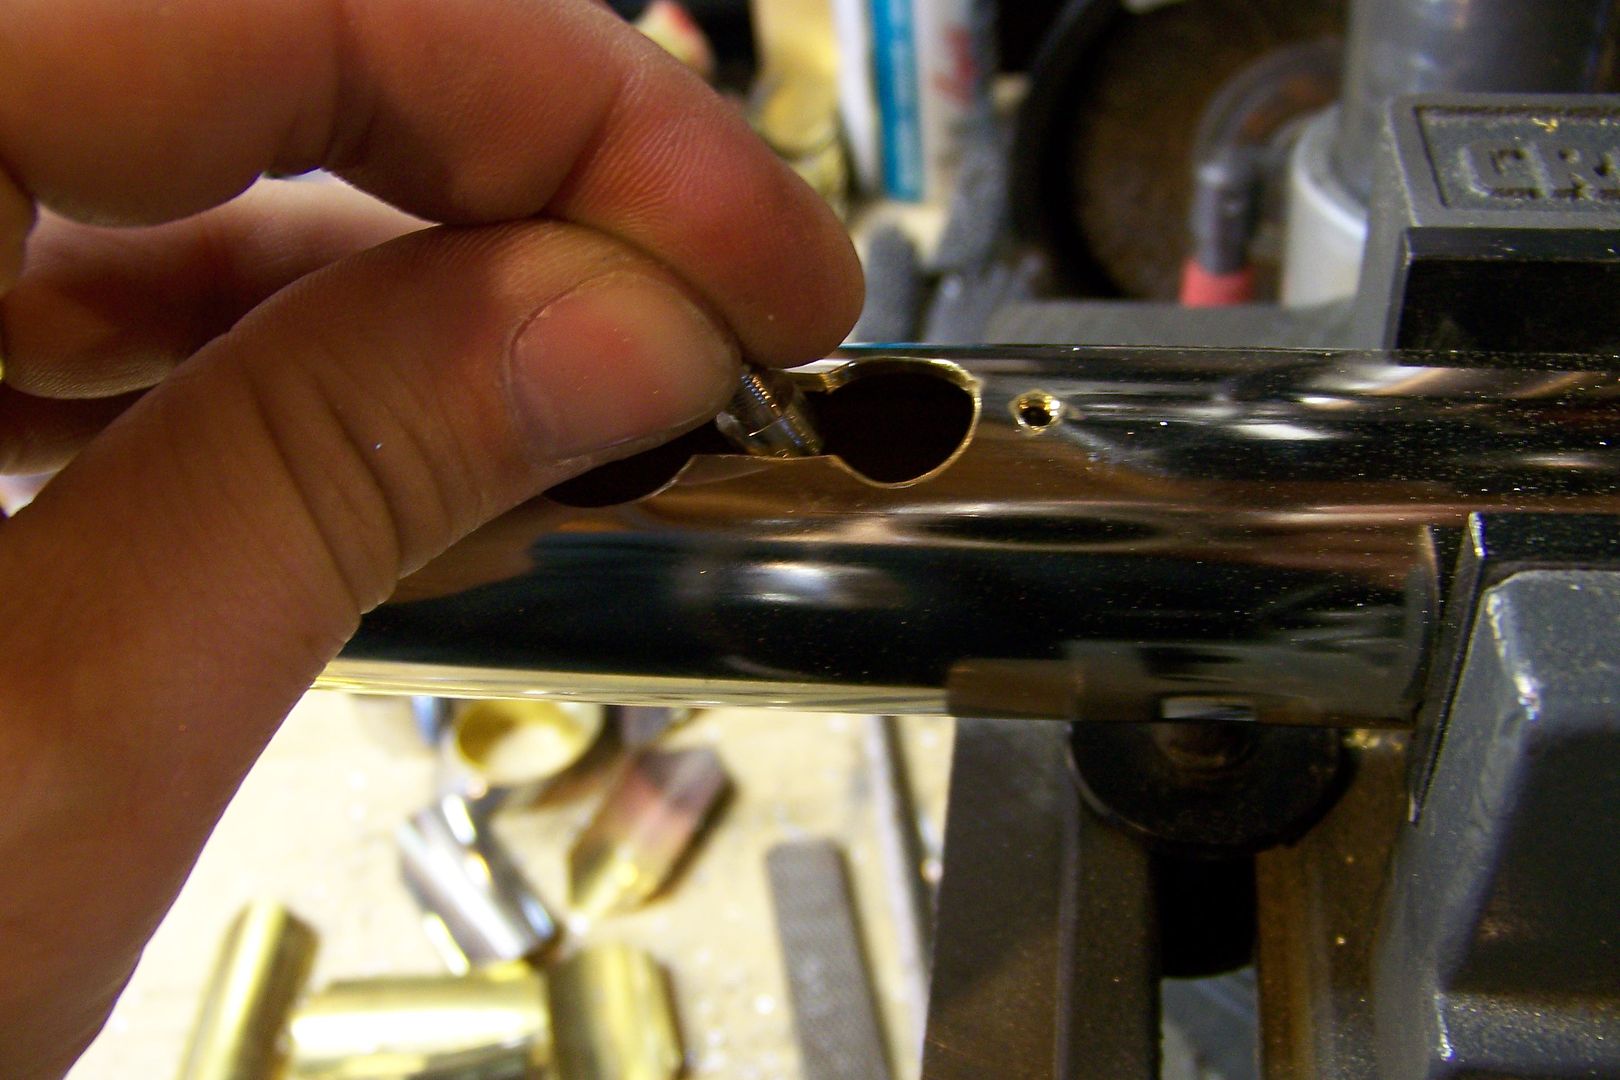
I moved on to the grips.....I used my tubing cutter method to score the tube to simulate grips:
Image
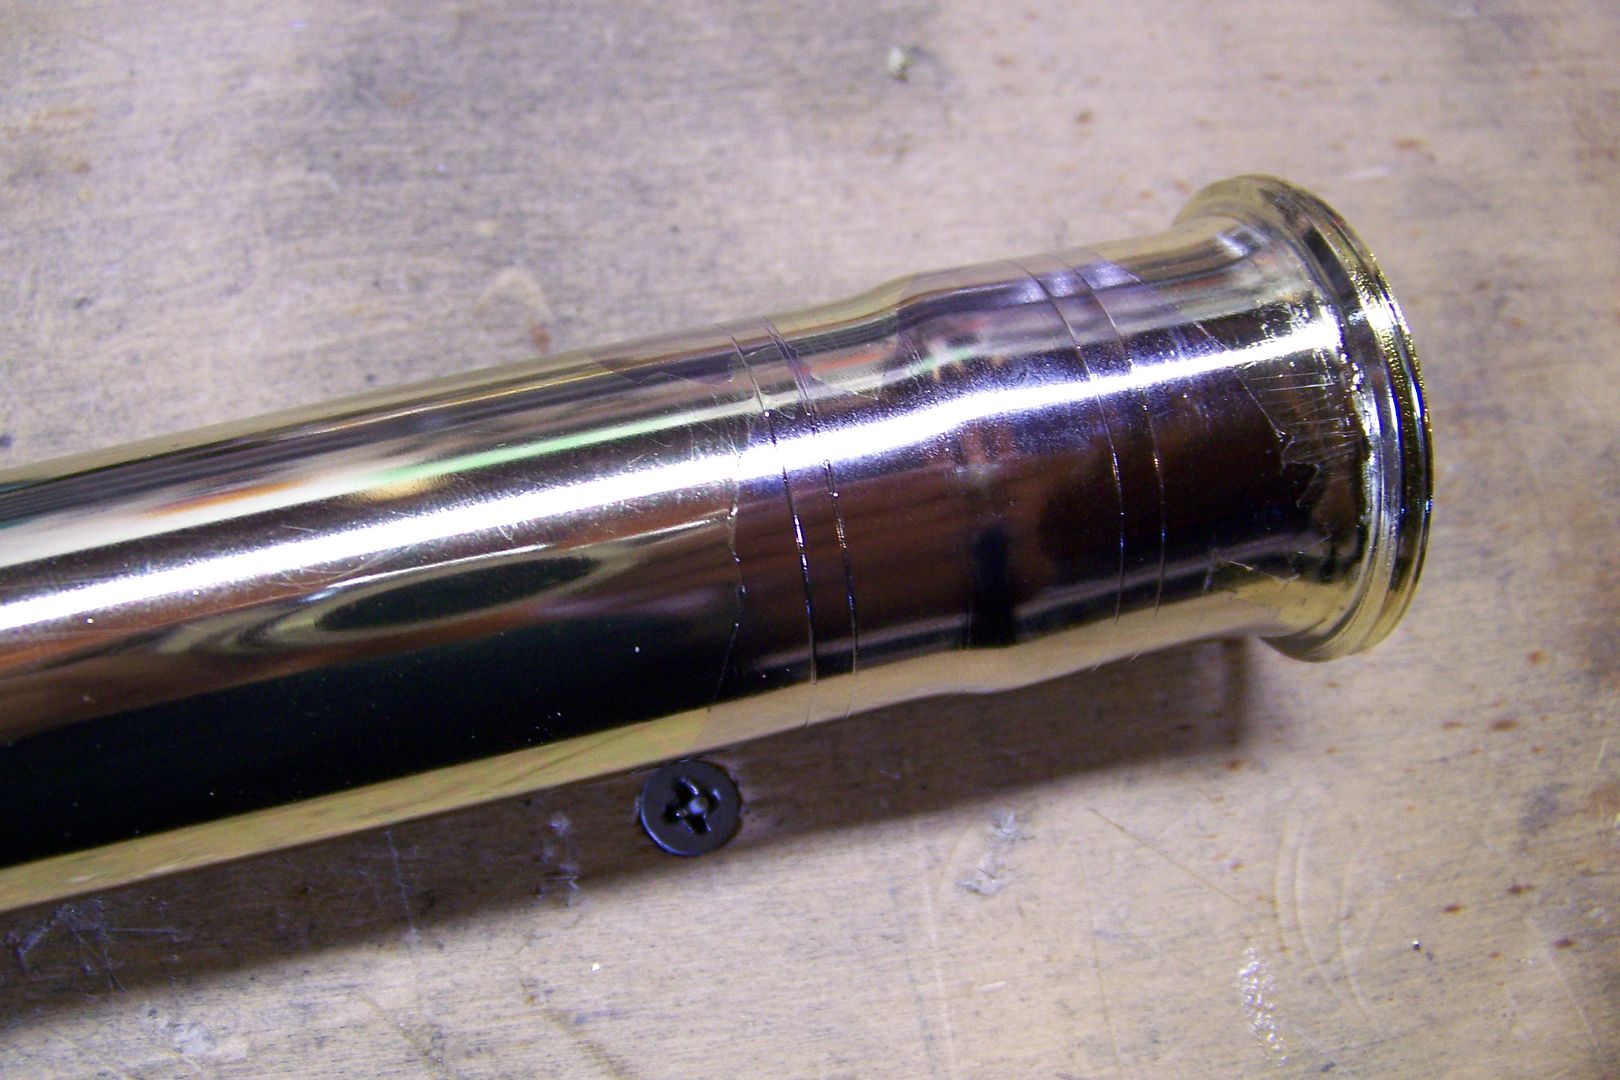
Uh-oh....that's not good....the brass coating is coming off completely....
Image

I added a few more scoring marks and then the coating began coming off like a ribbon:
Image
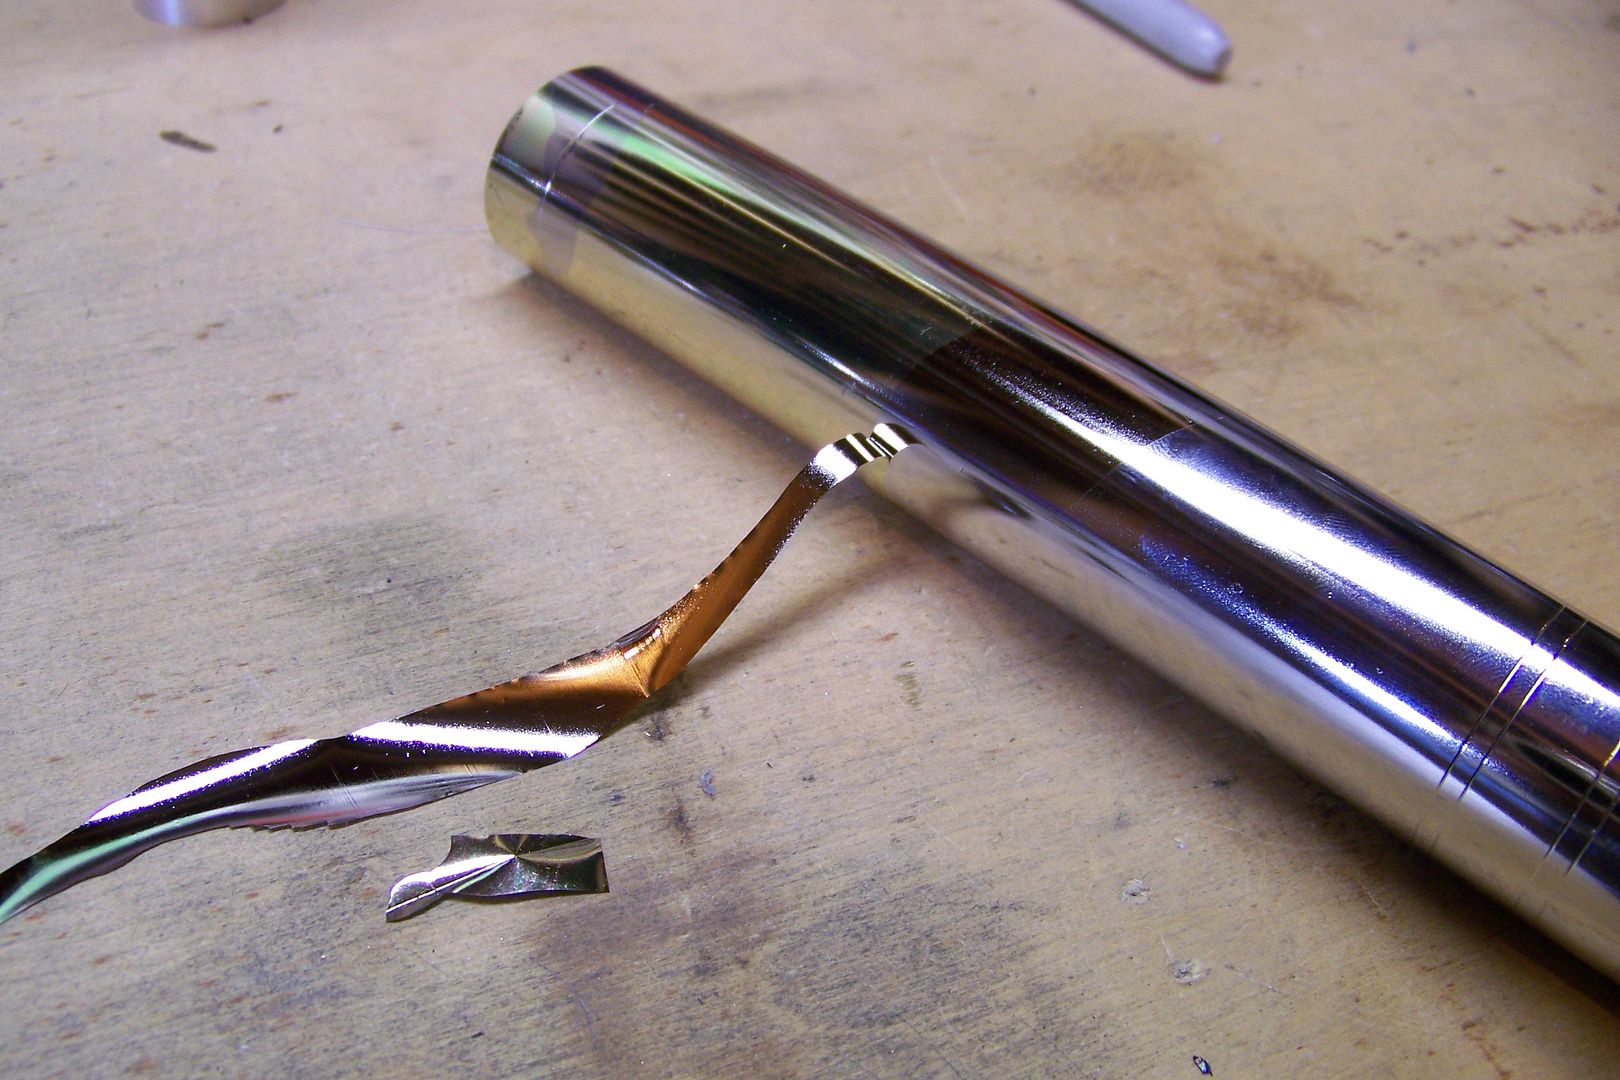
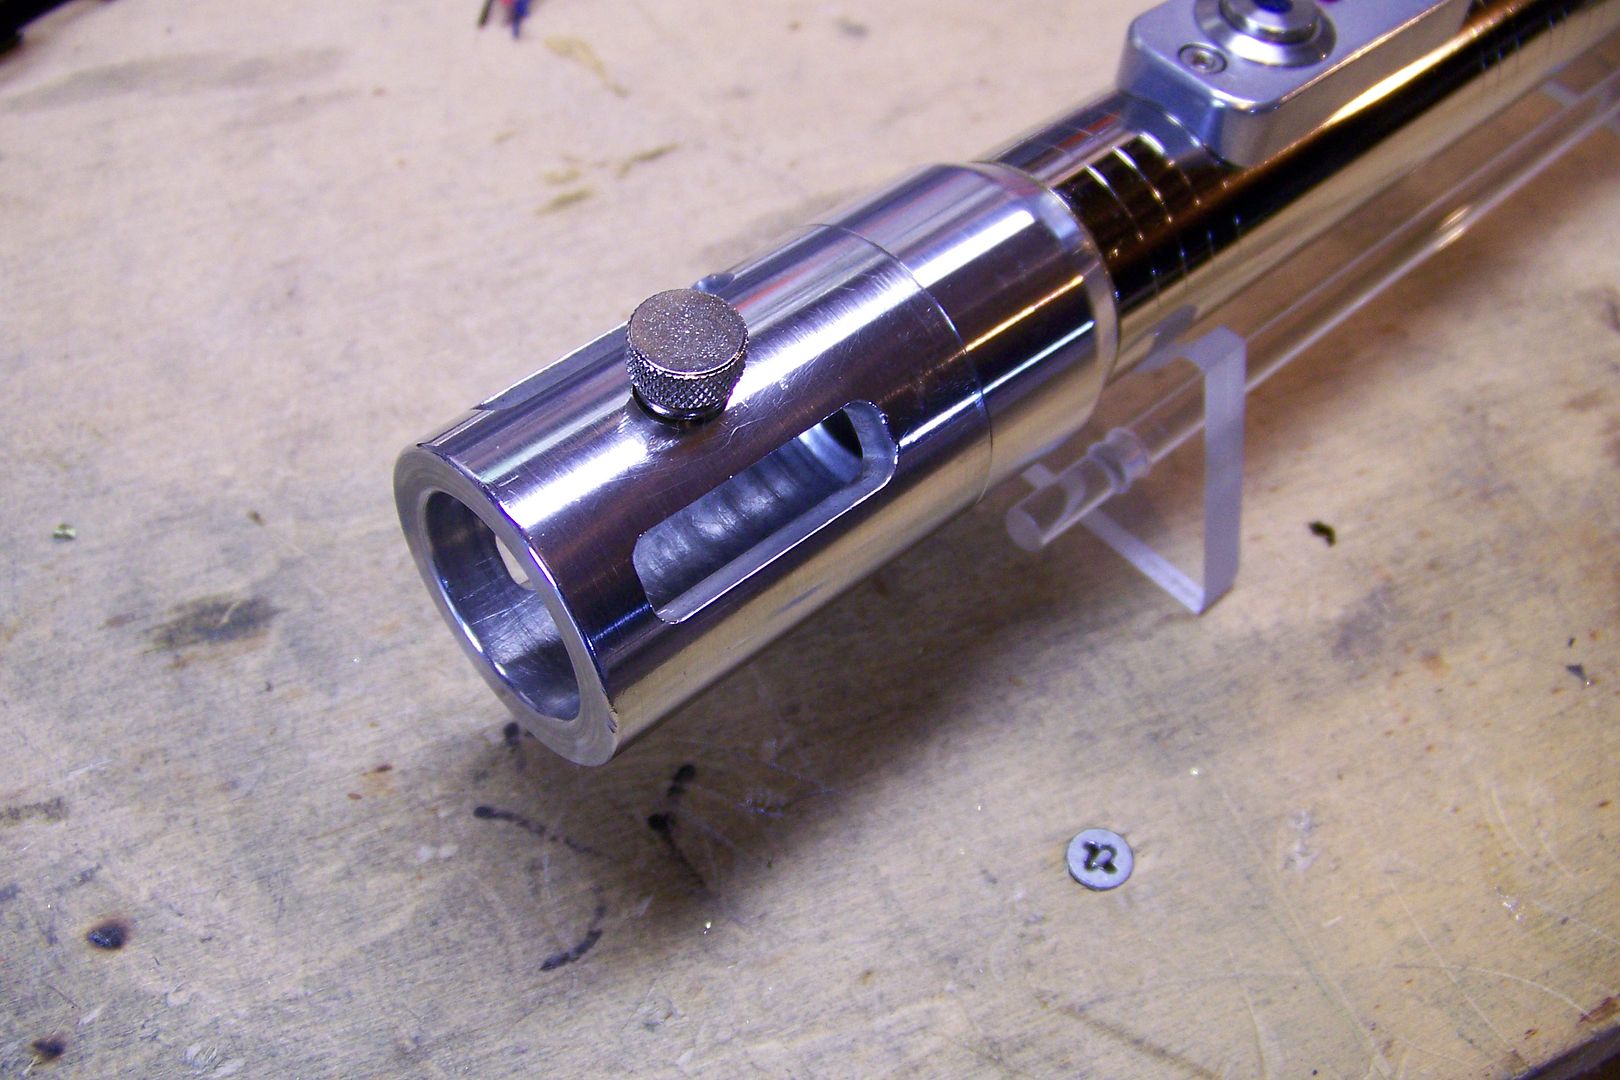
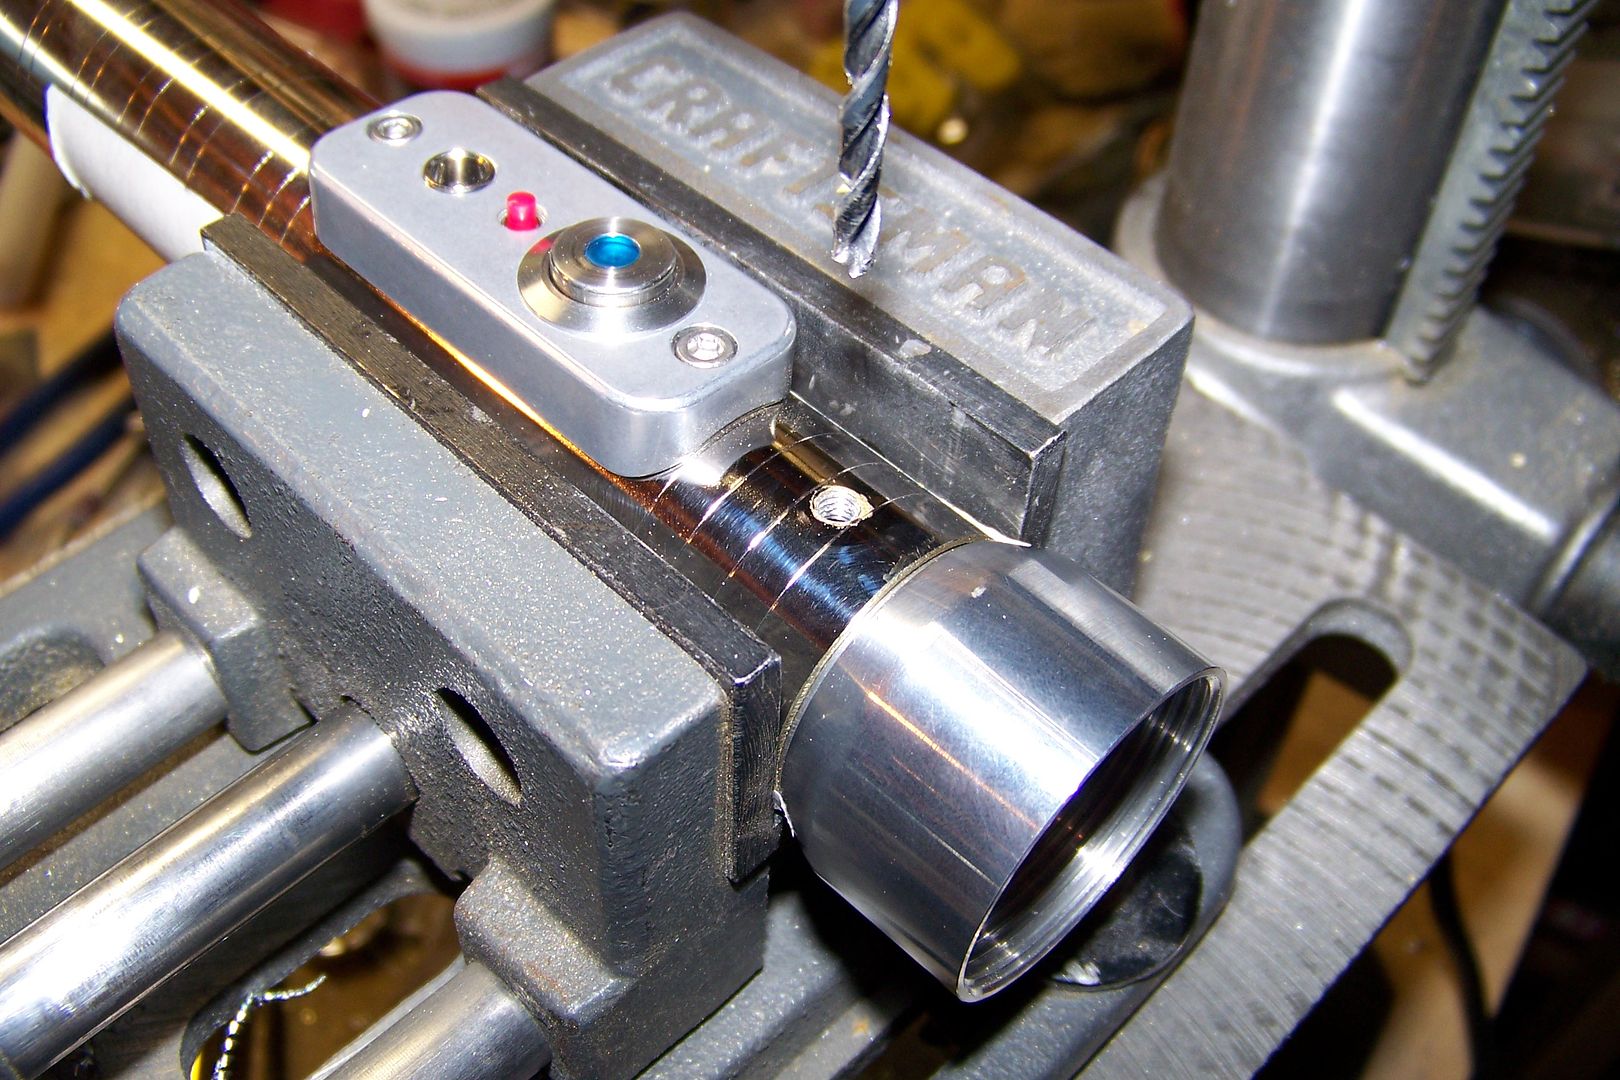
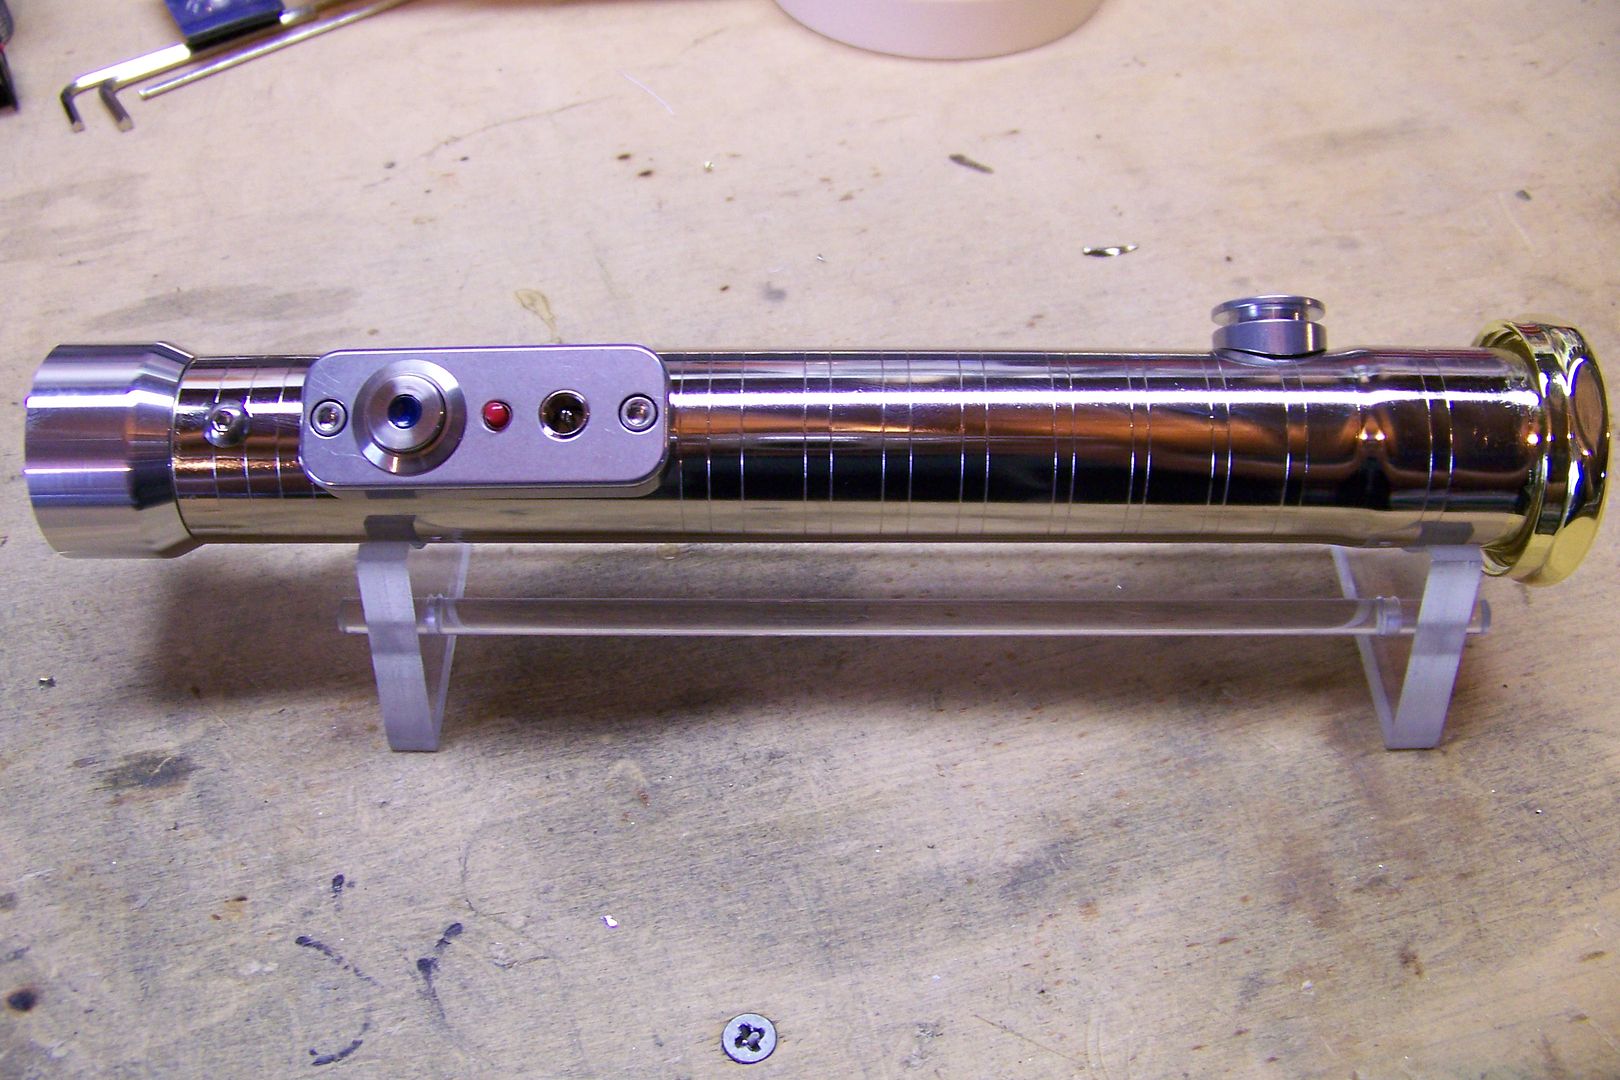
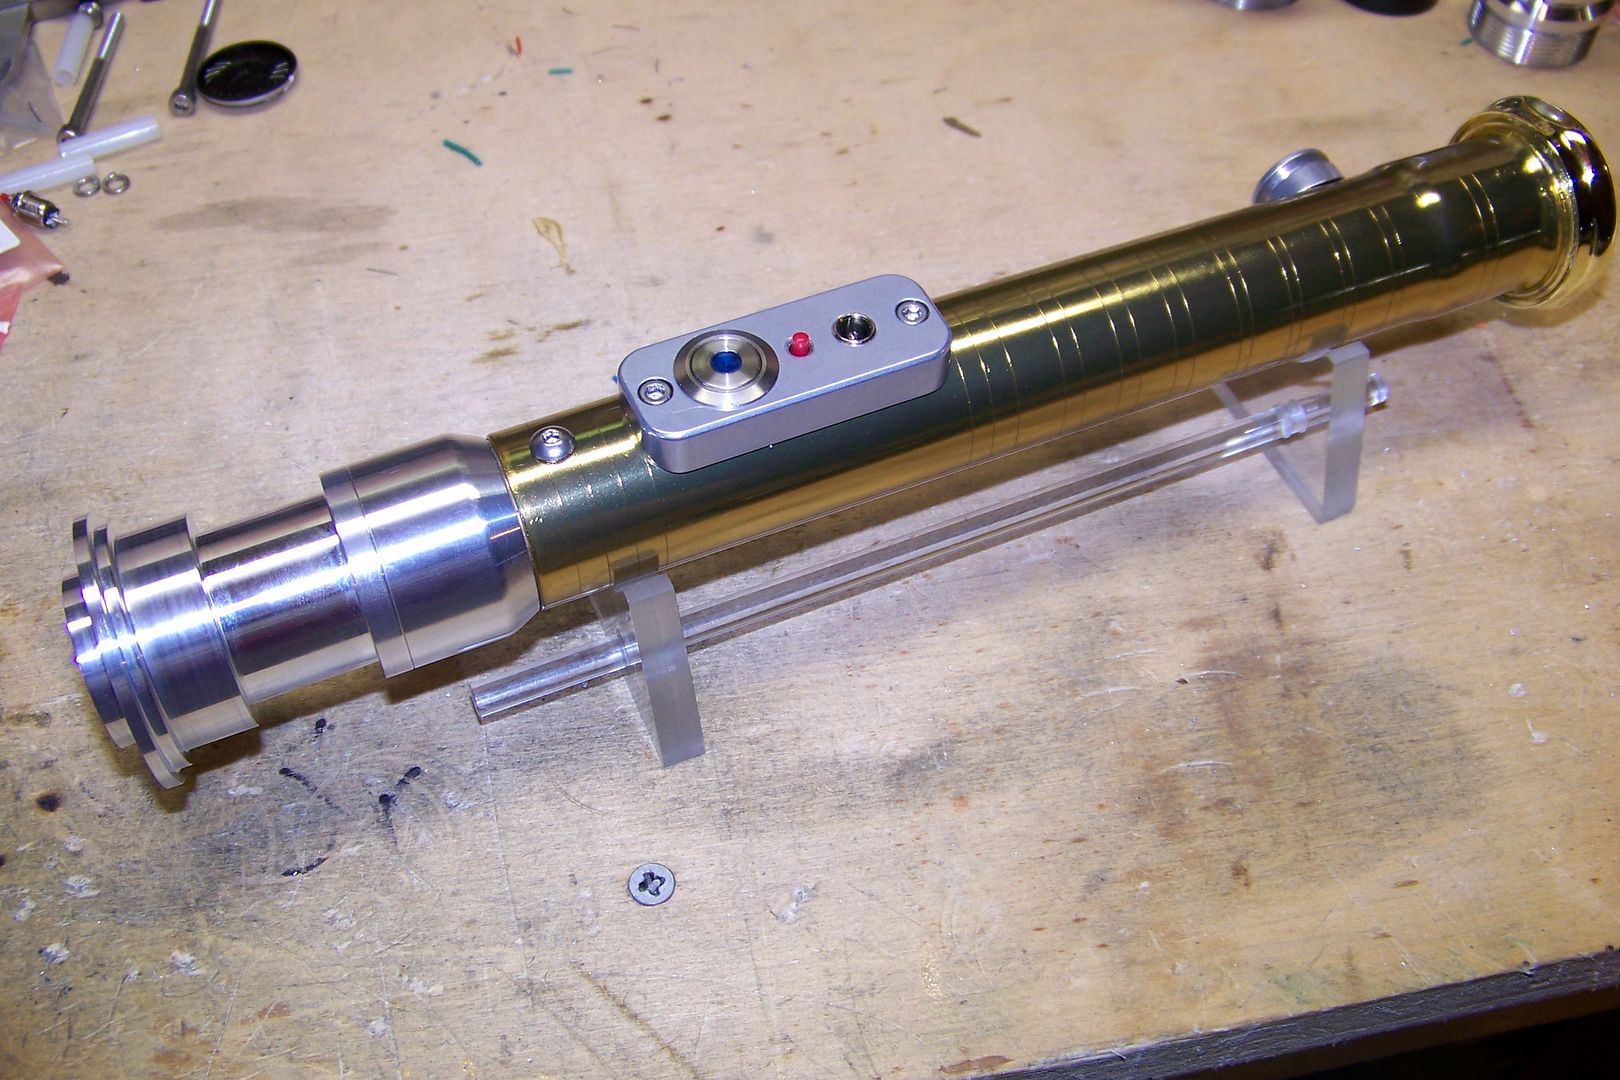
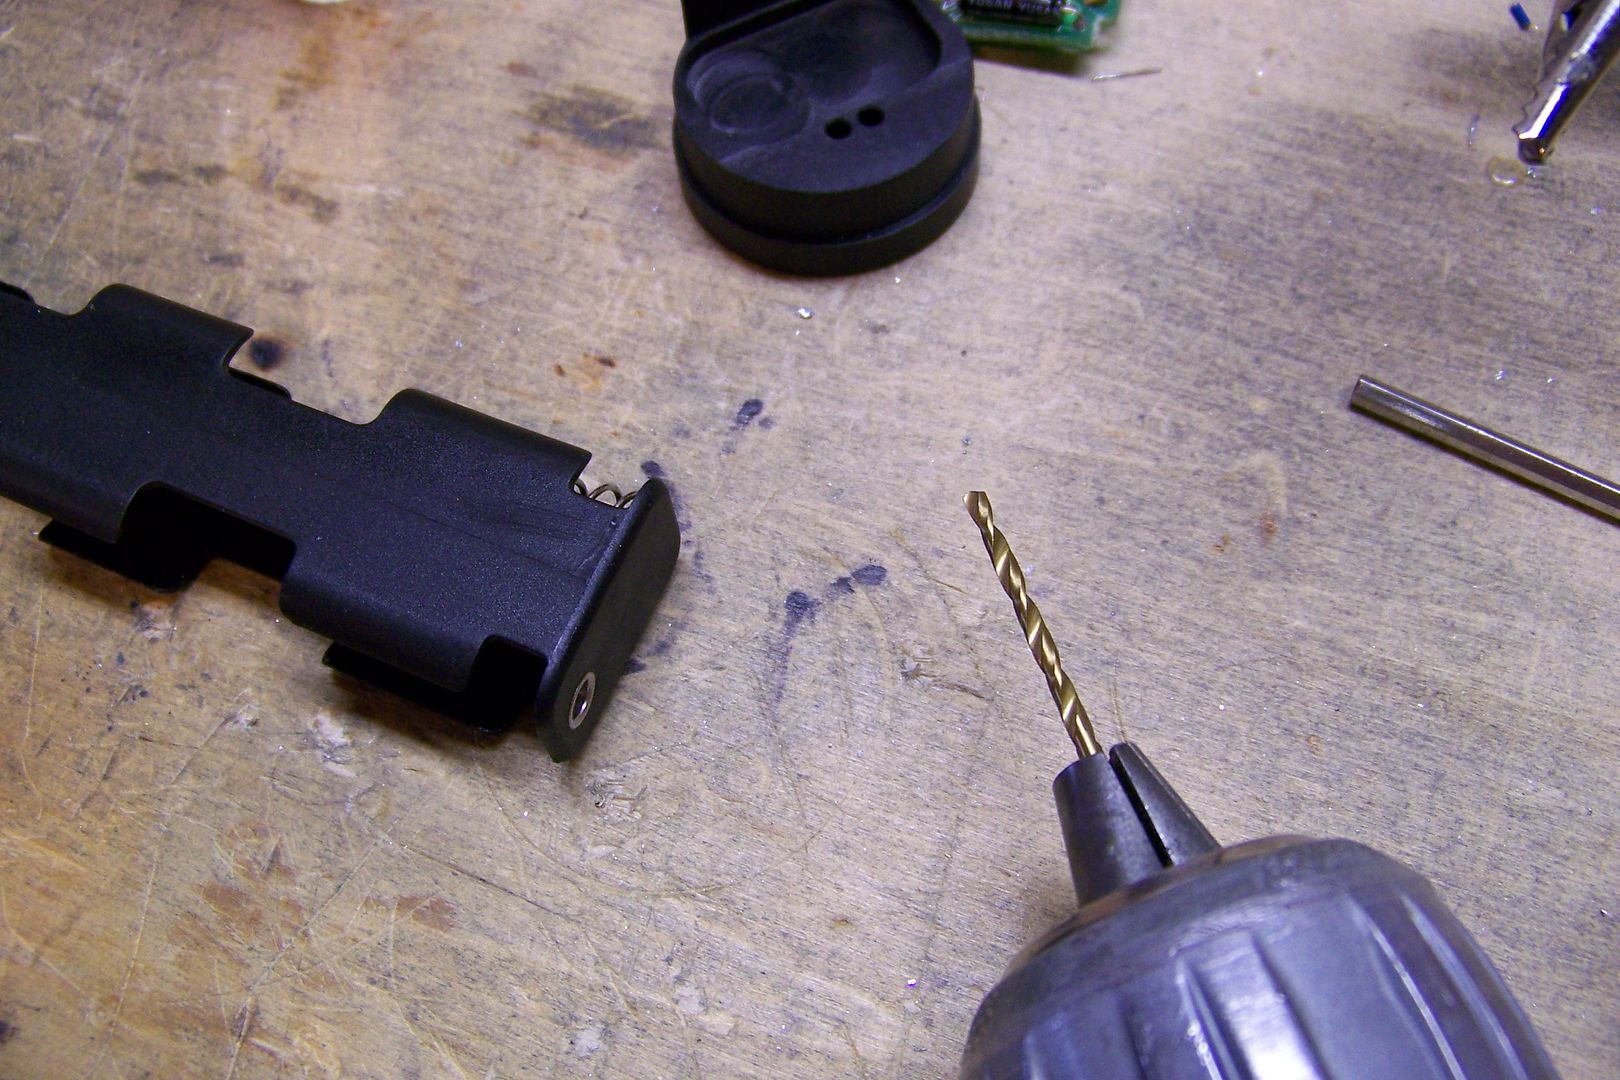
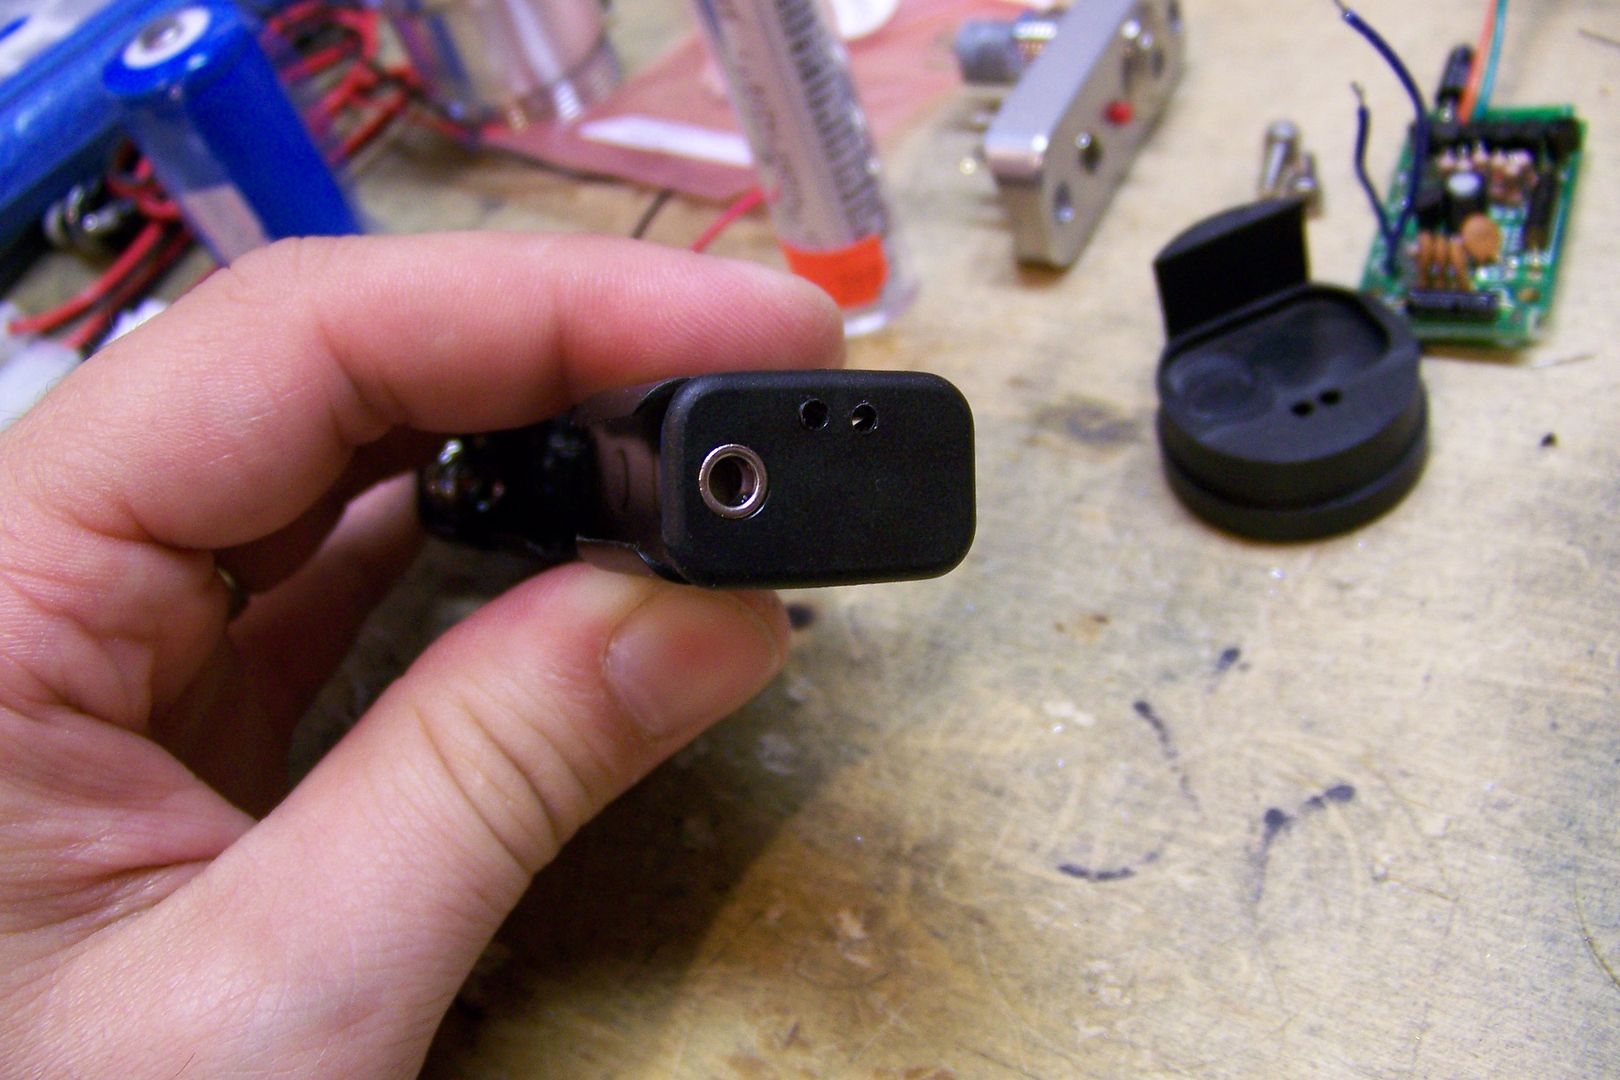
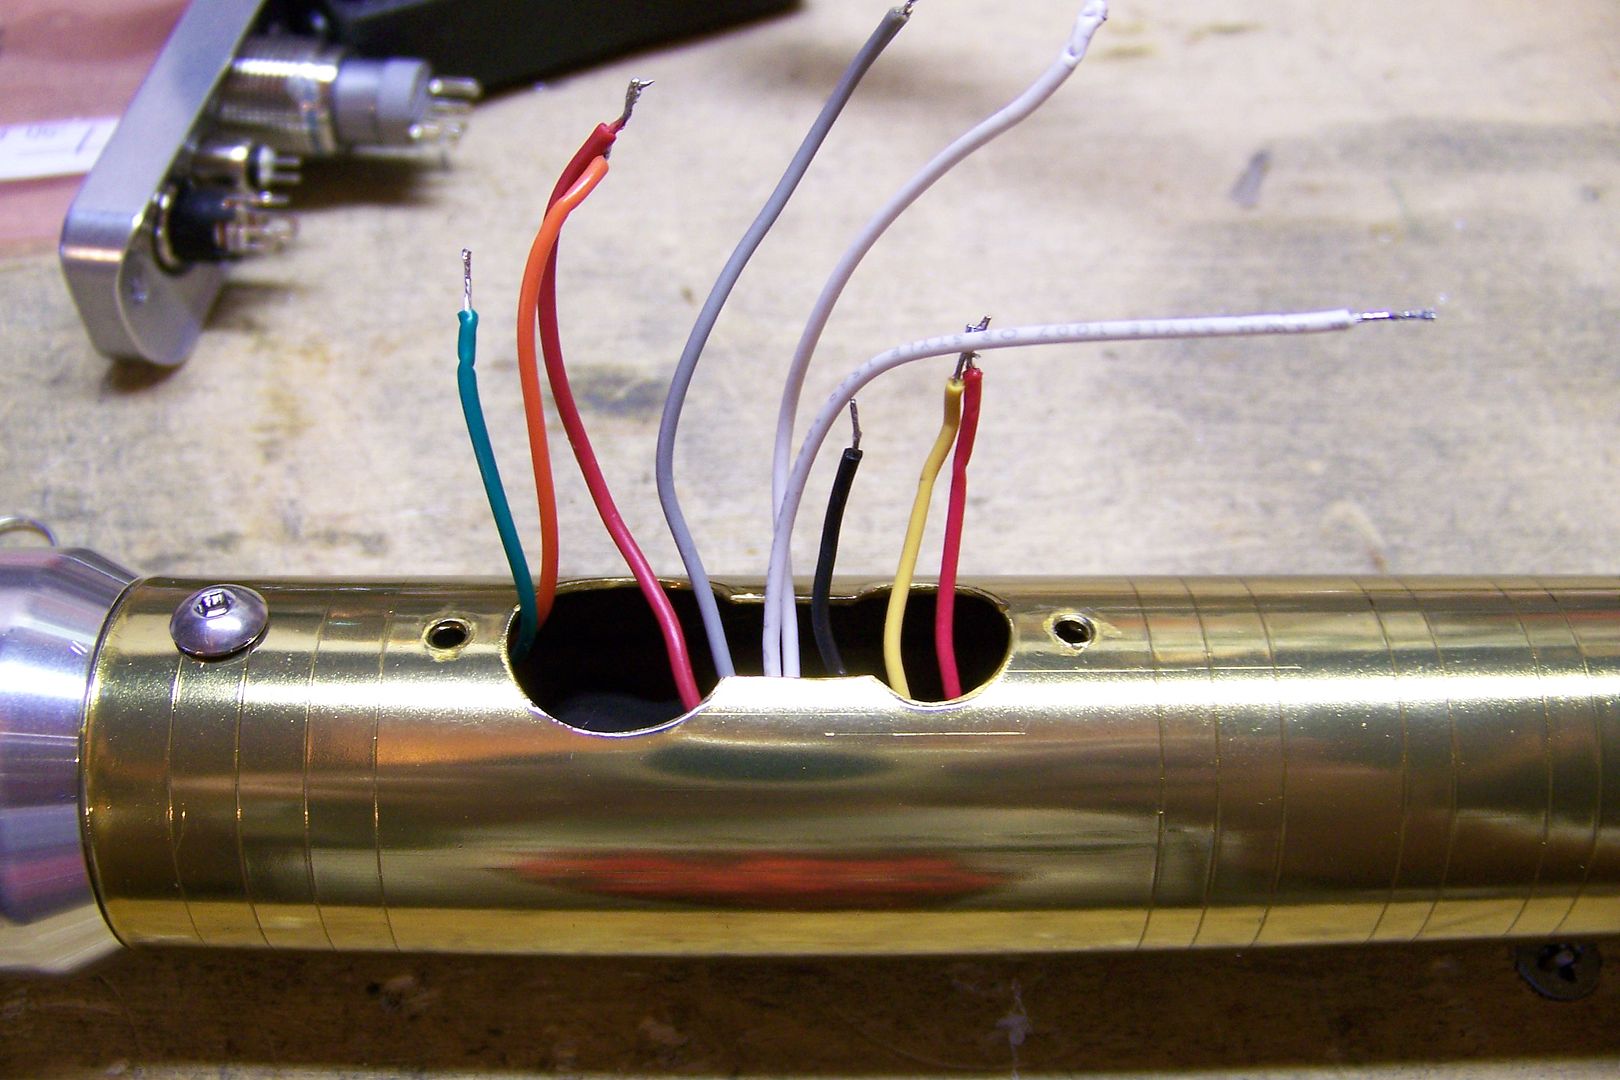
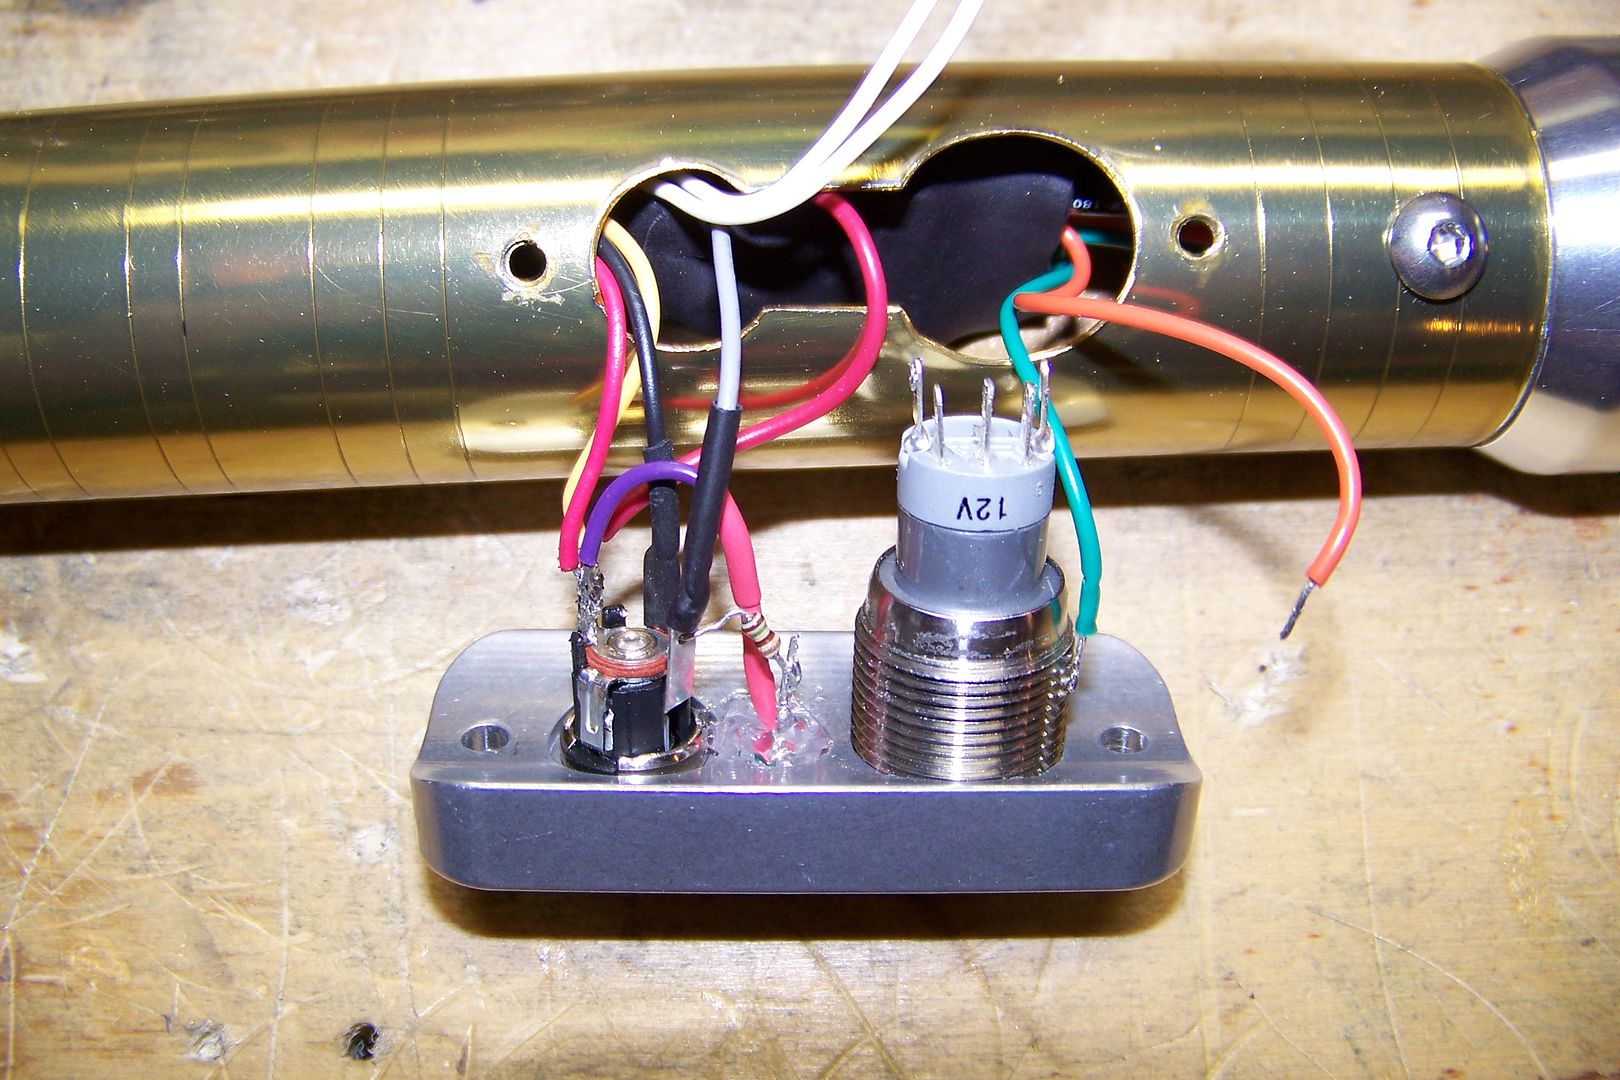
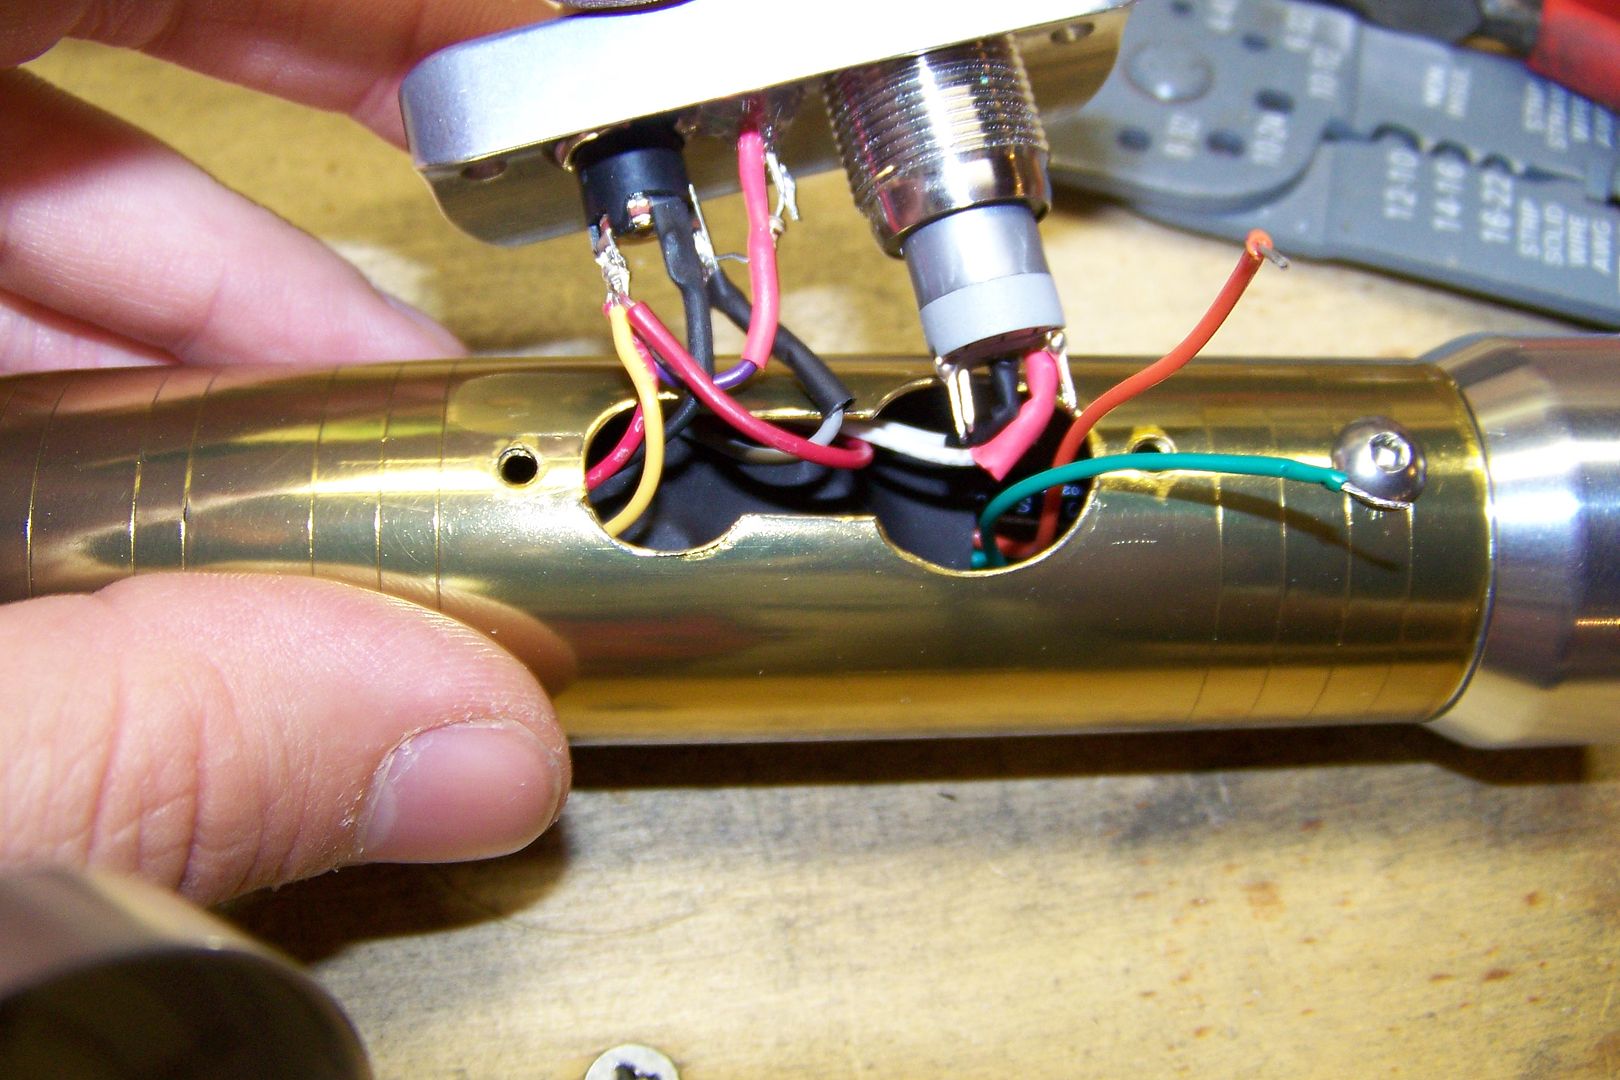
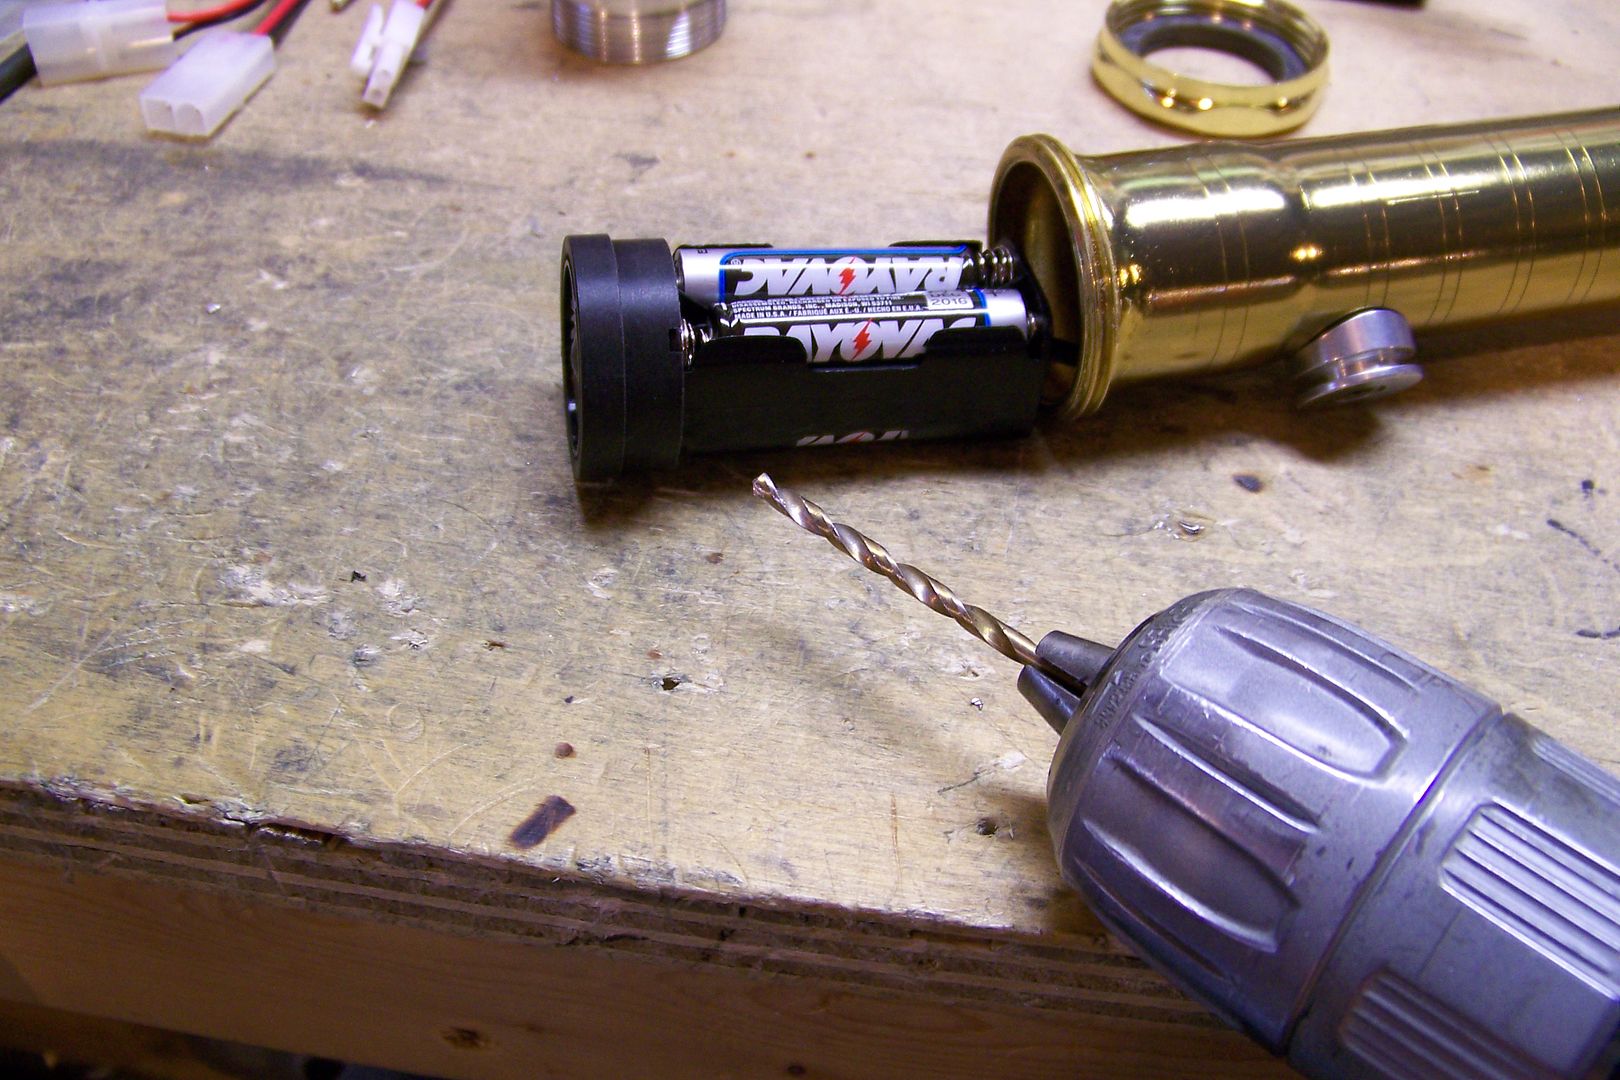
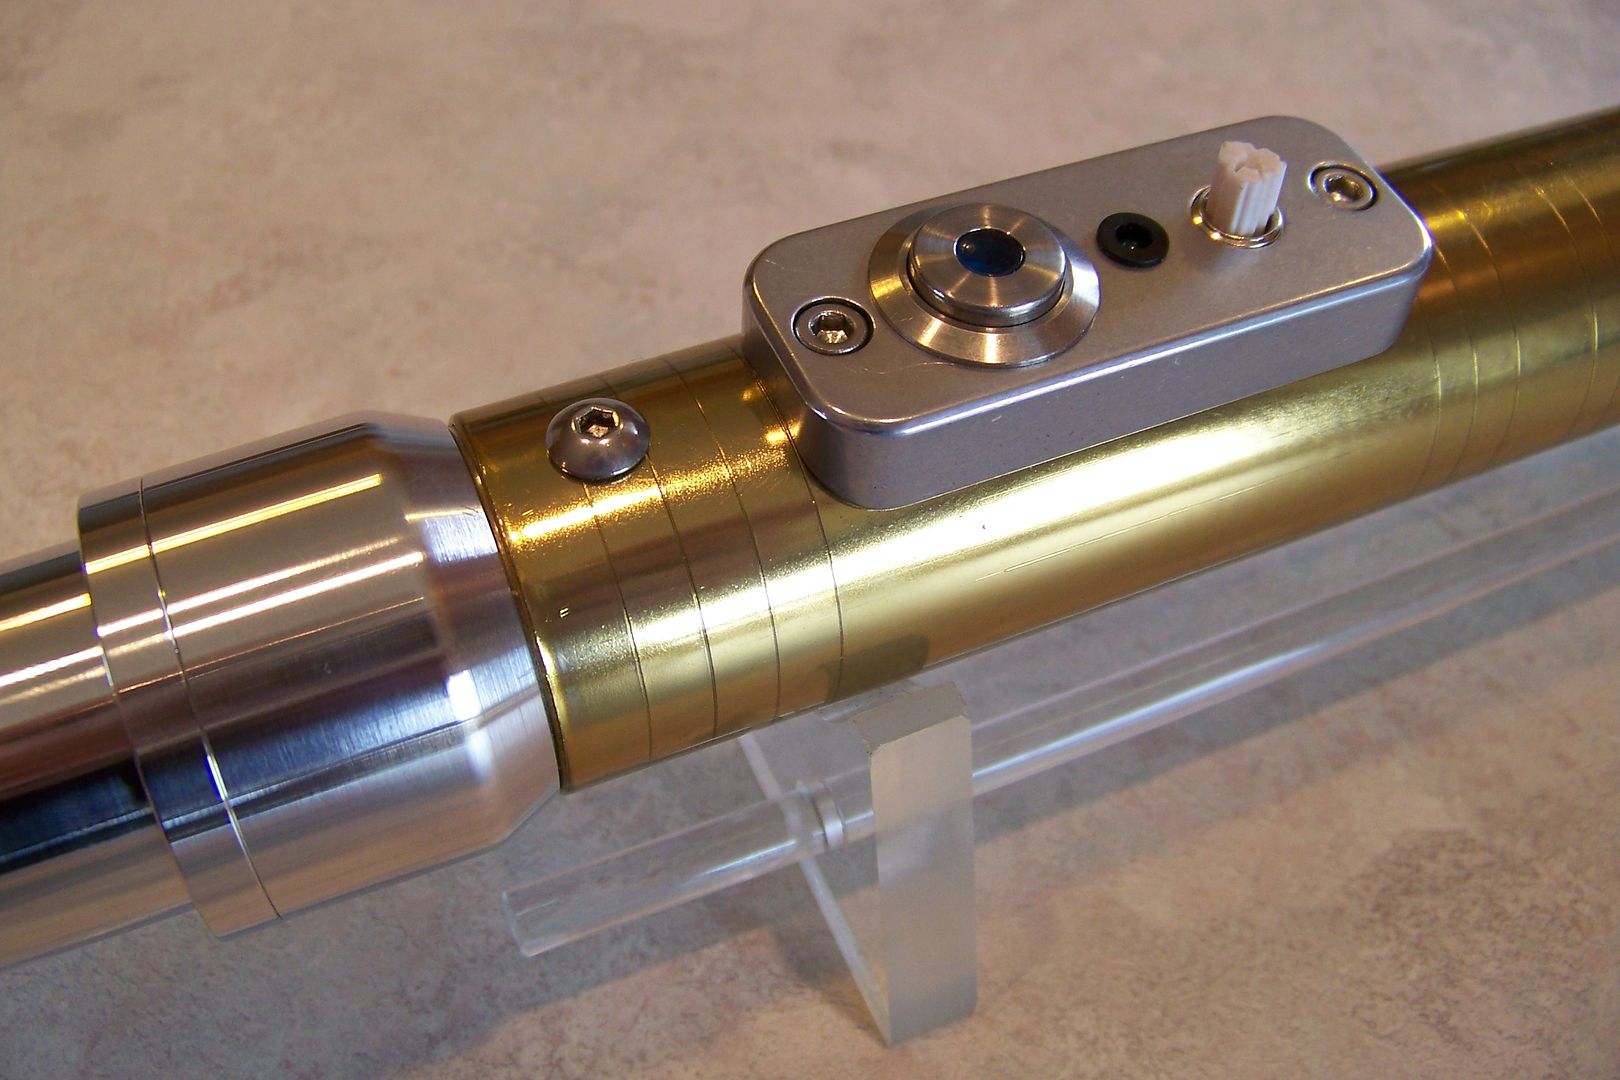
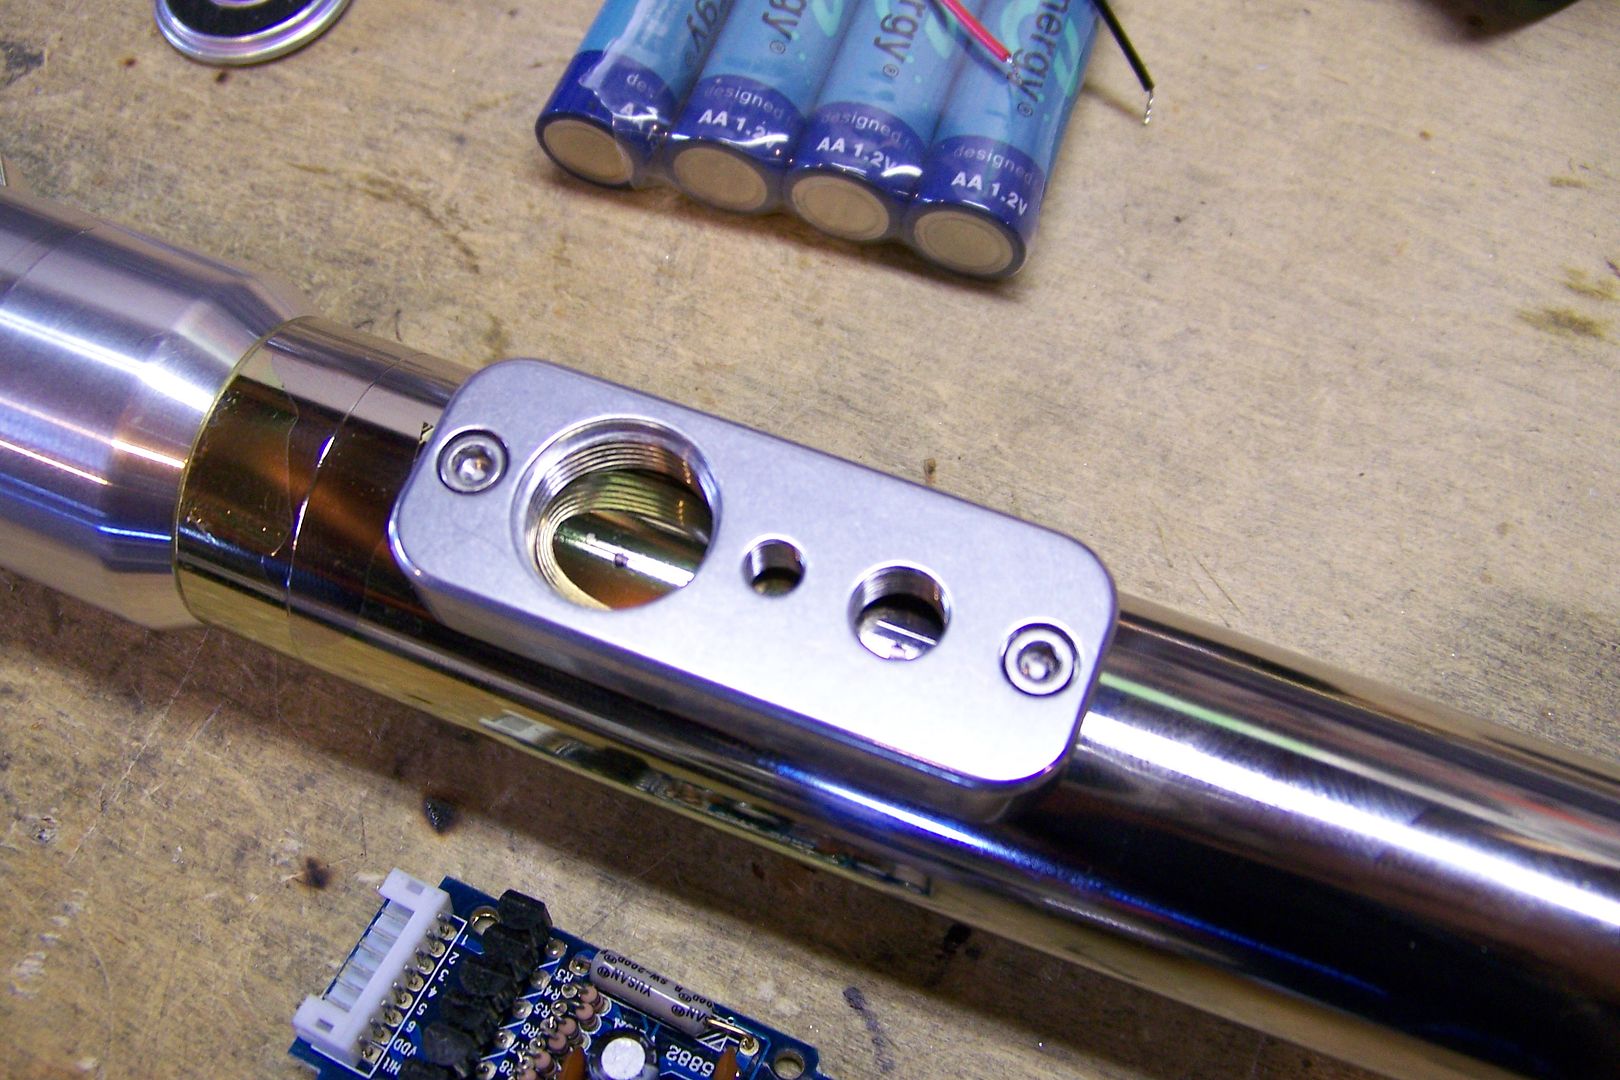
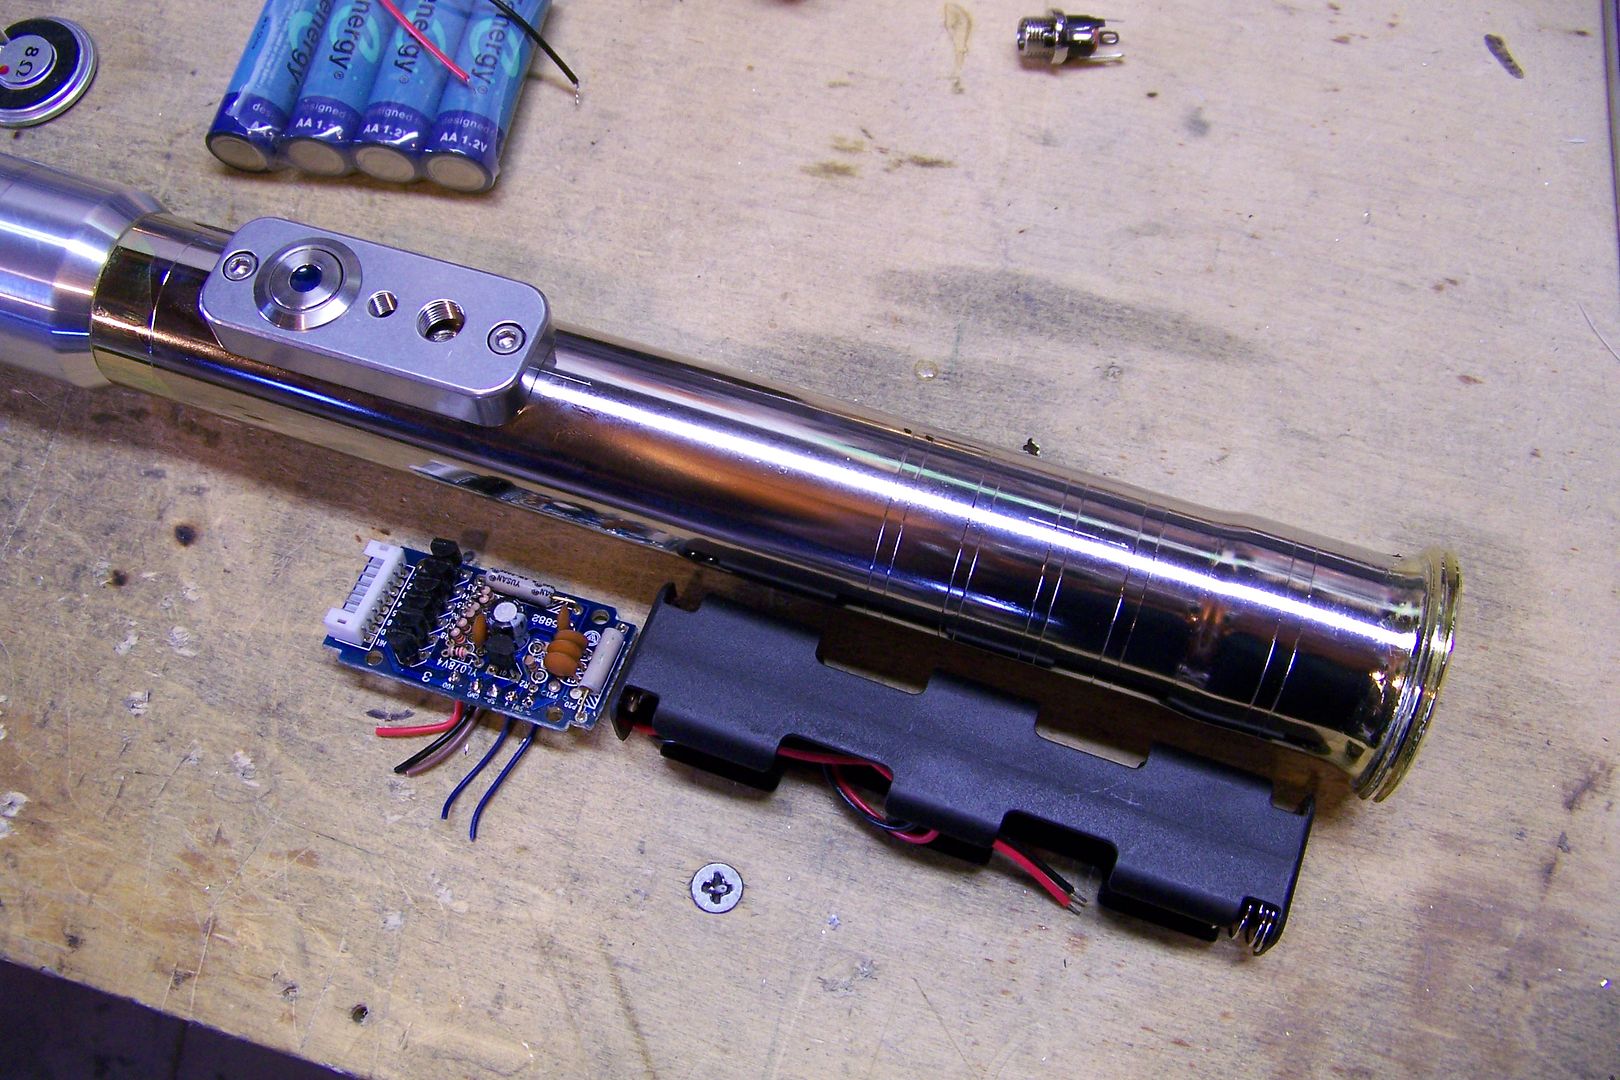
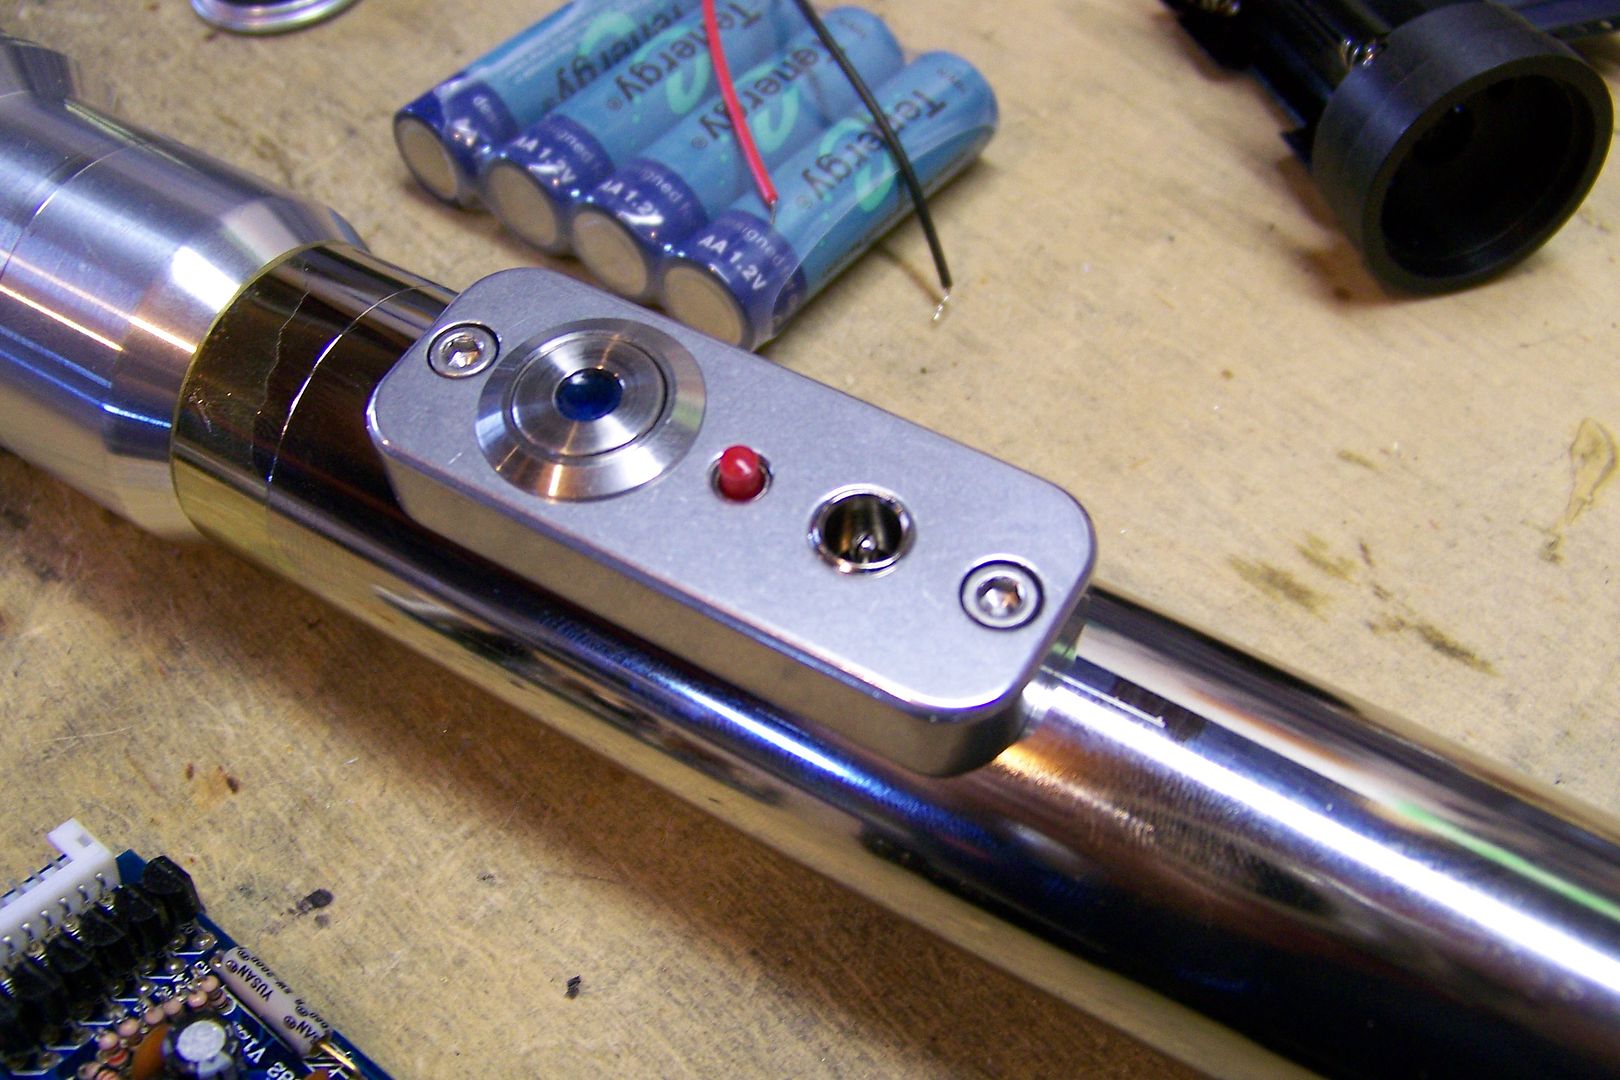
Looks like if i use this tube, it'll definitely have to be powder coated! I peeled of almost all of the coating, then moved on to figuring out where to mount the switch box to maximize internal space:
Image
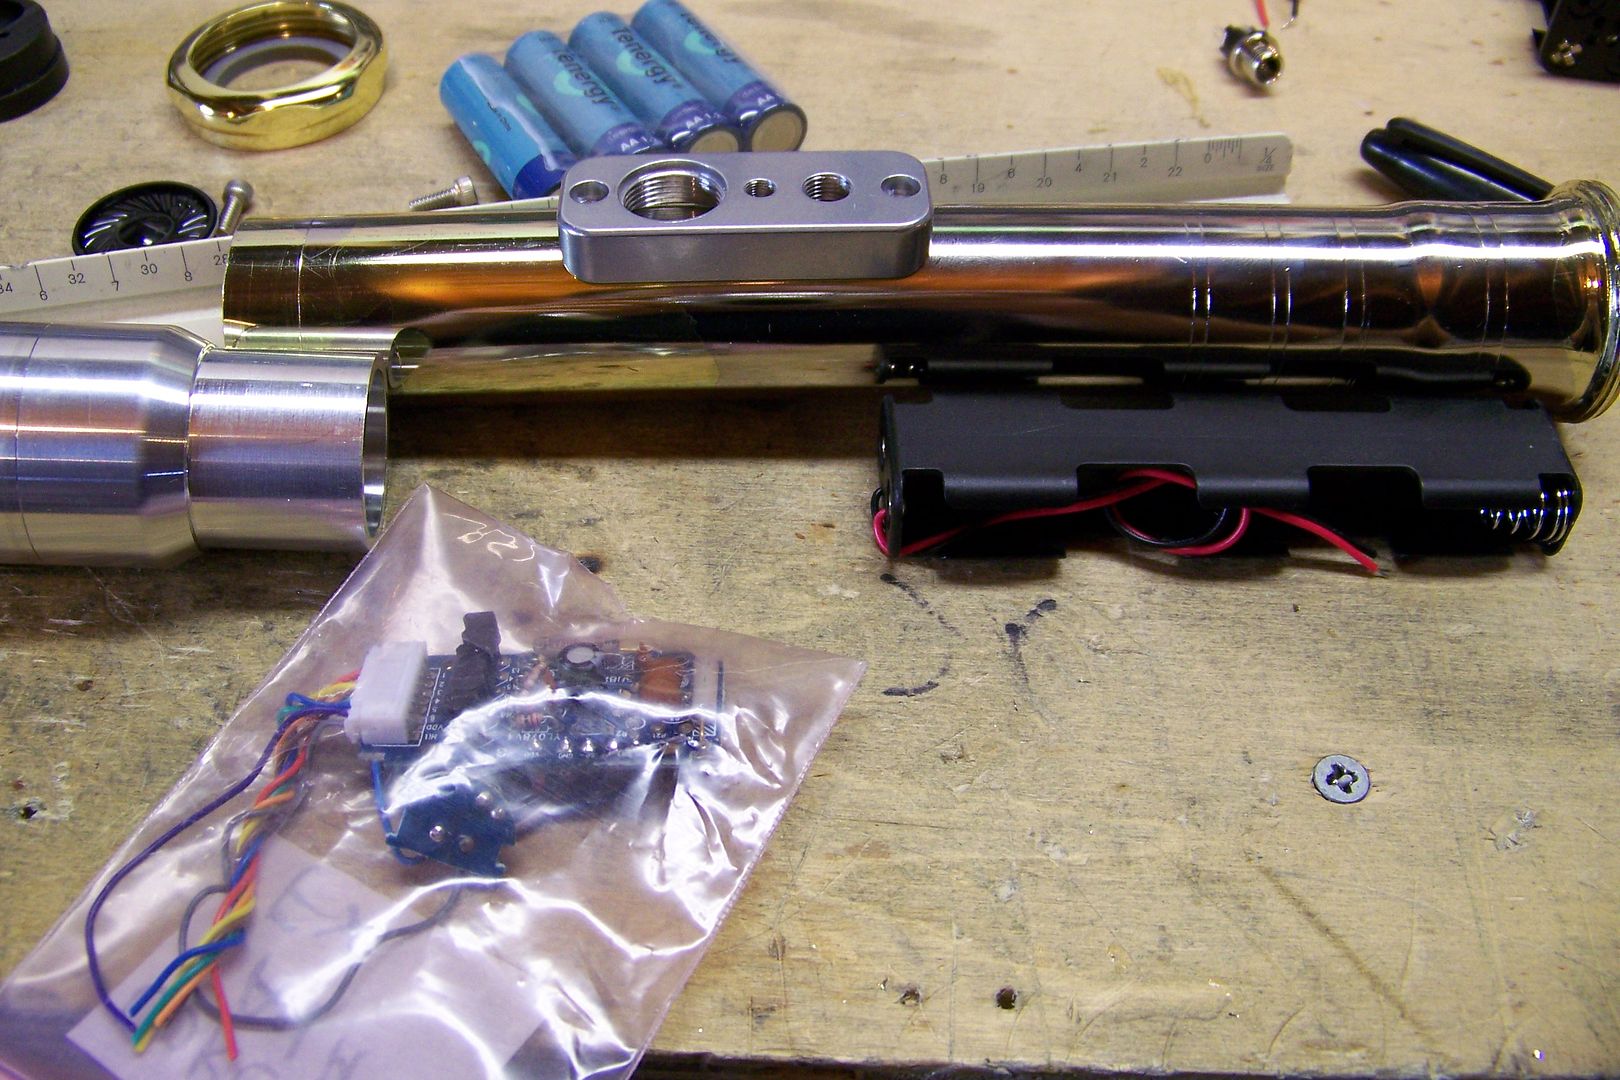
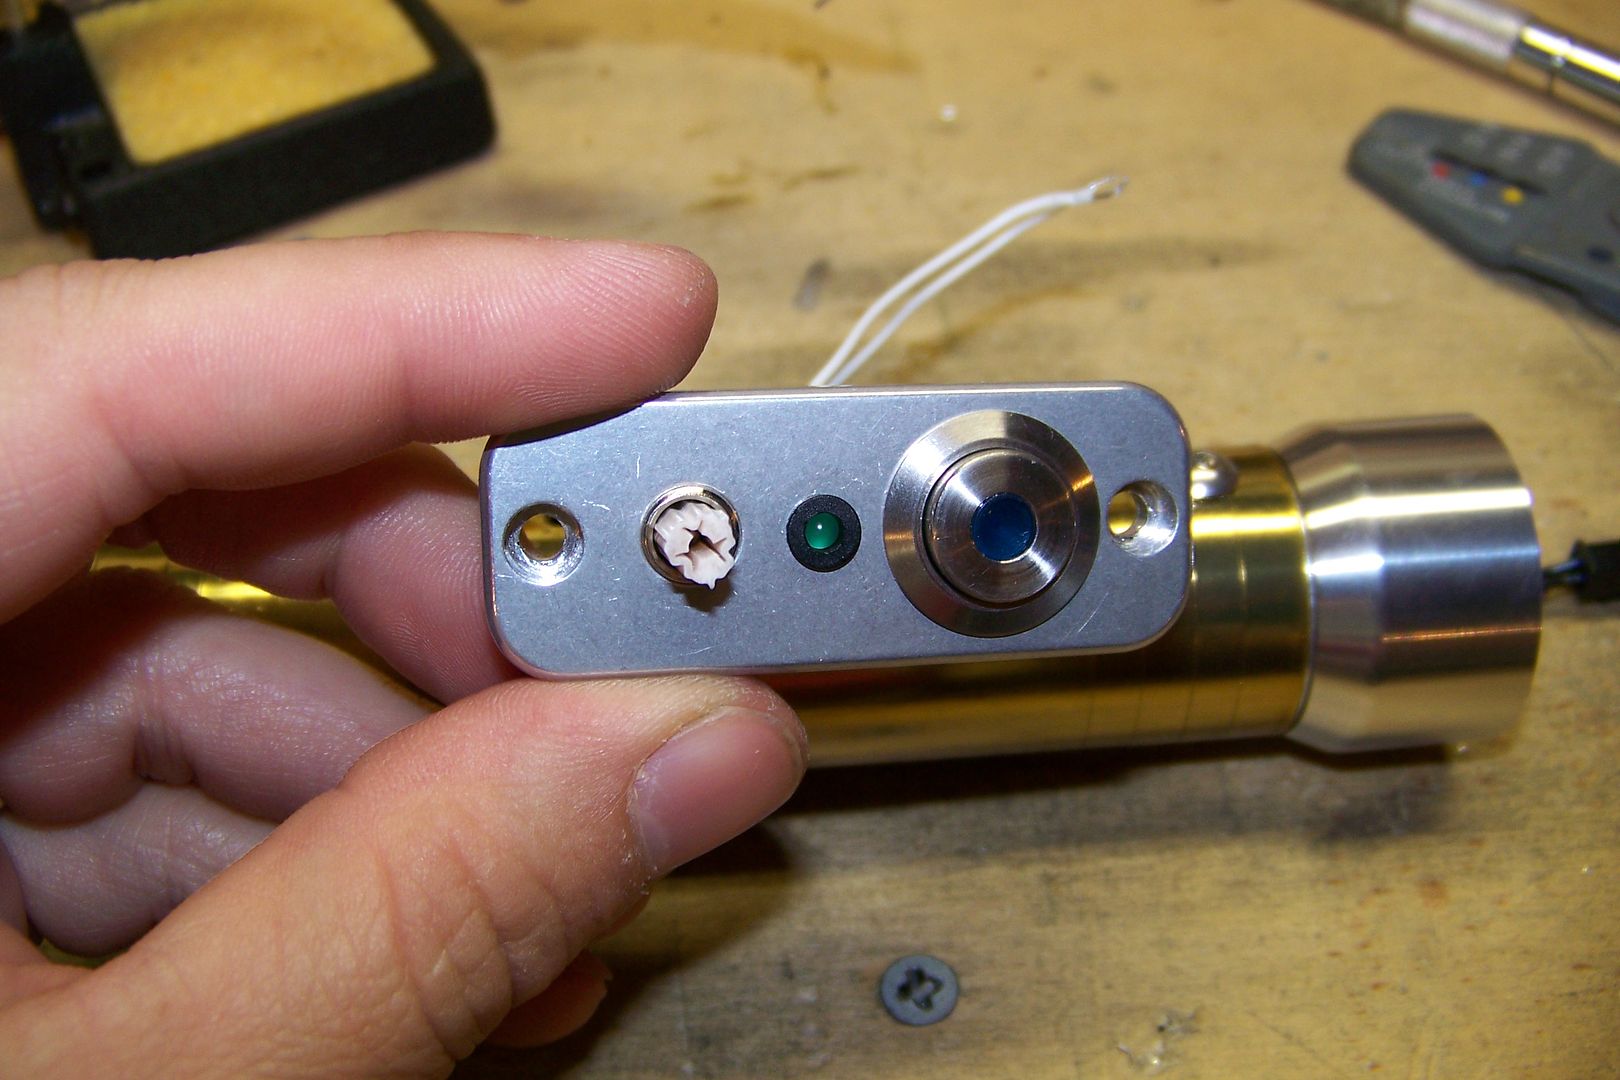
That might work okay.....

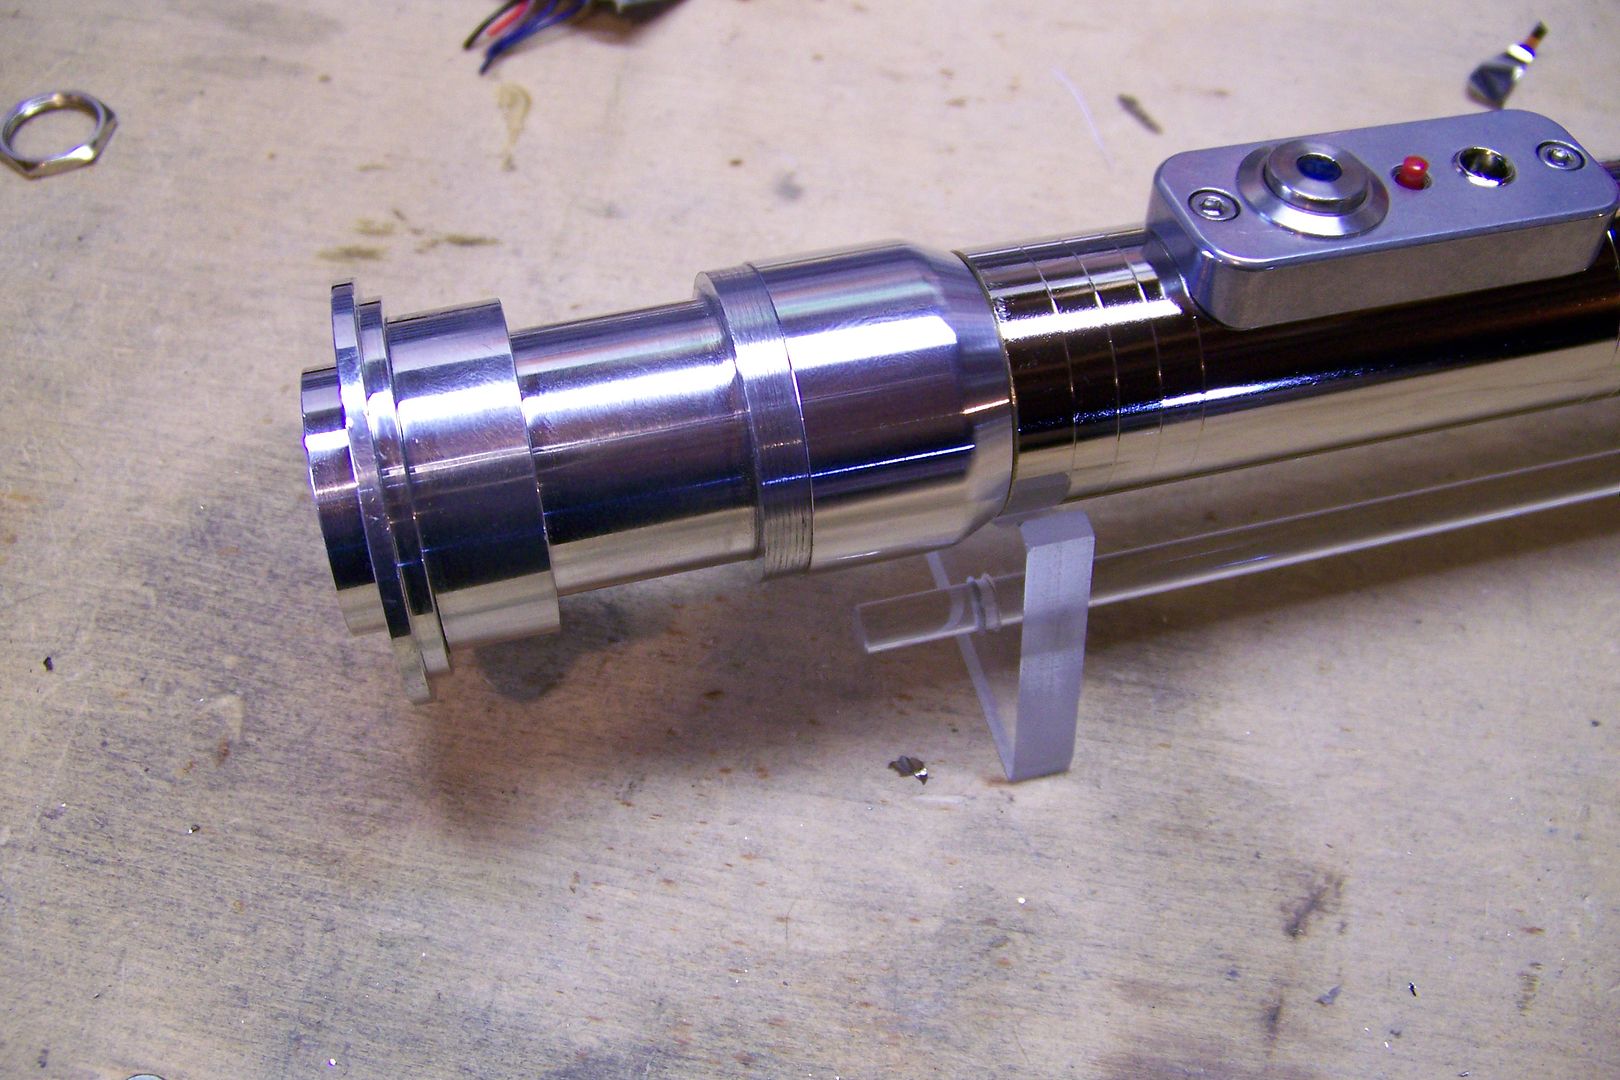
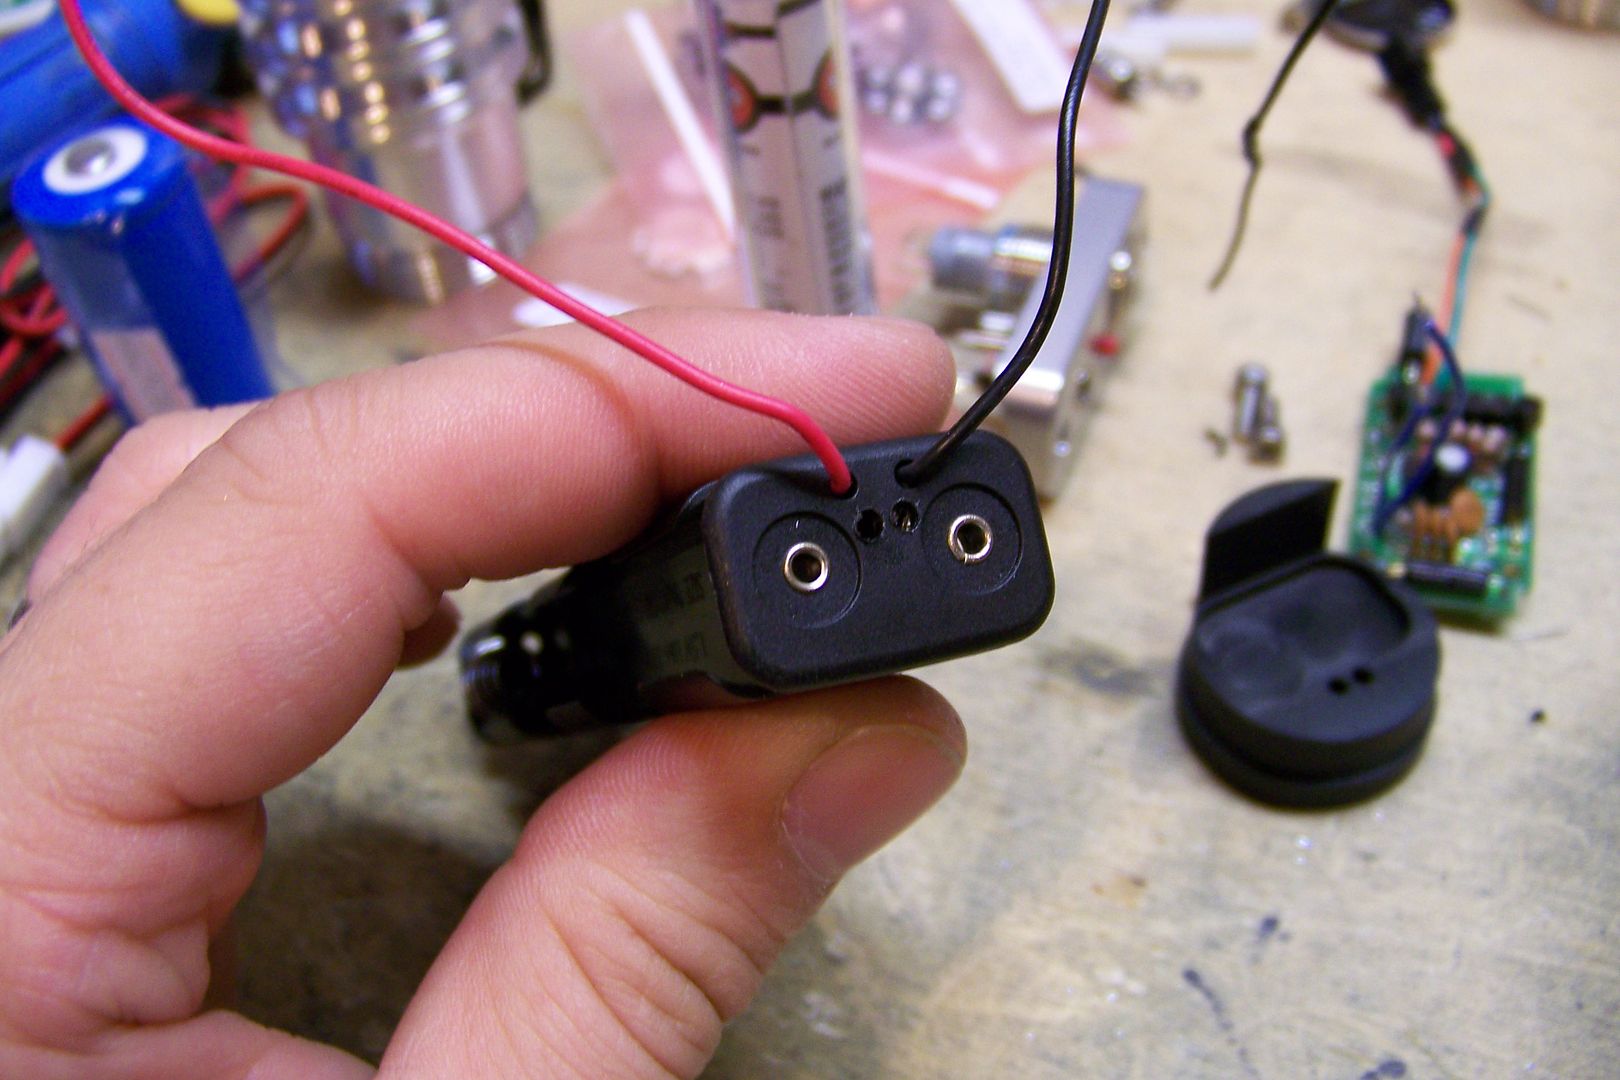
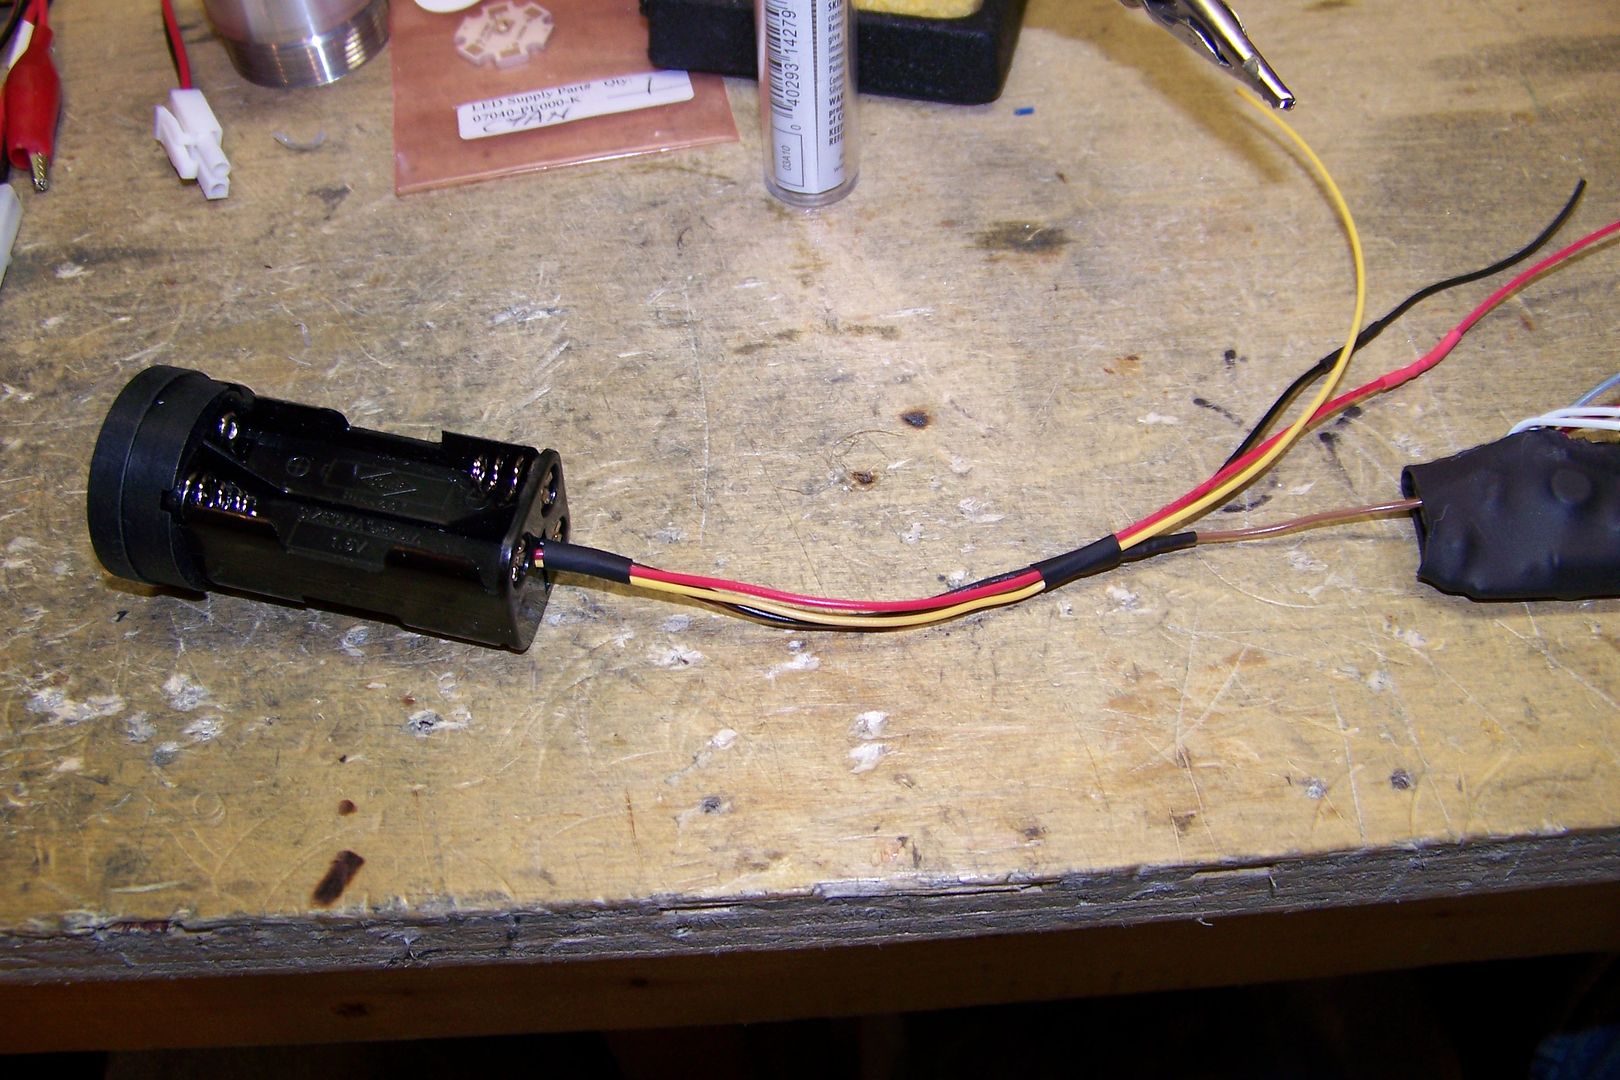
I could move the switch box further forward and switch to a 4-AAA battery holder, too:
Image

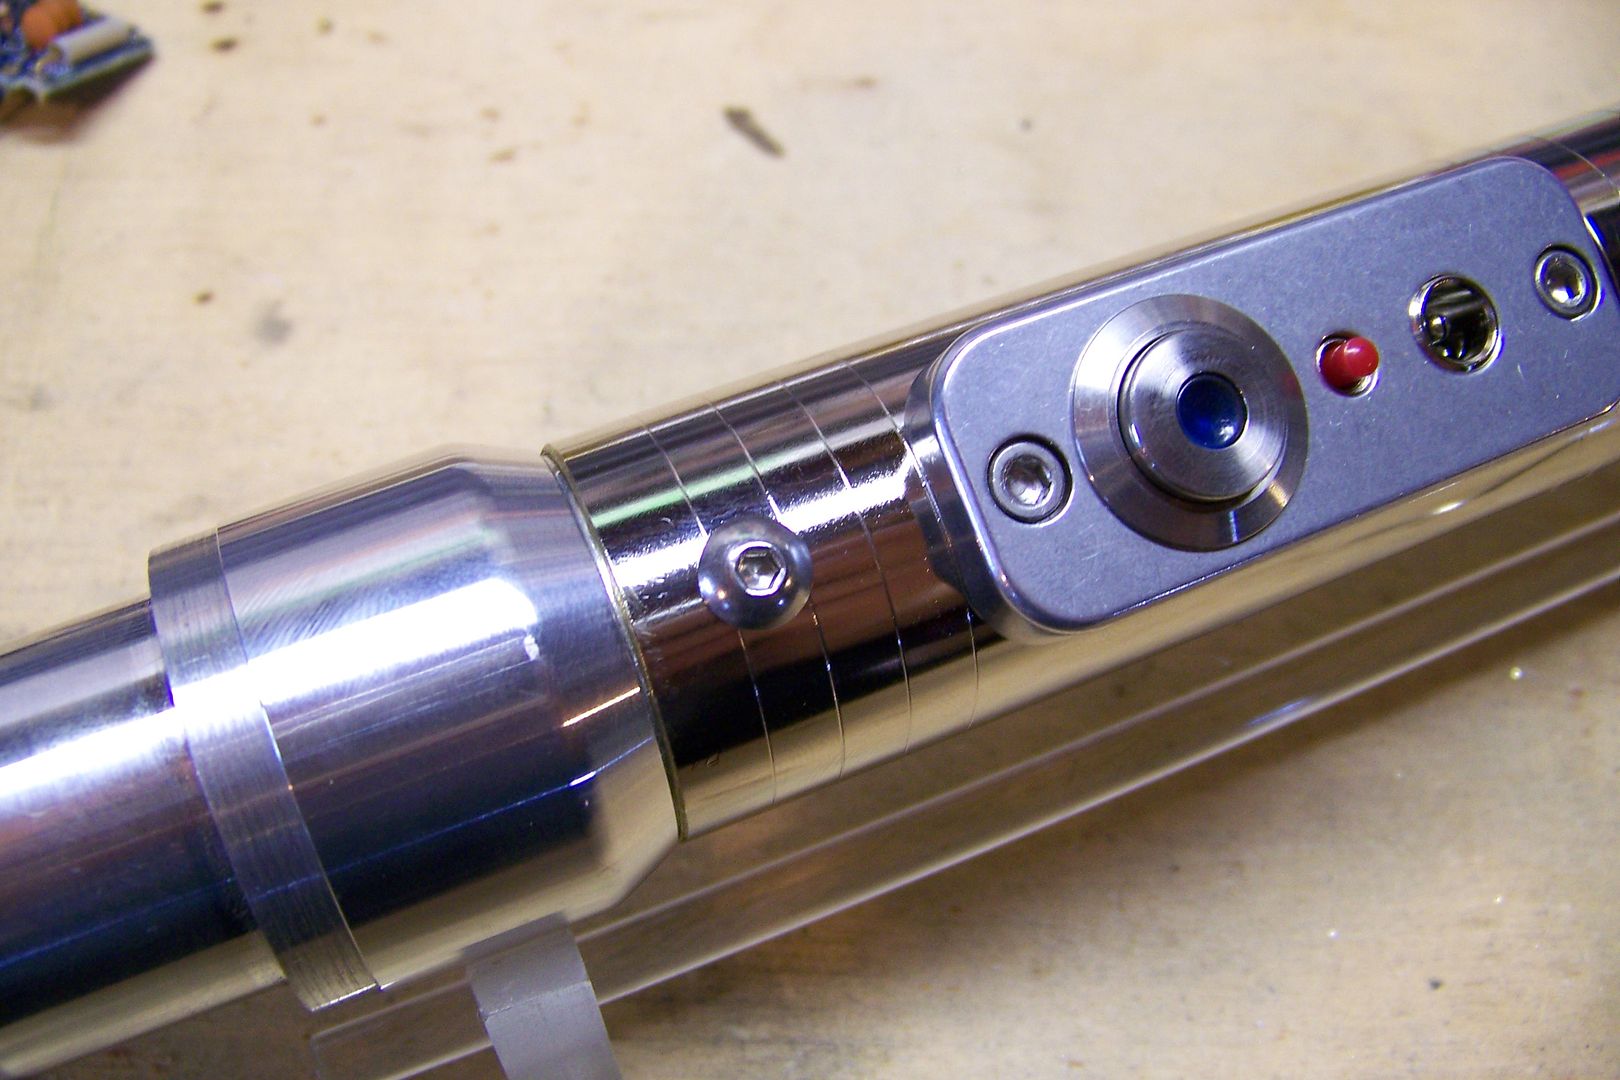
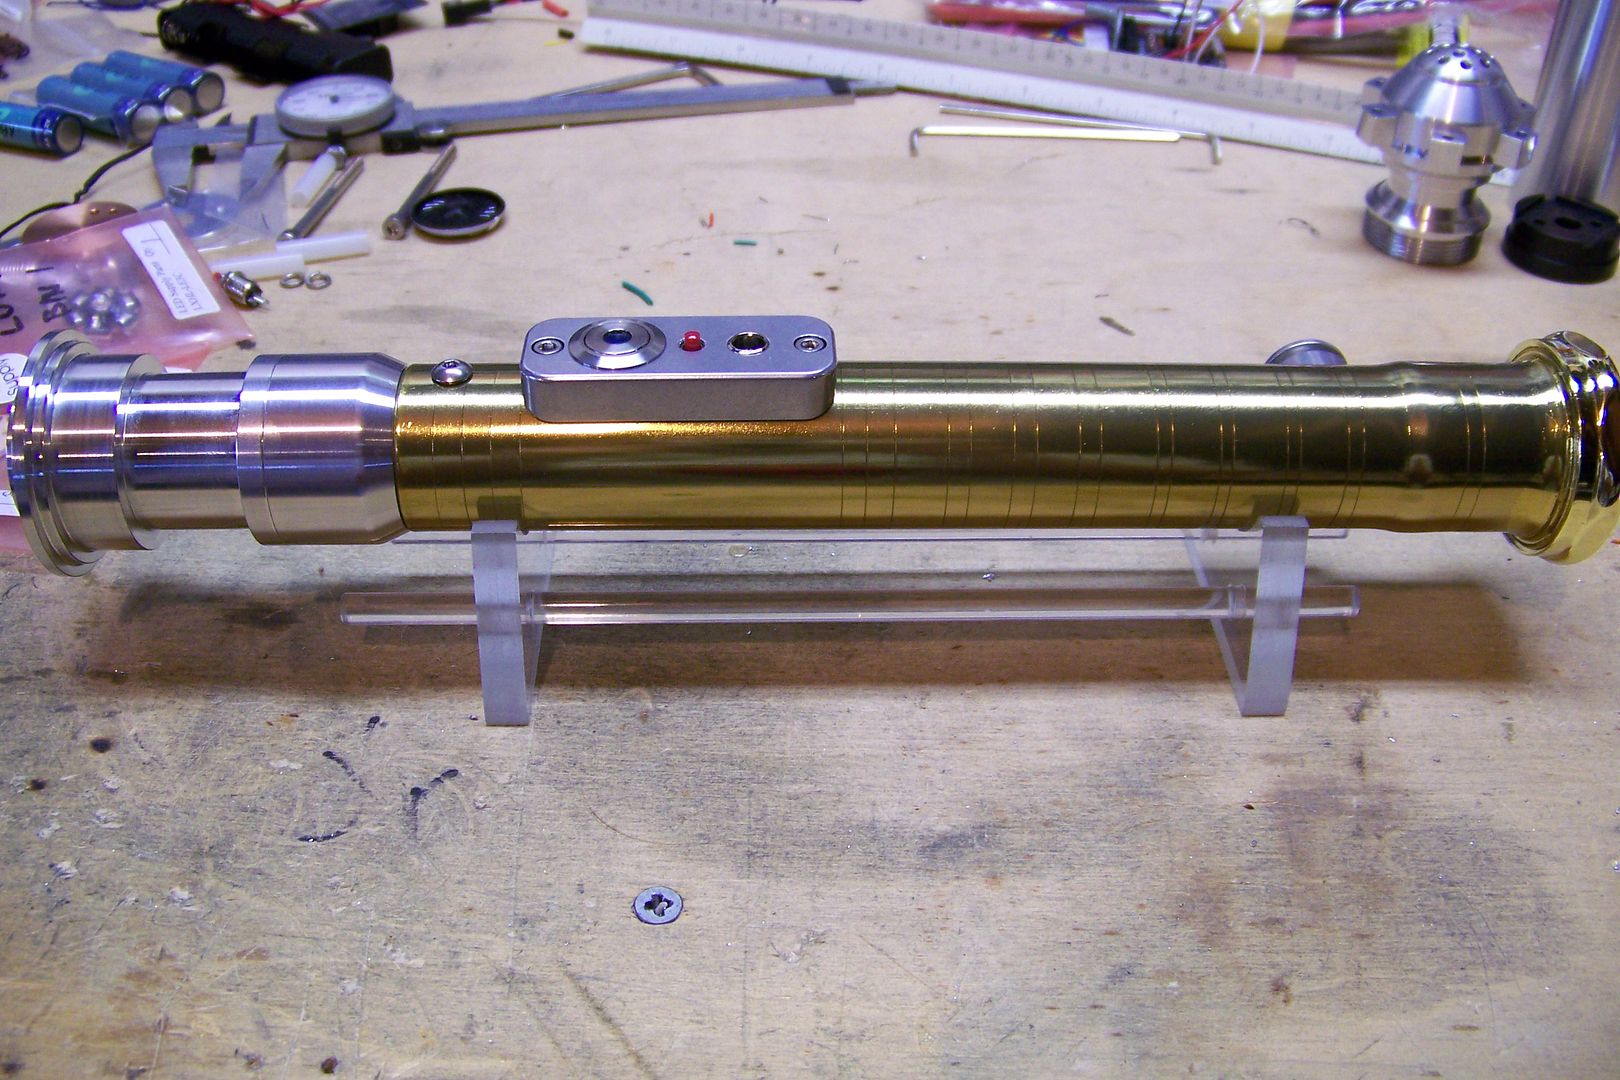
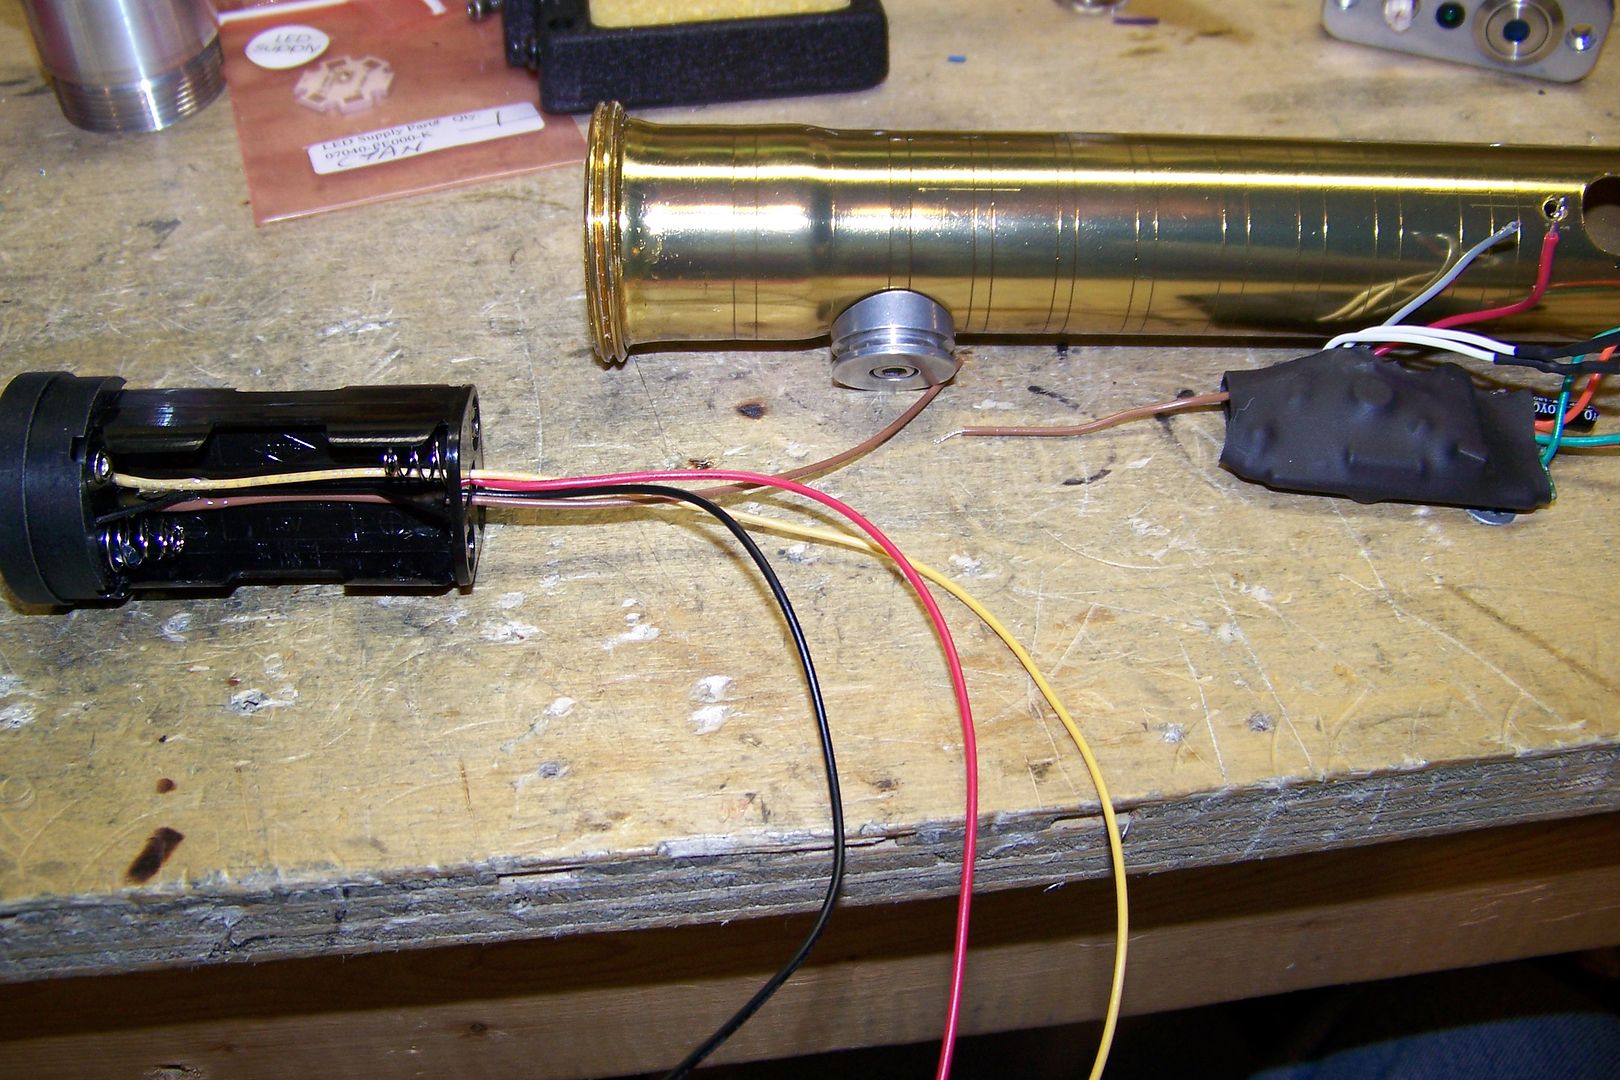
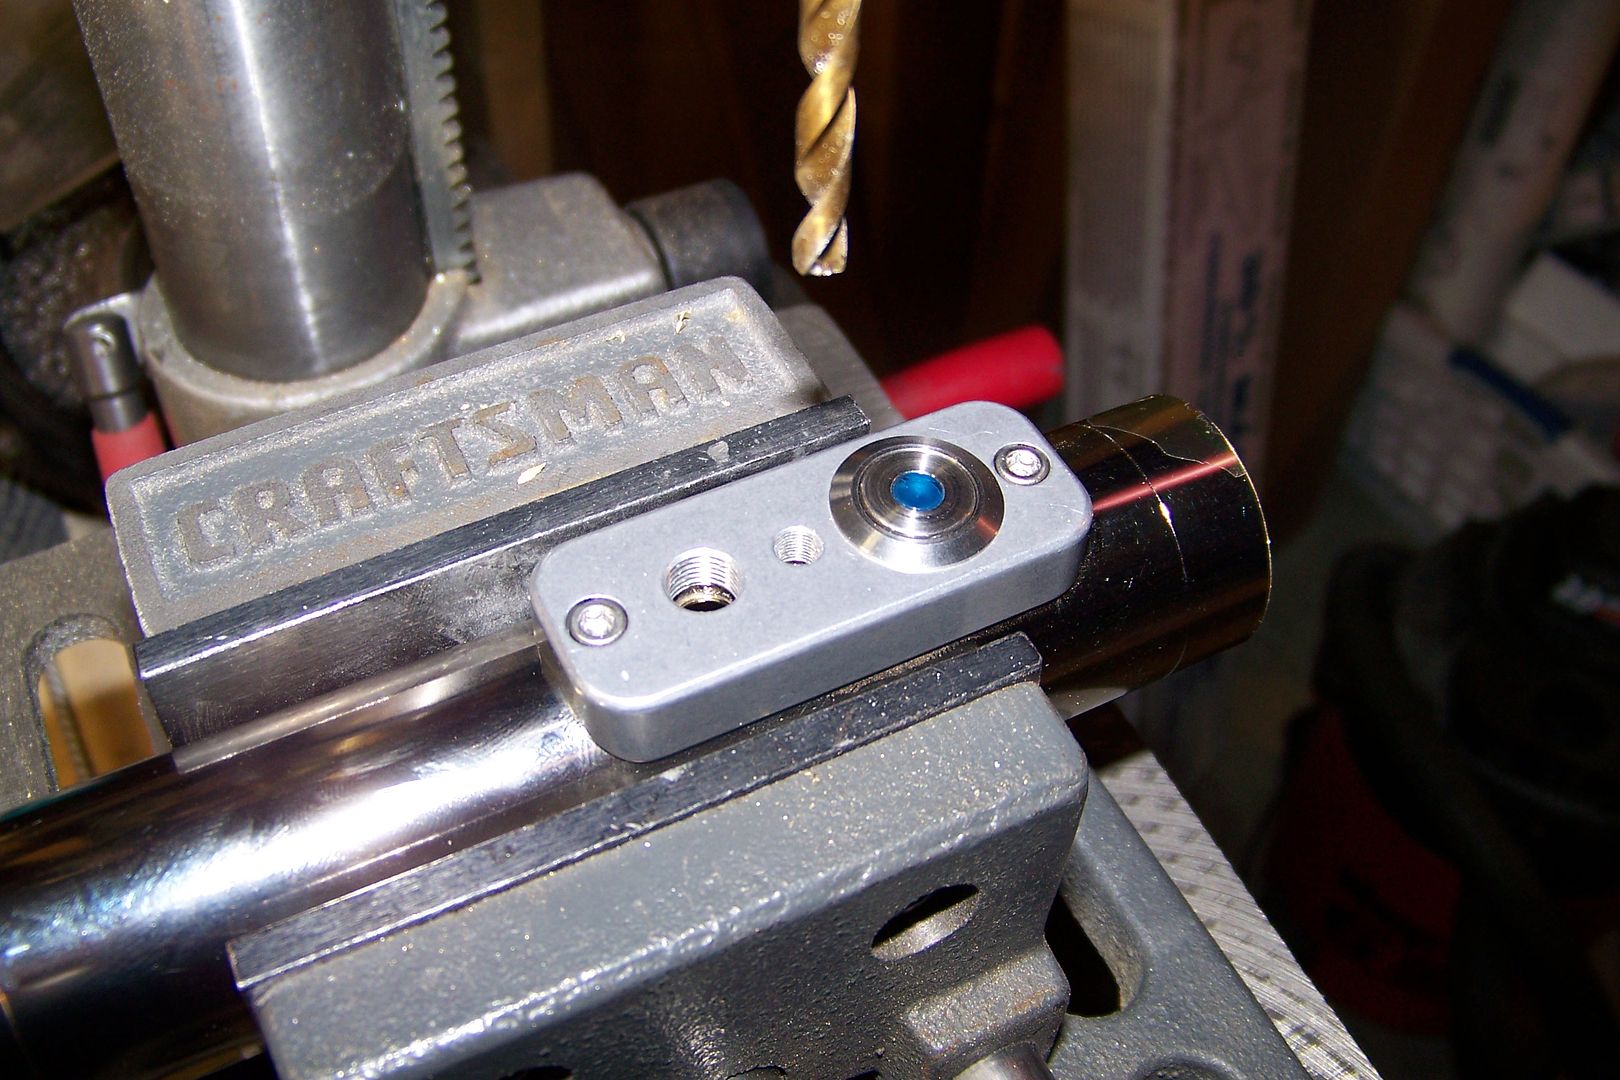
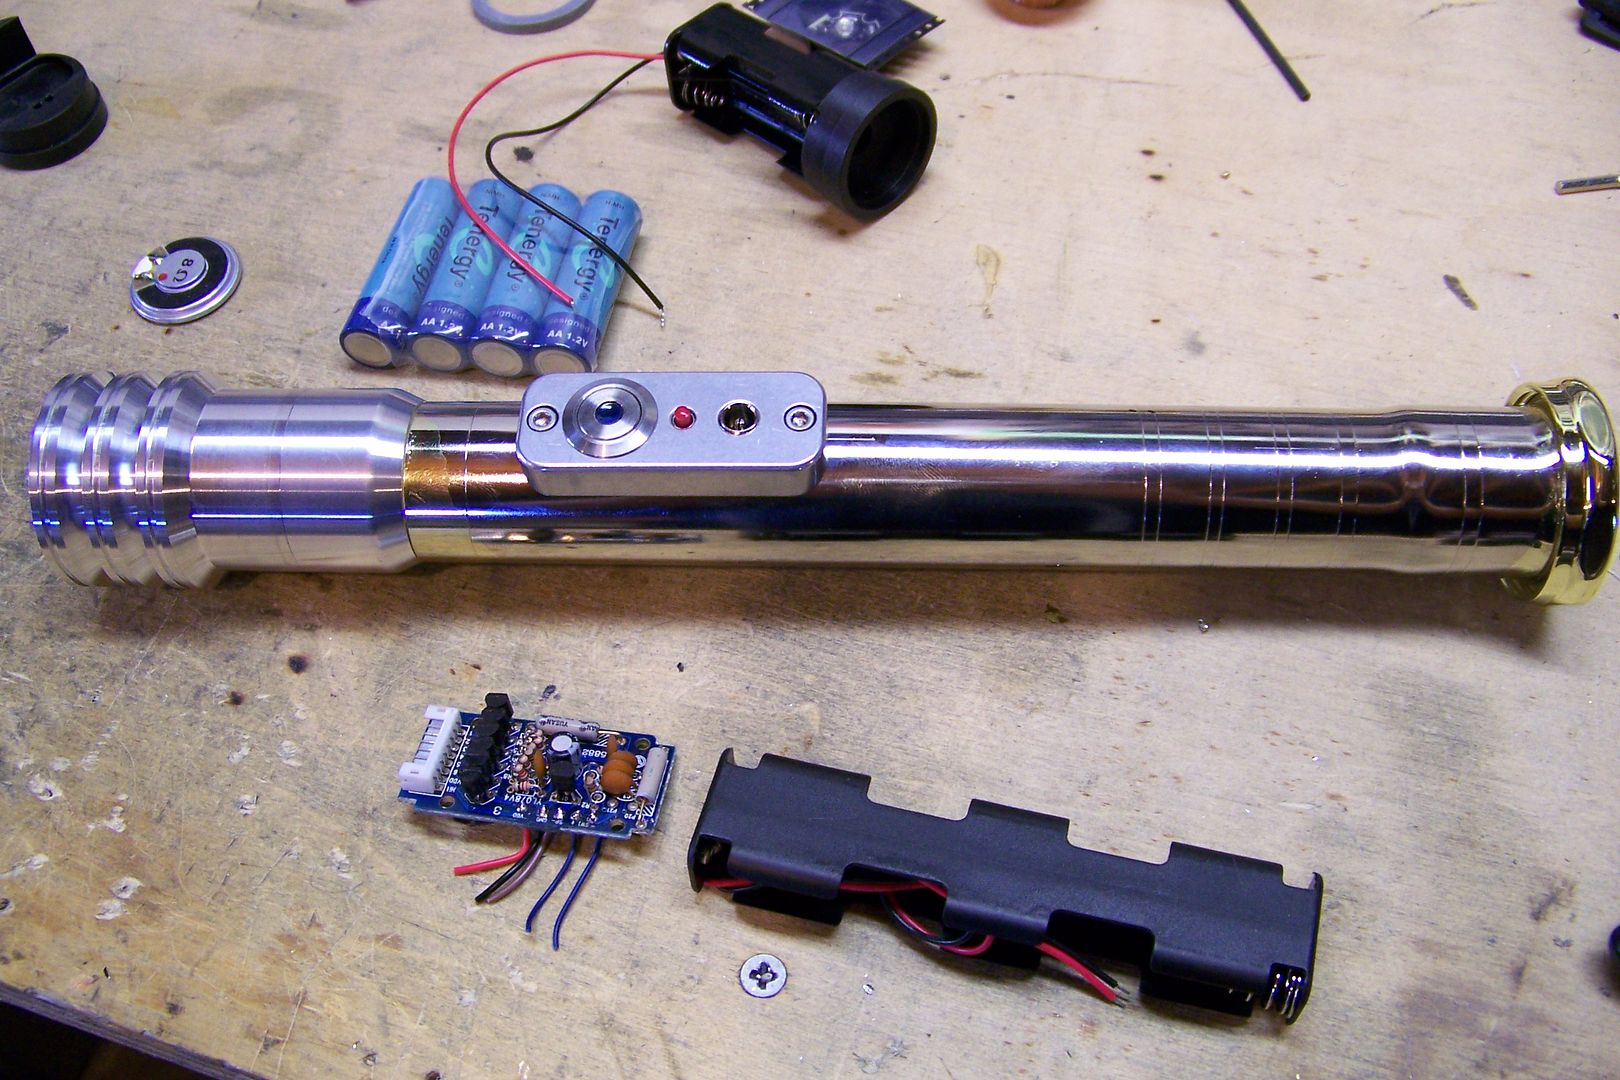
Or I could put it more centered on the hilt and put the sound board in front of the switch box:
Image
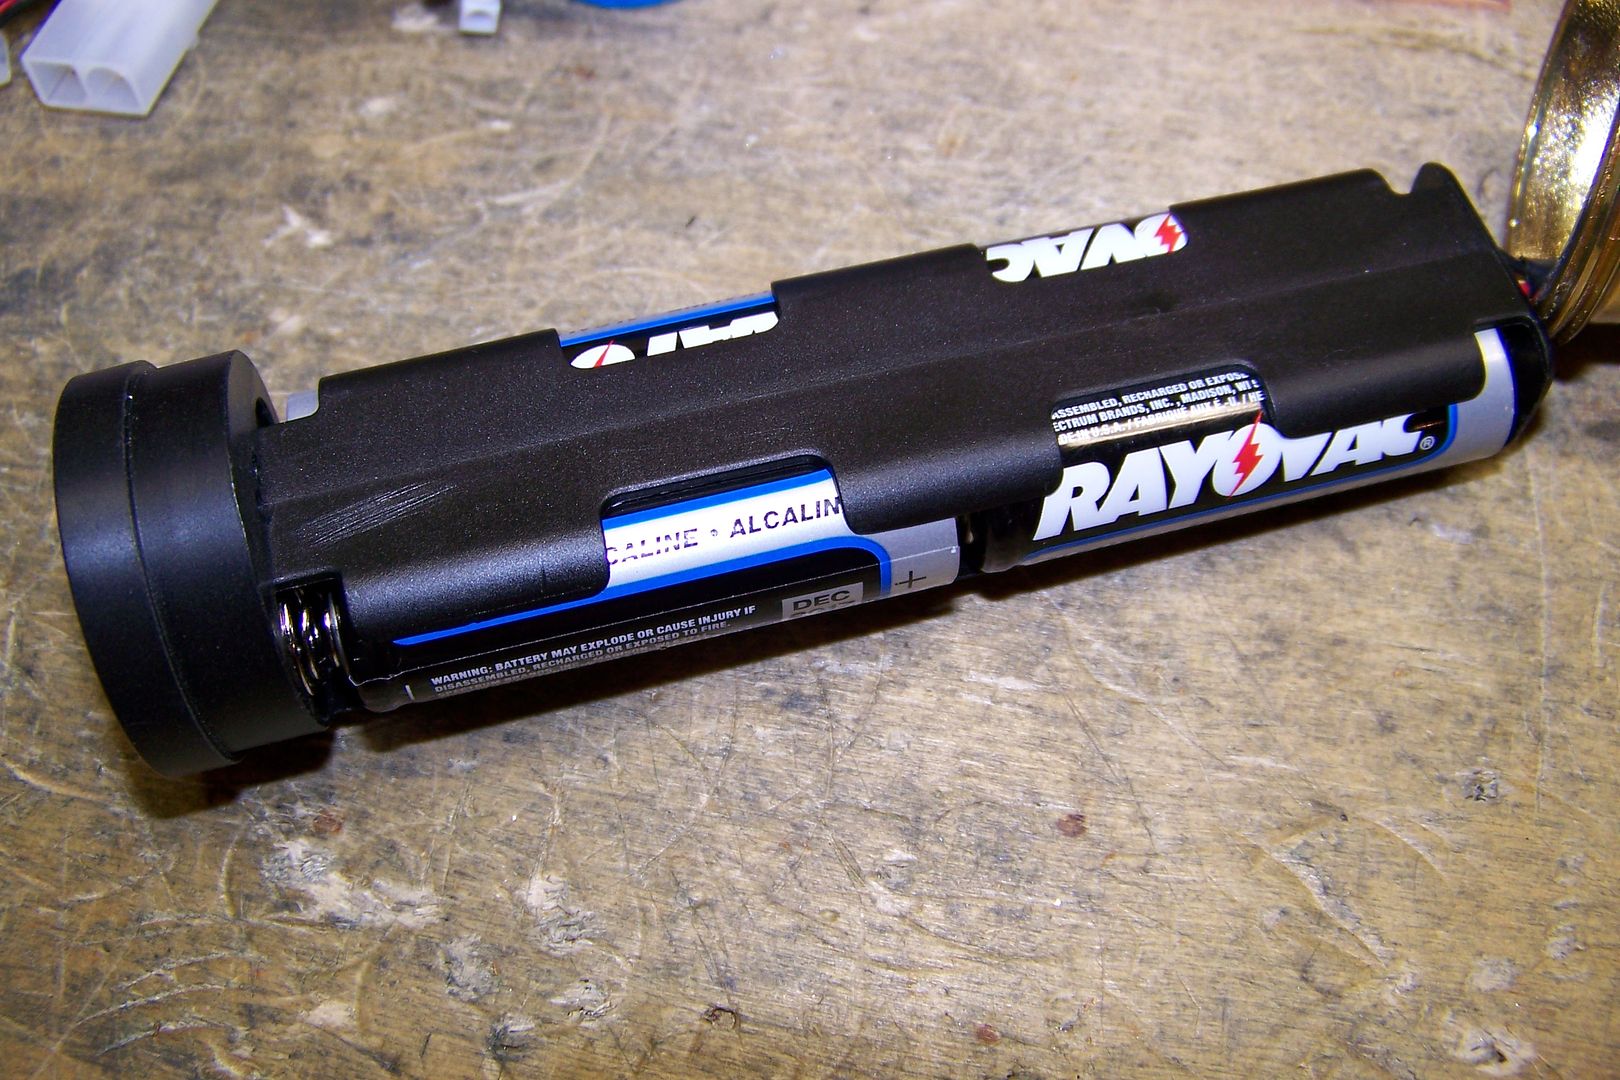
This would still need the AAA battery holder.....I'd rather use AA's for the increased capacity so the saber will run longer at the Base/Garrison events.

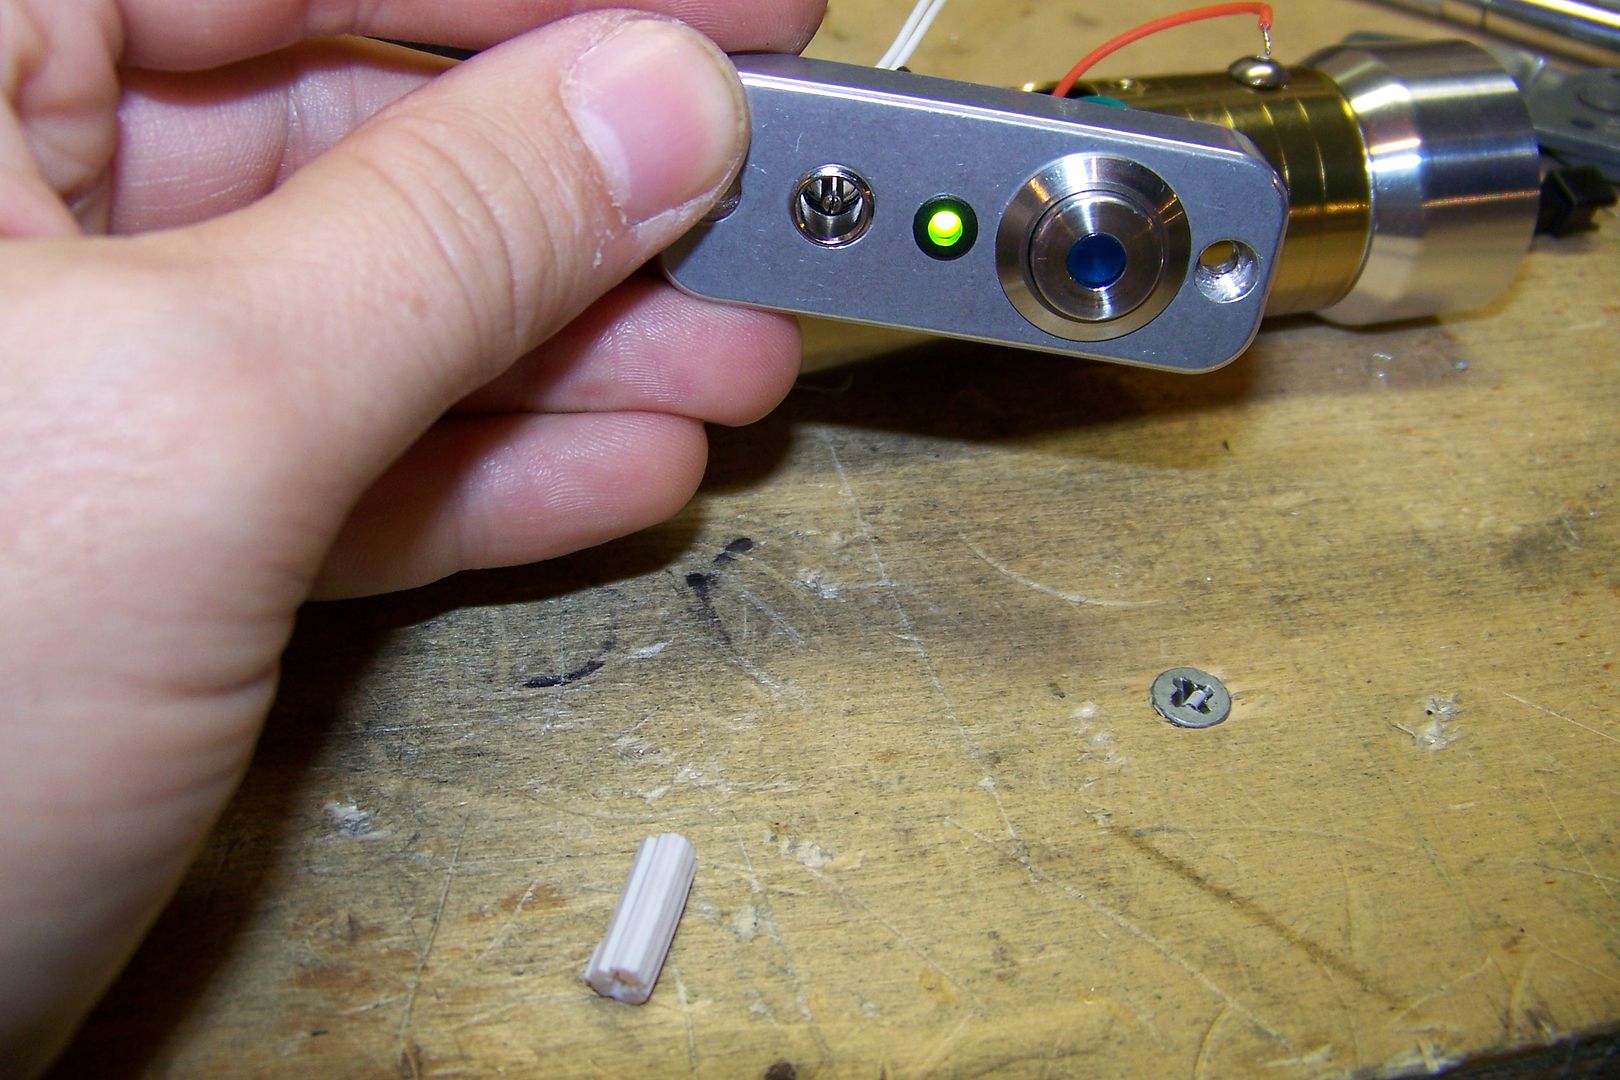
My instincts are telling me to go with the first set up and the AA battery holder.....
User avatar
Jay-gon Jinn
Great Lakes Base Member
Posts: 378
Joined: Wed Jun 27, 2007 1:25 pm
Location: Saint Johns, MI

Re: A lightsaber build for Karen Larabel, a.ka. JoCasta Nu

Post by Jay-gon Jinn »

So I set up the tube in the drill press and drilled a hole:
Image
I then tapped it for 6-32 threads and drilled and tapped a second hole, then bolted on the switch box:
Image

This is how everything should fit inside the hilt:
Image

Now I can drill for the switch...this required a 5/8" (16mm) hole:
Image
After some de-burring and adjusting with the 60 grit drum on the rotary tool, the switch box with the switch installed fits on like this:
Image
The battery pack and soundboard will be right where they are in the above pic when the saber is completed.

To use the other mounting holes in the box (a recharge port and extra push button) I'll need to drill some more holes;
Image
Using the box itself as a jig, I drill out the hole for the recharge port using a 15/64th bit, and then I drilled the switch hole using an 11/64th bit. These were the ones that fit right into the holes that were already in the switch box and are going to be used as pilot holes for the larger ones the parts will require.

I removed the box, and then drilled the hole for the recharge port larger using a 1/2" bit....this was the size required for the base of the charge port to fit through the hilt, and then changed the sanding drum out on the rotary tool for a cutting disc:
Image

I used the disc to create a simple slot between the two holes for the extra switch to fit through:
Image

The switch will fit right in there:
Image

I mocked up the switch box assembly and attached it:
Image

I think this set up should work just fine:
Image

Next on the "to-do" list on this are finishing up the grips and drilling and tapping for the sinktube adapter mounting screws. Also, after looking at this one some more, i think I may need to change the blade holder out for a smaller style....this one just looks to clunky to me.....it makes the saber top-heavy, too.
User avatar
Myshadowstar
GLG Member (Reserve)
Posts: 677
Joined: Thu Aug 12, 2010 6:38 pm
Legion ID: 7957
Location: Southgate, MI
Contact:

Re: A lightsaber build for Karen Larabel, a.ka. JoCasta Nu

Post by Myshadowstar »

wow nice work cool pics on the in's of lightsaber construction :)
"Only the Shadow knows what evil lurks in the hearts of men..."

Myshadowstar

------------
Old Republic Jedi- complete
Imperial Officer- complete

Image
User avatar
Wags
Garrison Armor Consultant
Posts: 2859
Joined: Thu Jun 14, 2007 12:32 am
Legion ID: 7195
Location: Allen Park, Mi 48101

Re: A lightsaber build for Karen Larabel, a.ka. JoCasta Nu

Post by Wags »

Myshadowstar wrote:wow nice work cool pics on the in's of lightsaber construction :)
Ditto. I love seeing this stuff. Top notch man. I have some of Jays work in my MC. Love the saber you did for me!! :thumbs: :thumbs:
User avatar
Jay-gon Jinn
Great Lakes Base Member
Posts: 378
Joined: Wed Jun 27, 2007 1:25 pm
Location: Saint Johns, MI

Re: A lightsaber build for Karen Larabel, a.ka. JoCasta Nu

Post by Jay-gon Jinn »

Wags wrote:
Myshadowstar wrote:wow nice work cool pics on the in's of lightsaber construction :)
Ditto. I love seeing this stuff. Top notch man. I have some of Jays work in my MC. Love the saber you did for me!! :thumbs: :thumbs:
That mace of yours did turn out very nice, being the first one i converted! The second one I did had an RGB led in it wired to make it purple/violet....that was cool too. ;)

O'm thinking with this one looking and feeling top heavy, though, that I'm going to order up another blade holder/emitter for it and get this one instead:
Image
That should lighten it up, and make it not look so chunky up top.... :wink:
User avatar
Jay-gon Jinn
Great Lakes Base Member
Posts: 378
Joined: Wed Jun 27, 2007 1:25 pm
Location: Saint Johns, MI

Re: A lightsaber build for Karen Larabel, a.ka. JoCasta Nu

Post by Jay-gon Jinn »

I worked on this one a bit more last night, and finished the grips:
Image

I also swapped out the blade holder for another one (MHS style 4) that I borrowed from CS-1:
Image Image
That's a little better....a style 3 will look similar in overall shape.....Let's try the style 5 I have on BS-2 which is also on the bench being stripped down for powder coating:
Image Image
I think we have a winner....I like that style best....it seems to balance it out more, and the weight is a lot better, too....the question now is, do I use a style 5, or a style 8 or 16?

Style 8 shown on BS-22:
Image Image

Style 16 shown on CS-14:
Image Image

I'm liking it with the style 5 myself, but I'll have to see which one Karen likes best.

In the meantime, I can still finish off the rest of the hilt, and did so by drilling and tapping for the mounting screw for the sink tube adapter:
Image
Drilled the hole......

Then tapped it for an 8-32 screw:
Image Image

I also drilled it and tapped it for a second screw on the opposite side:
Image

Last bit of business before this goes off for powder coating is the CT wheel:
Image
This can easily be swapped out for a 5/8" d-ring if need be.

Here's the hilt as it is right now:
Image

A comparison for length with BS-2:
Image
Now I wait until Karen gets back to me about the blade holder, or i just make a decision for her, and for the hilt to be pc'd.

While I wait for that, I can begin prepping this MR board for use in a custom saber, and will cover that here.
User avatar
Myshadowstar
GLG Member (Reserve)
Posts: 677
Joined: Thu Aug 12, 2010 6:38 pm
Legion ID: 7957
Location: Southgate, MI
Contact:

Re: A lightsaber build for Karen Larabel, a.ka. JoCasta Nu

Post by Myshadowstar »

sweet its almost like you need one of those flip books used to have as a kid where you could swap the lion head on a monkey body with an aligator tail or vice versa lol with all the styles available.
"Only the Shadow knows what evil lurks in the hearts of men..."

Myshadowstar

------------
Old Republic Jedi- complete
Imperial Officer- complete

Image
User avatar
SlvrCrest
GLG Member
GLG Member
Posts: 930
Joined: Mon Mar 12, 2007 7:14 pm
Legion ID: 4617
Location: Flint, MI

Re: A lightsaber build for Karen Larabel, a.ka. JoCasta Nu

Post by SlvrCrest »

They have something like that on the Custom Saber Shop's site. You can see what your saber will look like with all the pieces. Its fun, but it can get dangerous if you spend too much time there. So many options so little time.
Jedi Master Kolban Gryph-Lyn
TS-4617
User avatar
Jay-gon Jinn
Great Lakes Base Member
Posts: 378
Joined: Wed Jun 27, 2007 1:25 pm
Location: Saint Johns, MI

Re: A lightsaber build for Karen Larabel, a.ka. JoCasta Nu

Post by Jay-gon Jinn »

SlvrCrest wrote:They have something like that on the Custom Saber Shop's site. You can see what your saber will look like with all the pieces. Its fun, but it can get dangerous if you spend too much time there. So many options so little time.
you forgot "And so little money." :wink:
User avatar
Jay-gon Jinn
Great Lakes Base Member
Posts: 378
Joined: Wed Jun 27, 2007 1:25 pm
Location: Saint Johns, MI

Re: A lightsaber build for Karen Larabel, a.ka. JoCasta Nu

Post by Jay-gon Jinn »

Okay....been a few days since I posted here, but I do have a bit of an update....the main body tube for the saber will be getting powder coated tomorrow (Thursday, 9-9-10) and i should have it back by the following Monday....Tuesday at the latest.

In the meantime, I prepped an MR "Jedi" sound board for possible use in this saber:
Image
I began by removing the solder from the wires that came on the board. I use an industrial grade solder sucker for this:
Image
This has a locking mechanism in it that allows me to "load" it with vacuum, then by pressing a button, it releases and sucks the solder off the pcb:
Image
The wire can then be removed by simply pulling it out of the hole in the pcb. Sometimes it's necessary to reheat the pad to release any solder that might still be inside the hole holding the wire.

I removed all of the factory wires:
Image
Then began replacing them with my own:
Image
This red one is the main battery positive lead. This will eventually go to the positive terminal on the recharge port.

I then added all of the rest of the necessary wires:
Image
The view from the bottom:
Image
The black wire is the negative or ground for the board...this one will go to the terminal on the recharge port that will get disconnected when the power jack is plugged in for recharging....it will prevent the possibility of current running through the soundboard when the batteries are charging, which could damage the sound board.

The brown wire is the speaker negative....the positive for the speaker will be run to the positive terminal on the recharge port....MR and the new Hasbro Force FX sabers all share the speaker positive with the battery positive. The white wires are the switch wires.

For this board to properly power the main led, I'll need to bundle up the negative leads for the old led string:
Image
I stripped them back far enough to twist all of the bare copper leads together and then soldered them:
Image
To use the clash sensor, I'll have to replace one of the leads from the sensor's pcb:
Image
That little blue wire needs to go to the positive lead for the main blade led, the purple wire in the above picture.

I soldered a longer blue wire to the pad the old one was attached to, and bundled it to the purple positive lead:
Image
I soldered them together:
Image
Usually, I hot glue the sensor to the top of the board like so:
Image
I'm not sure there'll be enough room to do that in the hilt if I use this one for this saber because the board will need to fit under the recharge port when it's installed. I may have to use another one that I have here that has had the header plug from the old blade connection removed.

That board looks a little like this:
Image
so that's basically how I prep an MR/HSS FX sound board for use in a custom saber. Next time I have an update, hopefully, it'll be to show the installation in the hilt.
User avatar
Mira_Darkstar
GLG Member
GLG Member
Posts: 763
Joined: Tue Jun 01, 2010 3:44 pm
Location: Lansing, MI

Re: A lightsaber build for Karen Larabel, a.ka. JoCasta Nu

Post by Mira_Darkstar »

So many wires!
Costumes: Mara Jade, Slave Leia, and Rey.
User avatar
Myshadowstar
GLG Member (Reserve)
Posts: 677
Joined: Thu Aug 12, 2010 6:38 pm
Legion ID: 7957
Location: Southgate, MI
Contact:

Re: A lightsaber build for Karen Larabel, a.ka. JoCasta Nu

Post by Myshadowstar »

do I cut the red wire or the blue wire zomg! lol awsome.
"Only the Shadow knows what evil lurks in the hearts of men..."

Myshadowstar

------------
Old Republic Jedi- complete
Imperial Officer- complete

Image
User avatar
Jay-gon Jinn
Great Lakes Base Member
Posts: 378
Joined: Wed Jun 27, 2007 1:25 pm
Location: Saint Johns, MI

Re: A lightsaber build for Karen Larabel, a.ka. JoCasta Nu

Post by Jay-gon Jinn »

Mira_Darkstar wrote:So many wires!
Oh, that's only what, 6 or 7? My personal brass saber has about 20 wires in it. :shock:

I got the main hilt tube back from powder coating, and it is once again a nice golden color! Pictures to come tomorrow.
User avatar
Jay-gon Jinn
Great Lakes Base Member
Posts: 378
Joined: Wed Jun 27, 2007 1:25 pm
Location: Saint Johns, MI

Re: A lightsaber build for Karen Larabel, a.ka. JoCasta Nu

Post by Jay-gon Jinn »

I got some work done to it today, here's what I got done!

The hilt came back from powder coating after being coated in Translucent Gold, so I put it together to see how it'll look:
Image Image
I think it looks good, and should do nicely!

Here's a couple of close ups of the color:
Image Image
The only thing about these sink tubes I like us that the nut is actually polished brass, not that crummy coating that peeled off, so it's still nice and brassy looking. Powder coating the main hilt saved this one, I think.

So, on to the wiring! I need to drill some holes in the 4-AA battery pack to allow the speaker wires to be run through the inside of the holder to keep it free from wires snagging:
Image
I used a 5/16" bit and drilled both ends of the holder:
Image Image

I had to modify the speaker mount as well:
Image
I eye-balled the approximate location I'd need a hole, and drilled a couple right next to each other to create a slot. It lined up pretty well:
Image
A little adjustment, and the hole was spot-on:
Image
I threaded wires through the holder:
Image
I'll use yellow for the positive, and brown for the negative ('cause it matches the board's wire).

I ran the wires through the hole in the speaker mount:
Image
Then soldered them to the speaker:
Image
Then pulled the wires back through the battery holder to seat the speaker:
Image Image
To finish the battery/speaker pack, I hot glued the speaker mount to the battery holder, then the speaker to the speaker mount by adding a large dollop of glue over the center of the speaker mount, then pushed the speaker into place and held it for a few seconds until the glue cooled and hardened.

I then added some bits of heat shrink tubing on the wires to create a wiring harness:
Image
Battery/speaker pack is finished!

On to the sound board.....the above board is not going to fit in this saber with the switch box located where it is, due to the wires that will be coming from the recharge port, so I went with the modified and repaired board I had on the bench for now:
Image
I added the necessary wires.

The finished board:
Image
Before I install this in the saber, I'd better make sure it still works:
Image Image
I added a couple of extra wires that I normally wouldn't....the two blue wires are for the extra button, and are soldered to the clash sensor....if it works, it'll simulate a blaster deflection when the button is pressed by triggering a clash effect.....if it works....

With everything wired up, I hit the button:
Image Image

The switch:
Image
Added the main led, which dimmed the switch a bit, since it is a current hog:
Image
I tried using the second switch to activate the clash, and all it did was "power-cycle" the sound board....looks like that is out for this saber, anyway. I'll have to use something else to fill the switch hole in the switch box.

I heat shrink wrapped the sound board, then cut a slit in the wrap to pull the wires through to make it easier to route them for attaching them to the switch and recharge port:
Image

I then slid the soundboard and battery pack into the saber and pulled the wires though the opening:
Image

There's just enough room for the battery pack and speaker mount to fit:
Image
It looks like this could be a really tight squeeze, but I'm going to try and fit the 4-AA battery holder in there anyway. If it doesn't fit, I can build up a 4-AAA pack instead.

As for the auxiliary switch hole, I decided to fill it with a 3mm green led:
Image
More updates to come as work progresses.....
User avatar
Jay-gon Jinn
Great Lakes Base Member
Posts: 378
Joined: Wed Jun 27, 2007 1:25 pm
Location: Saint Johns, MI

Re: A lightsaber build for Karen Larabel, a.ka. JoCasta Nu

Post by Jay-gon Jinn »

I started assembly by wiring up the switch box:
Image
This included wiring the green 3mm accent led to the recharge port....the reason? It now serves as an idle stand-by led that comes on when the kill plug is pulled:
Image Image

After finishing up the switch and it's led, I tried to fit the switch box into the saber:
Image Image
No go....it's not going to fit with that AA battery holder....and since the owner will be using this at costuming events with the 501st and Rebel Legion, she'll need to be able to change the batteries, as this will likely be her only saber for the event.

So, I made up another battery pack and speaker combo:
Image
This time using a 4-AAA battery holder and the v2 speaker mount from TCSS. Assembly is pretty much the same as the first battery/speaker pack.

I began assembly again:
Image

Re-soldered all of the wires on the switch box....again:
Image Image

Now I believe it's ready to be installed on the hilt:
Image

I added some fresh AAA's and pushed the button:
Image

Satisfied that it's going to work, I secured the switch box using two 6-32 socket head cap screws:
Image

Now to make up the main blade led:
Image
I'm out of the thermal adhesive pads, and keep forgetting to order more, so i'll go back to using the thermal compound on this one.

I added the male half of the quick-disconnect plug:
Image

Installed the led:
Image

Then added the lens and finally the blade holder:
Image

And there it is:
Image

While testing it, I noticed it wasn't very loud, and had a thin sound to it....I totally forgot to modify the speaker mount! I'll use a 1/8" drill bit on my cordless drill to create some back vents in the speaker mount:
Image Image
I had to be careful not to drill too deep, to avoid hitting the speaker itself, or the wires, but it worked out okay:
Image

Now, only a few thing remain....I need to make the speaker grille for the pommel/endcap:
Image
And then drill and tap for the blade retention screw, and build the blade.

Stay tuned!
User avatar
Myshadowstar
GLG Member (Reserve)
Posts: 677
Joined: Thu Aug 12, 2010 6:38 pm
Legion ID: 7957
Location: Southgate, MI
Contact:

Re: A lightsaber build for Karen Larabel, a.ka. JoCasta Nu

Post by Myshadowstar »

wow thats simply awsome! SO in depth of an article and saber is such a piece of art :) :thumbs: :mrgreen:
"Only the Shadow knows what evil lurks in the hearts of men..."

Myshadowstar

------------
Old Republic Jedi- complete
Imperial Officer- complete

Image
User avatar
Jay-gon Jinn
Great Lakes Base Member
Posts: 378
Joined: Wed Jun 27, 2007 1:25 pm
Location: Saint Johns, MI

Re: A lightsaber build for Karen Larabel, a.ka. JoCasta Nu

Post by Jay-gon Jinn »

I found a "crumb cup" in my pile of parts from the hardware store, and it looks like it'll fit, so I'll cut that up and use it for the speaker grille:
Image
This was hard to cut....used up a whole reinforced cutting wheel on it....but it's cut!
Image

This saber is getting there, only a couple thing left....drill and tap for the blade set screw, build the blade, and come up with a method for hanging it from the leather loop on the belt she wears underneath the cloth obi of her Jocasta Nu costume.

Here it it so far:
Image Image

Image Image
I should be able to finish off the hilt tomorrow and get some final pictures and a video up this weekend sometime.
User avatar
Count Scoobith
Posts: 65
Joined: Wed Jan 31, 2007 5:56 pm

Re: A lightsaber build for Karen Larabel, a.ka. JoCasta Nu

Post by Count Scoobith »

Very nice work as always!!!! :thumbs:

I'm VERY HAPPY Karen is going to have a SABER!!!!
Image
User avatar
Jay-gon Jinn
Great Lakes Base Member
Posts: 378
Joined: Wed Jun 27, 2007 1:25 pm
Location: Saint Johns, MI

Re: A lightsaber build for Karen Larabel, a.ka. JoCasta Nu

Post by Jay-gon Jinn »

Well, I think I'm going to call this one done, even though it still has a couple things to work out, like the belt hanging technique....I'll have to do that in person at the next event we're both at.

Anyway, here's the

FINAL PICS!!

Image

Image

Image

Image

Image

Image

Image

Image

Image

Image

Image

Image
User avatar
Myshadowstar
GLG Member (Reserve)
Posts: 677
Joined: Thu Aug 12, 2010 6:38 pm
Legion ID: 7957
Location: Southgate, MI
Contact:

Re: A lightsaber build for Karen Larabel, a.ka. JoCasta Nu

Post by Myshadowstar »

wow congrats on the completion! :mrgreen: Awsome work :thumbs:
"Only the Shadow knows what evil lurks in the hearts of men..."

Myshadowstar

------------
Old Republic Jedi- complete
Imperial Officer- complete

Image
Post Reply